

You'll love this Chocolate Pizzelle Recipe! These crispy, Italian snowflake cookies taste buttery and light, with delicious chocolate flavor. Enjoy this variation of traditional pizzelle!
I'm wondering if these Chocolate Pizzelle cookies need a warning label. "If you try one, be prepared to eat two more!"
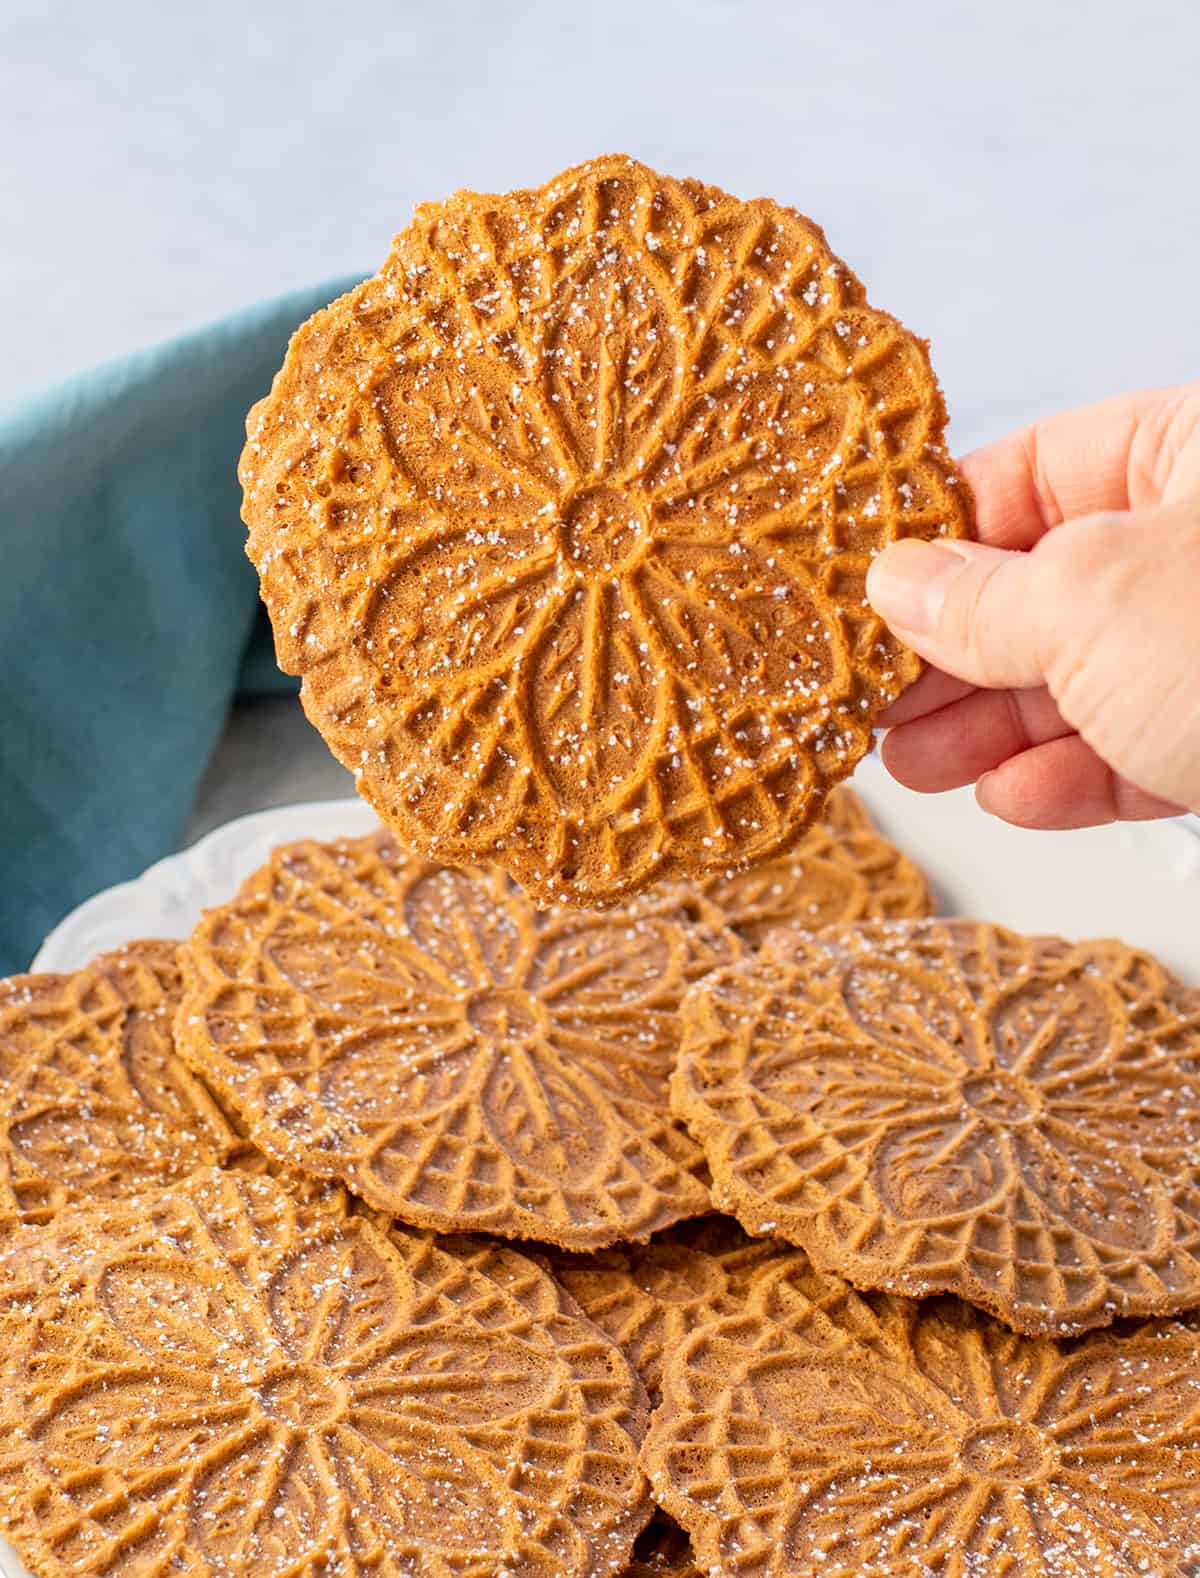
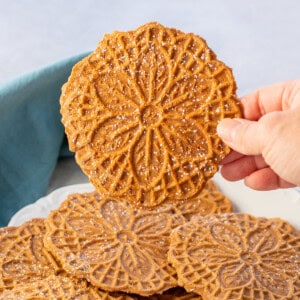
Because they're light, crispy, buttery and chocolatey. "They're mere wafers," you'll tell yourself, as you chomp away on one while eying the remaining stack.
Don't say I didn't tell you! And you have to check out these Lemon Pizzelle.
Recipe ingredients
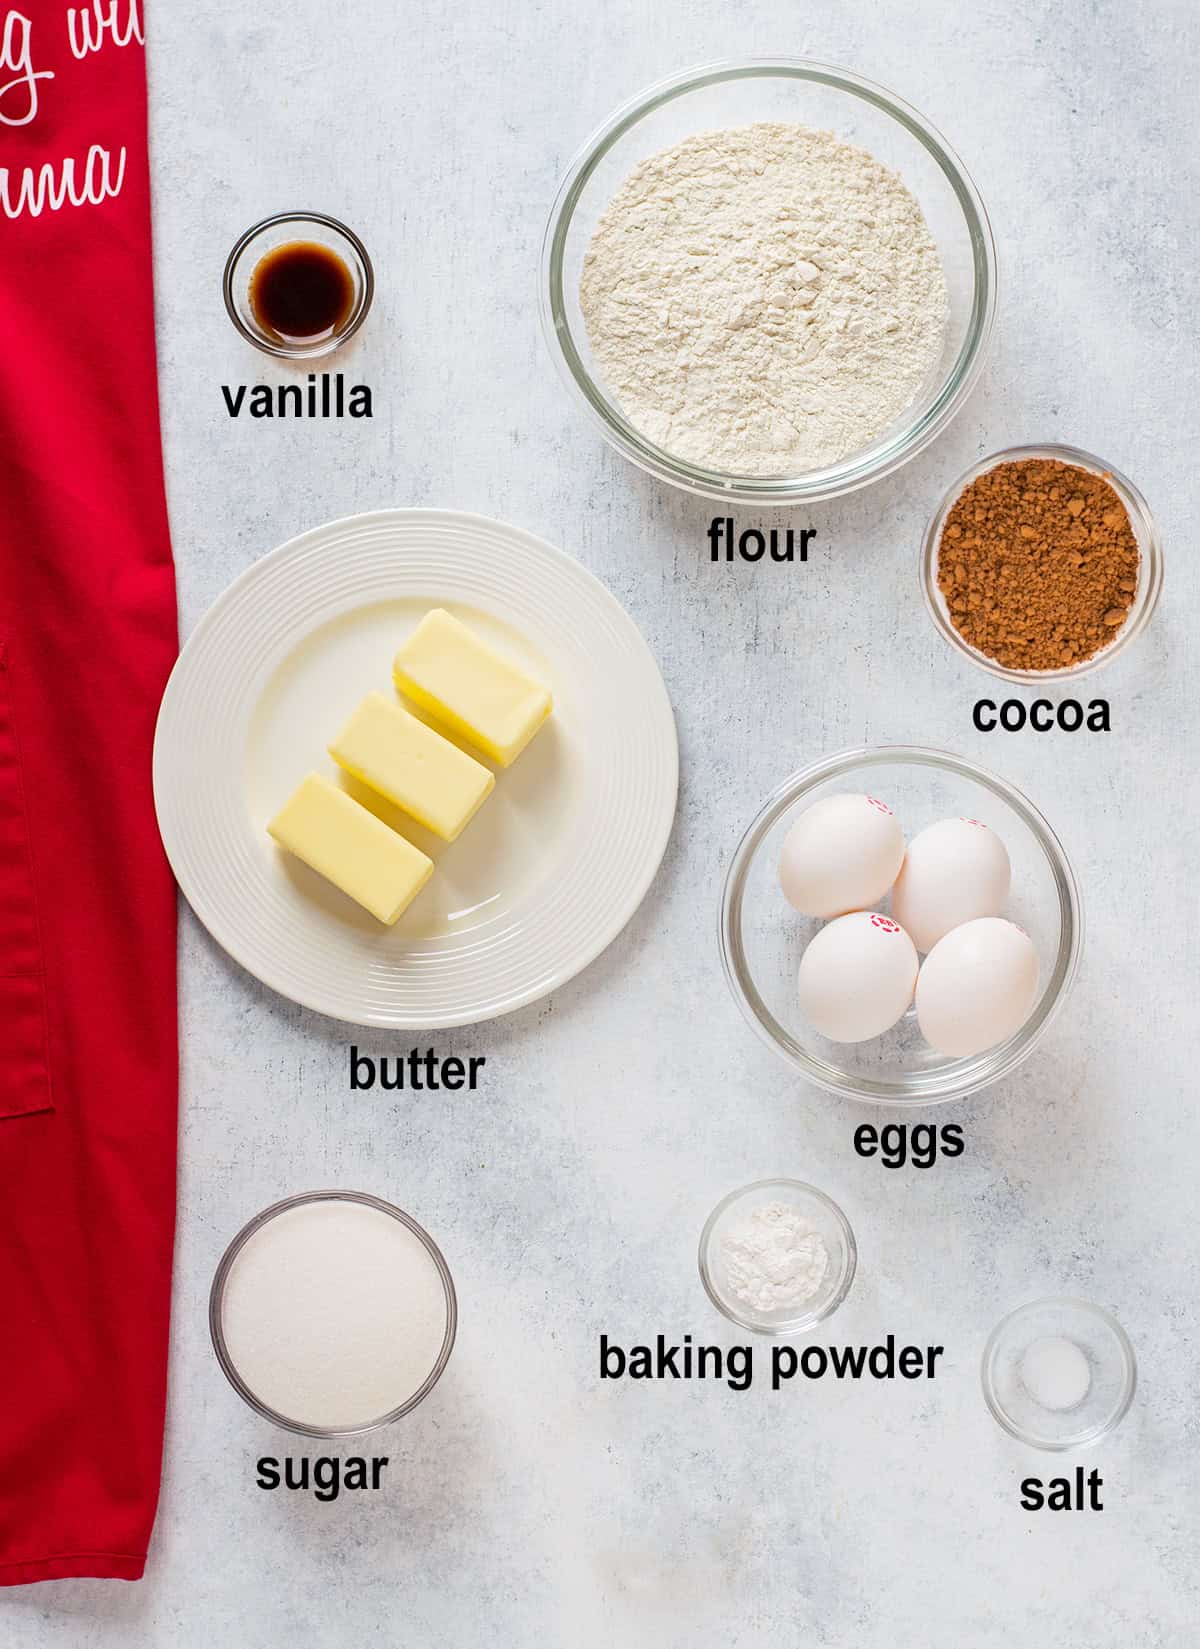
Butter: This is the secret to crispy, Chocolate Pizzelle with delicious, buttery flavor. I prefer to use salted butter. If you use unsalted, be sure to add a little extra salt to the batter.
Cocoa Powder: I use regular, unsweetened cocoa powder here. But feel free to try dark chocolate cocoa for a deeper flavor and darker color.
Salt: A little salt makes the flavors pop. No bland cookies allowed!
Vanilla Extract: Vanilla helps enhance the chocolate flavor. Don't skip it!
How to make it
See the card at the end of this post for the full recipe, but here's an overview.
Begin by preheating your pizzelle press.
Make the pizzelle batter
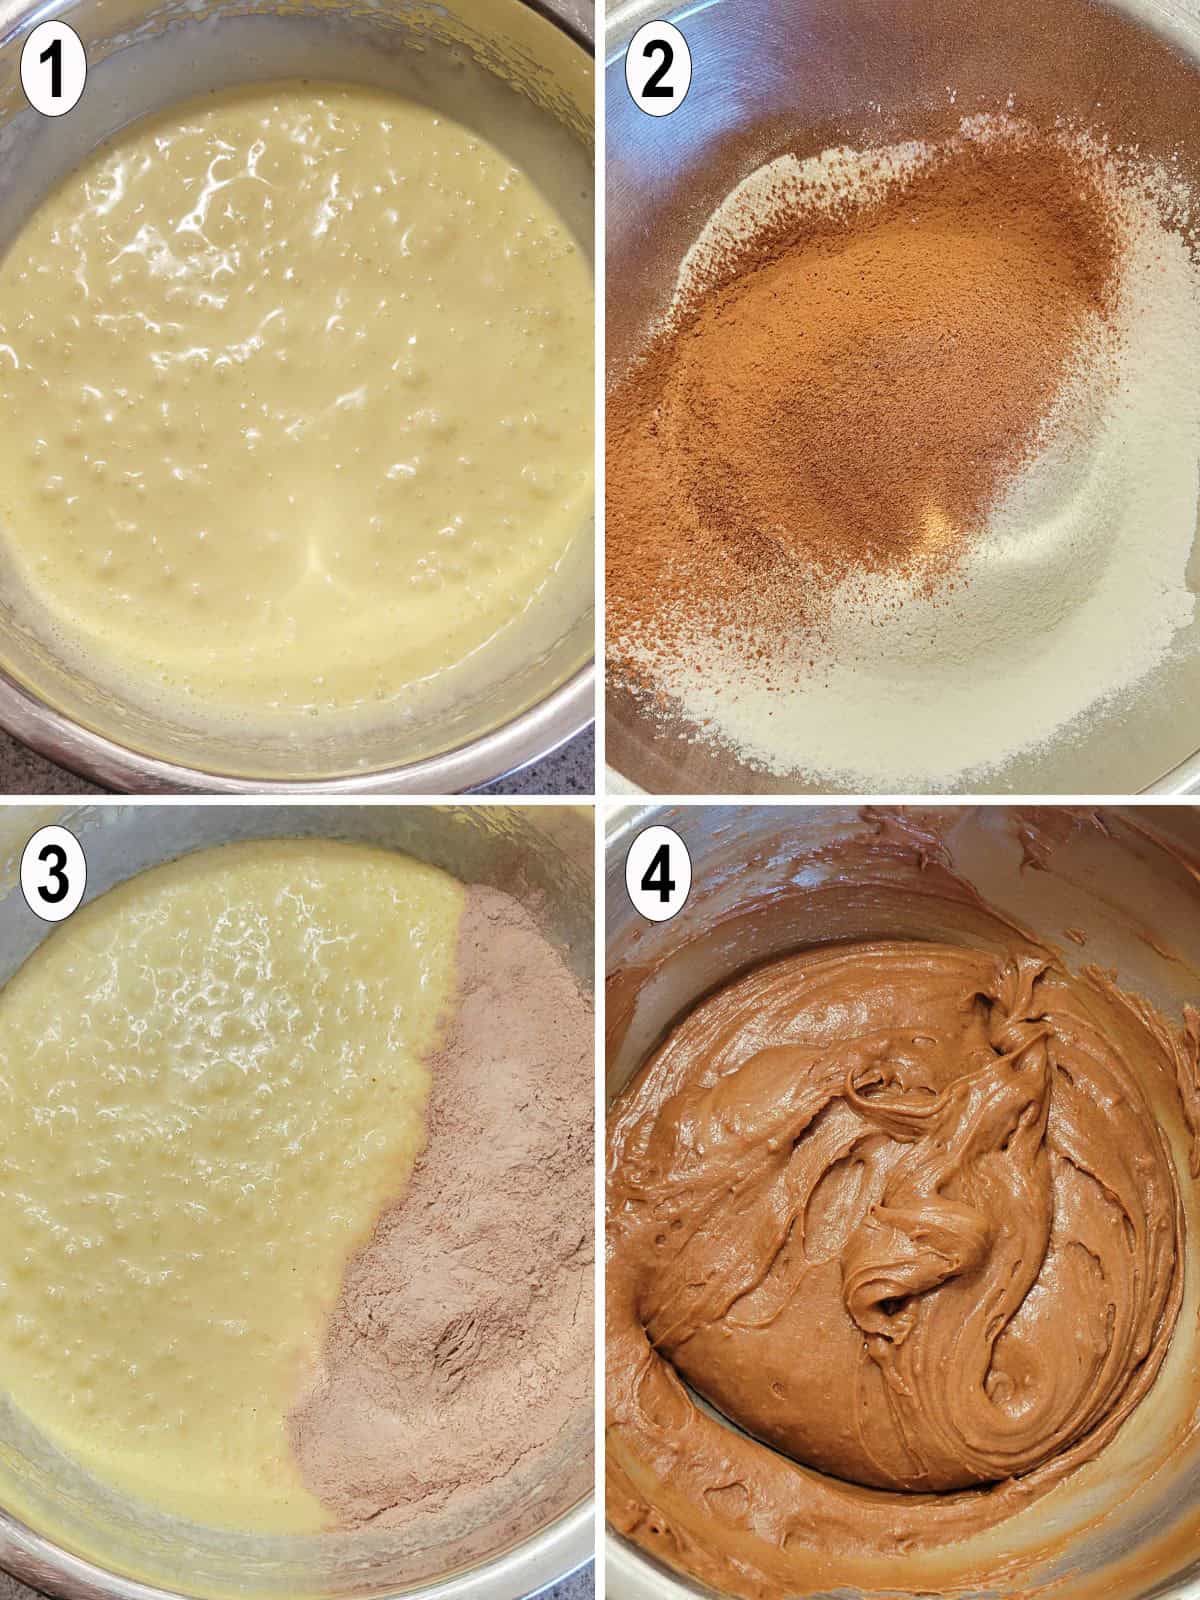
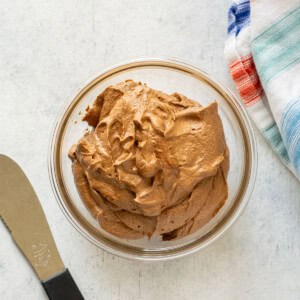
- Beat eggs and sugar in a bowl until pale yellow. Add melted butter and vanilla and beat until blended.
- Use a fine-mesh strainer (affiliate link) to sift the flour, cocoa, baking powder and salt into another bowl. Stir to combine.
- Fold half of the dry mixture into the egg mixture.
- Fold in the rest of the dry mixture, just until the flour is incorporated.
Cook the pizzelle
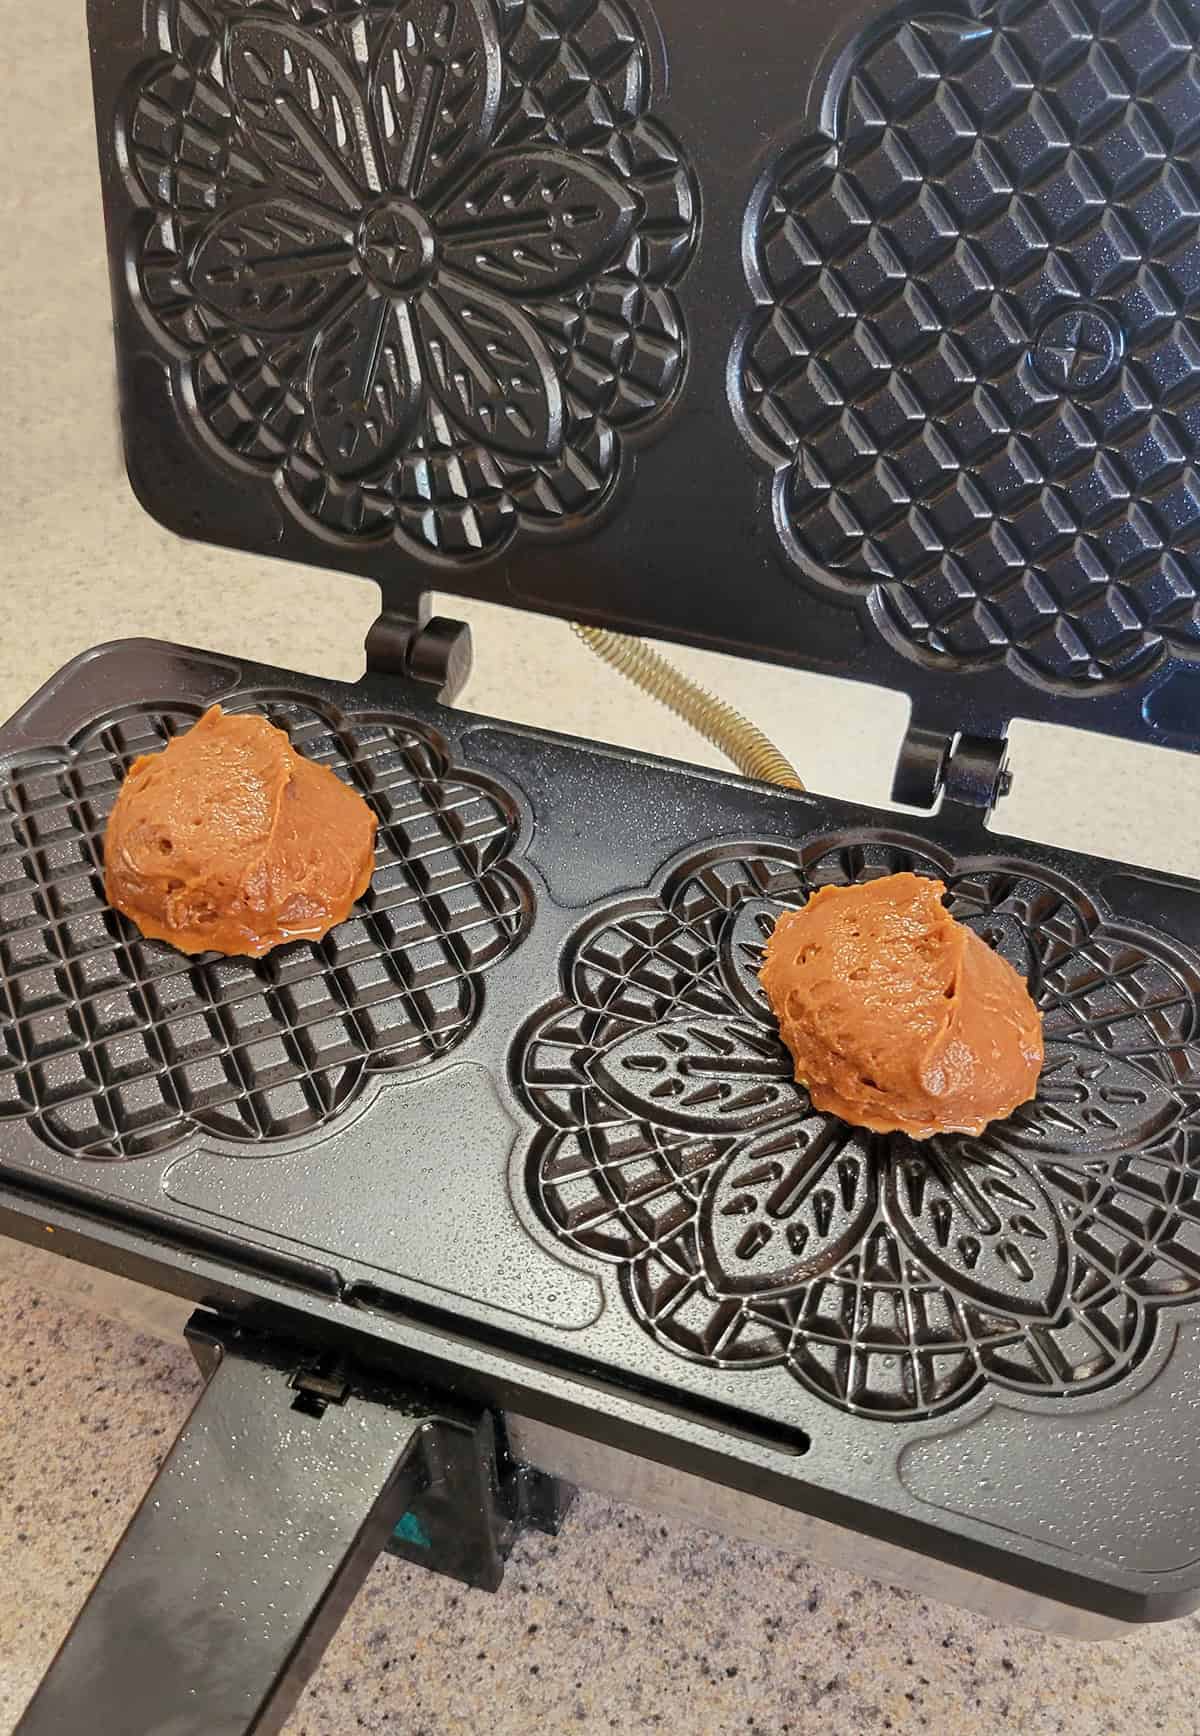
- Scoop some batter onto your pizzelle iron.
- Close the iron and cook for about 90 seconds, or until done. Remove the pizzelle with a spatula and cool on a wire rack.
- Once cool, carefully break apart any cookies that are connected and use your nail to break off any excess crust around the edges.
Recipe tips
- Be sure to read and follow the instructions for your pizzelle maker before starting. You may need to grease the iron with cooking spray.
- Make sure the pizzelle are completely cooled off before stacking them. Steam can make them soft.
How to serve them
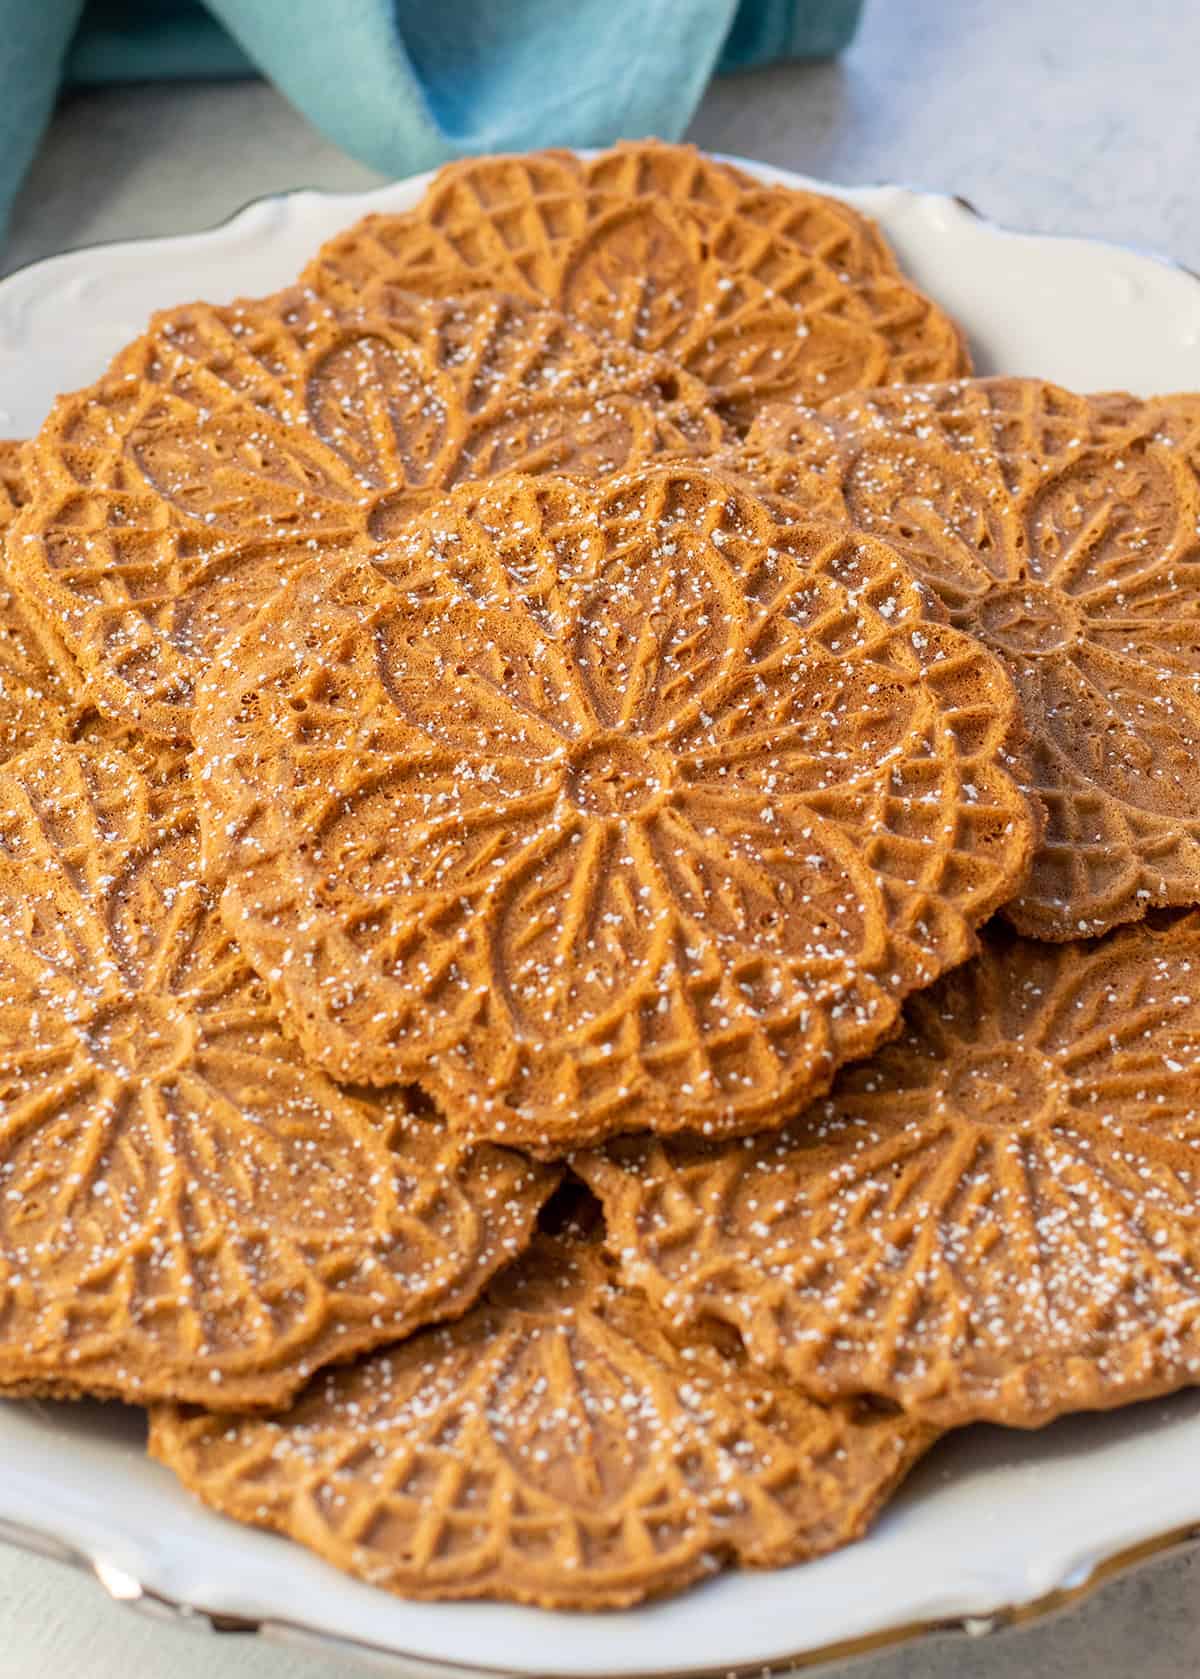
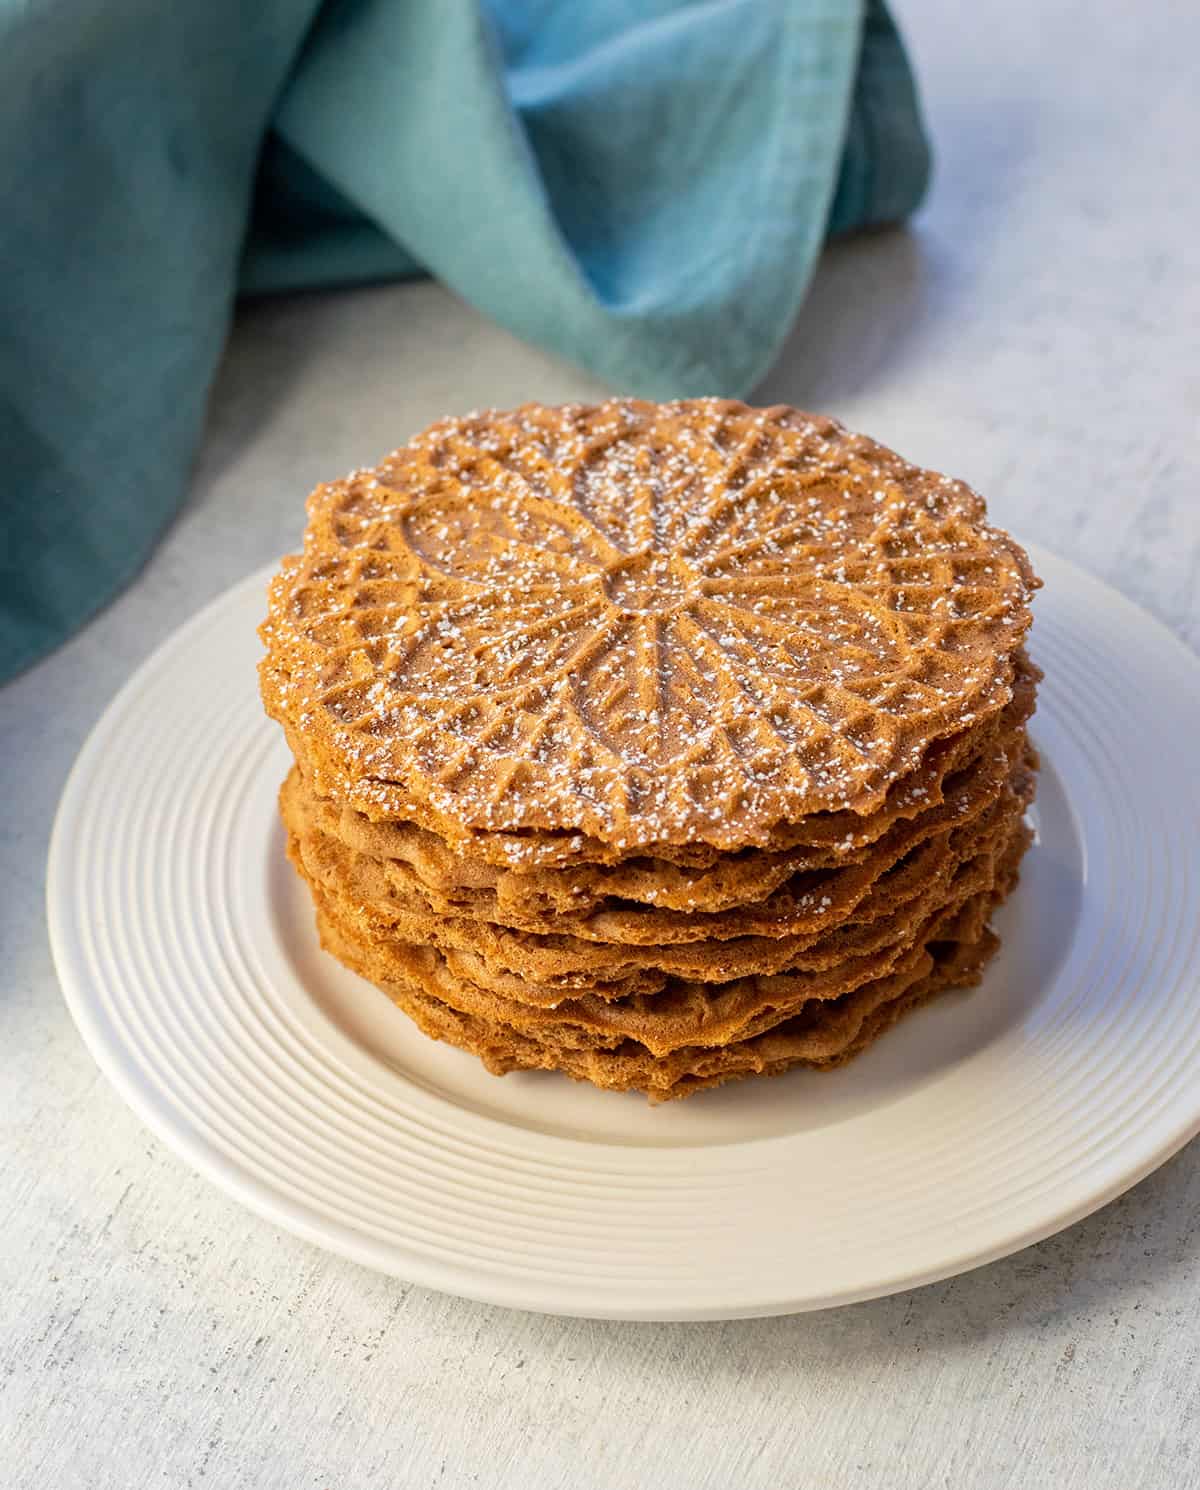
I recommend serving chocolate pizzelles with a dusting of powdered sugar. It looks beautiful and adds a touch of sweetness.
Of course, you can mold these chocolate waffle cookies into cones, shells or cups while they're still warm:
- Try wrapping them around cannoli tubes and stuff them with cannoli filling, whipped cream or pastry cream.
- Shape them around ramekins and fill them with ice cream.
- Form them into cones and stop up the bottom of each with a tiny marshmallow. Then add mousse, pudding or ice cream.
How to store chocolate pizzelle
When the pizzelle cookies have cooled off, store them at room temperature in an air-tight container or zip-top plastic bag. They'll keep for several days and remain crisp due to the butter in this recipe.
You also can freeze chocolate pizzelle for up to three months. To freeze, wait until they've cooled after cooking. Wrap up to six at a time in plastic, then place them in a container to prevent any breaking.
Choosing a pizzelle iron
The thickness of your pizzelle will depend on how deep the grooves are on your pizzelle maker.
We use this pizzelle iron (affiliate link), which makes thin pizzelle, as pictured. It has a wire clasp to help keep the pizzelle press closed, but we find it easier to gently press down the top handle instead.
If you'd rather get a pizzelle maker with a wide handle and no wire clasp, you could try this one or this one (affiliate links).
More recipes like this
- Italian Rainbow Cookies
- Torta Caprese Recipe
- Tiramisu with Egg Whites
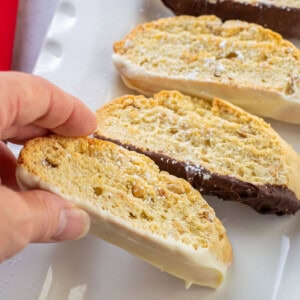
- Chocolate-Dipped Hazelnut Biscotti
- Chocolate Liqueur Recipe
- Almond Biscotti Cookies
Enjoy!
If you try this Chocolate Pizzelle recipe, please leave a comment and a rating!
Chocolate Pizzelle
Equipment
Ingredients
- 12 Tablespoons salted butter
- 4 extra-large eggs
- ½ cup + ⅓ cup granulated sugar
- 1 teaspoon vanilla extract
- 1 ¾ cups all-purpose flour (spoon it into the cup and level it off with a knife)
- 3 Tablespoons unsweetened cocoa powder (use regular or dark)
- 2 teaspoons baking powder
- ⅛ teaspoon salt
- powdered sugar for serving (optional)
Instructions
- Heat your pizzelle press according to the manufacturer's instructions.
- Add the butter to a microwaveable bowl and melt the butter in the microwave, covered.
- In a medium bowl, beat the eggs and sugar for at least three minutes, until the color is lighter yellow.
- Add the melted butter and vanilla extract to the egg mixture. Beat until blended.
- Sift the flour, cocoa, baking powder and salt into a small mixing bowl. (I place a large, fine-mesh strainer over a bowl, add the dry ingredients to the strainer and gently shake the strainer to sift the flour.) Give the flour mixture a stir with a spoon.
- Fold half of the flour mixture into the egg batter. (Use an under-and-over motion with a rubber spatula.) When that is combined, fold in the remaining flour mixture, just until incorporated.
- Follow the instructions in your pizzelle press manual for how to cook the pizzelle. Grease your pizzelle iron with cooking spray if required.
- Place one heaping tablespoon of batter onto each of the pizzelle plates on your iron, starting just behind the center of each plate (check your manual for where to place the batter.) If you have a cookie scoop with the capacity for two tablespoons, use that for ease and uniformity but don't fill it all the way. (Make a couple of pizzelle to see how much batter works best with your iron.)
- Cook the pizzelle until golden, or according to your preference. (Mine takes around 90 seconds.) It's likely that the two cooked pizzelle will be connected by excess batter. Leave them that way for now.
- Use a spatula to remove the cooked pizzelle from your iron and transfer them to a wire rack to cool. The pizzelle will be very hot. (See notes if you want to shape the pizzelle into bowls, cones or cannoli shells.)
- Continue making more pizzelle until you have used up the batter. You can stack any cooled pizzelle to make room on your cooling rack.
- When the pizzelle have cooled completely, gently separate each pair of pizzelle and break off any excess crust around the edges of the snowflake pattern with your fingers. (I don't recommend scissors, because the pizzelle will break.) You can eat the pieces you broke off.
- You can serve the pizzelle cookies plain, with a dusting of powdered sugar or with a dollop or more of whipped cream.
- Store the cooled chocolate pizzelle in an airtight container at room temperature. Mine stay crisp even in a plastic container, but if you prefer, you could store them in a cookie tin or large coffee can. They should keep for several days. To freeze, wait until the pizzelle cookies are completely cool. Wrap up to six at a time in plastic, then place them in a container to protect them from breaking. Freeze them for up to three months.
Notes
- Mold them into edible sundae cups by using ramekins or the bottom of a muffin pan. Fill with mousse, custard or ice cream, and top with strawberries.
- Wrap them around dowels to make pizzelle cannoli shells. You can even dip the ends in melted chocolate.
- Form them into cones, and when cooled, place a tiny marshmallow in the bottom of each one to prevent leaks. Fill them with ice cream or whipped cream.
Nutrition
(Recipe Source: Cooking with Mamma C)

Mom says
For this chocolate Pizzelle recipe, you suggest adding salt if you're going to use unsalted butter; yet in your recipe you use salted butter and additionally add more salt to this recipe.
My question is, how much more additional salt other than the 1/8 teaspoon of salt you add, that's required if using unsalted butter for this recipe?
Mamma C says
Hi Mom - I would start conservatively and add an extra 1/8 teaspoon salt. Then cook one or two pizzelle and taste to see if more salt is needed. If so, add up to another 1/8 teaspoon or so to the batter.
Susan Roth says
Awesome - delicious
Mamma C says
Hi Susan - I'm so glad you enjoyed them! Thank you for leaving a review.