

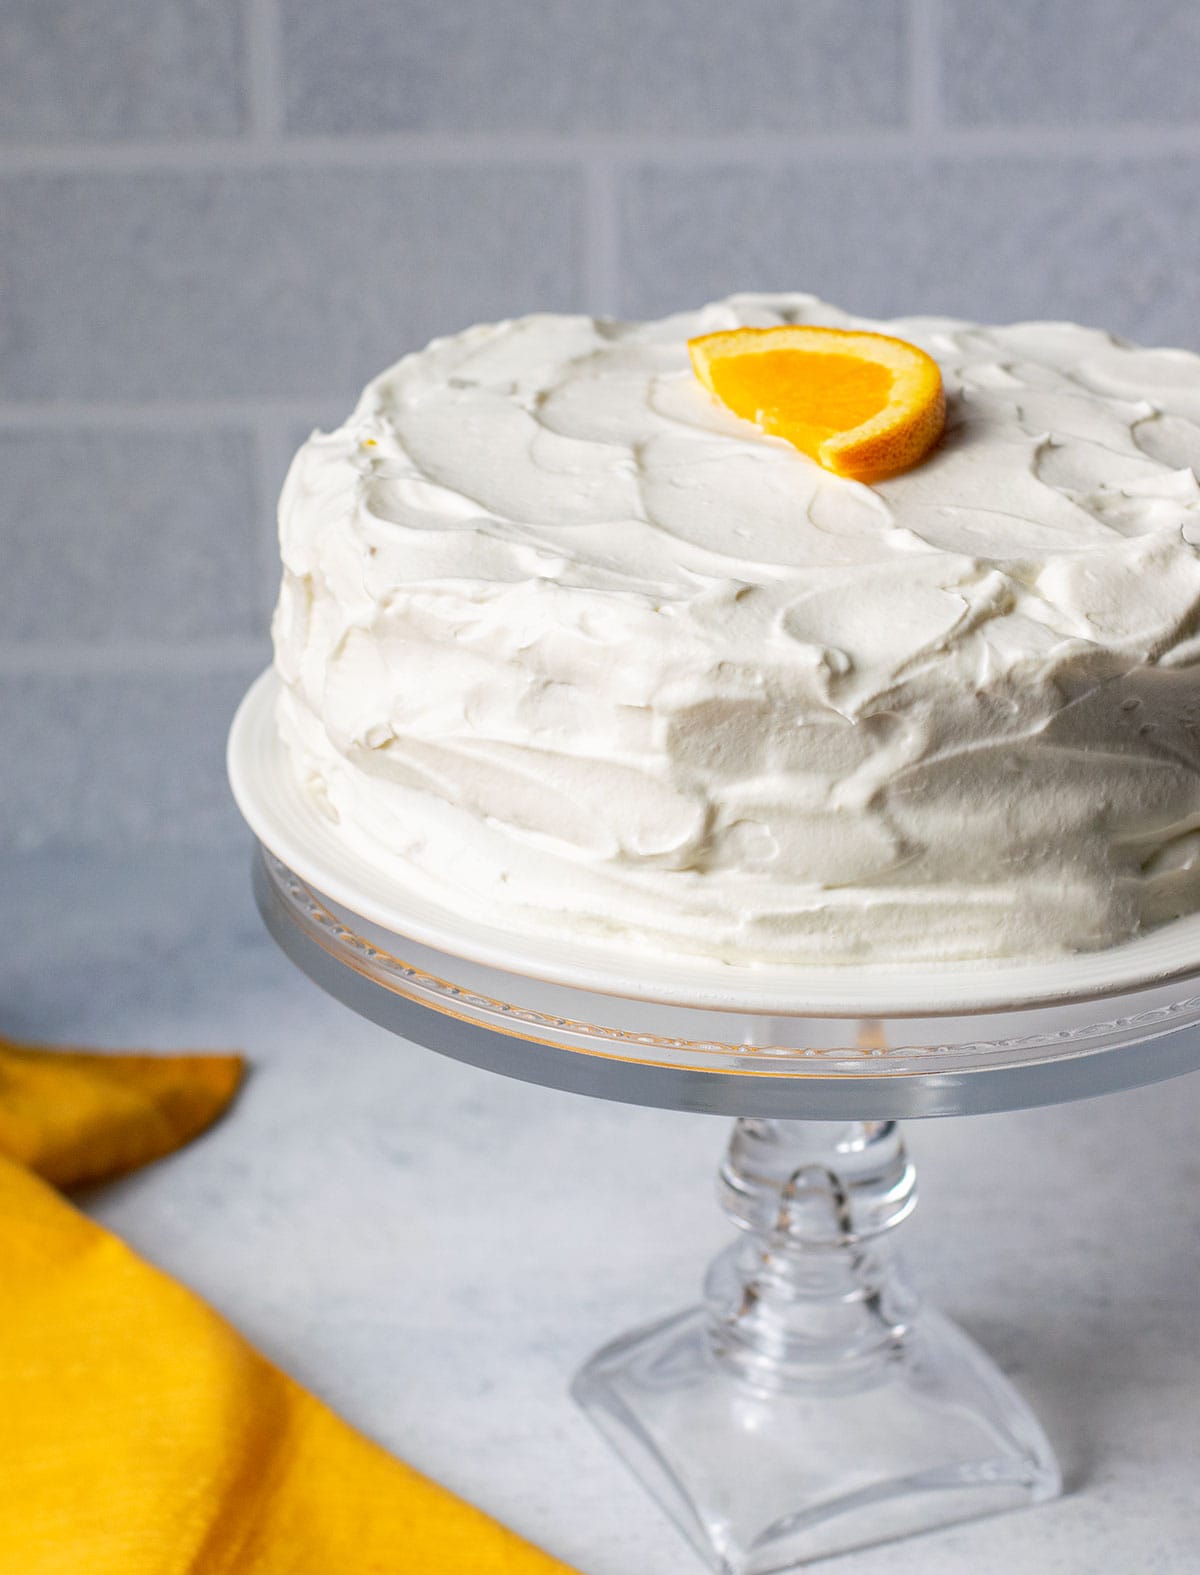
This Orange Creamsicle Cake will be the best orange cake of your life! It features layers of fresh, orange sponge cake with whipped cream frosting. This Swedish recipe has been in my family since the 1960s! Make it for a special occasion.
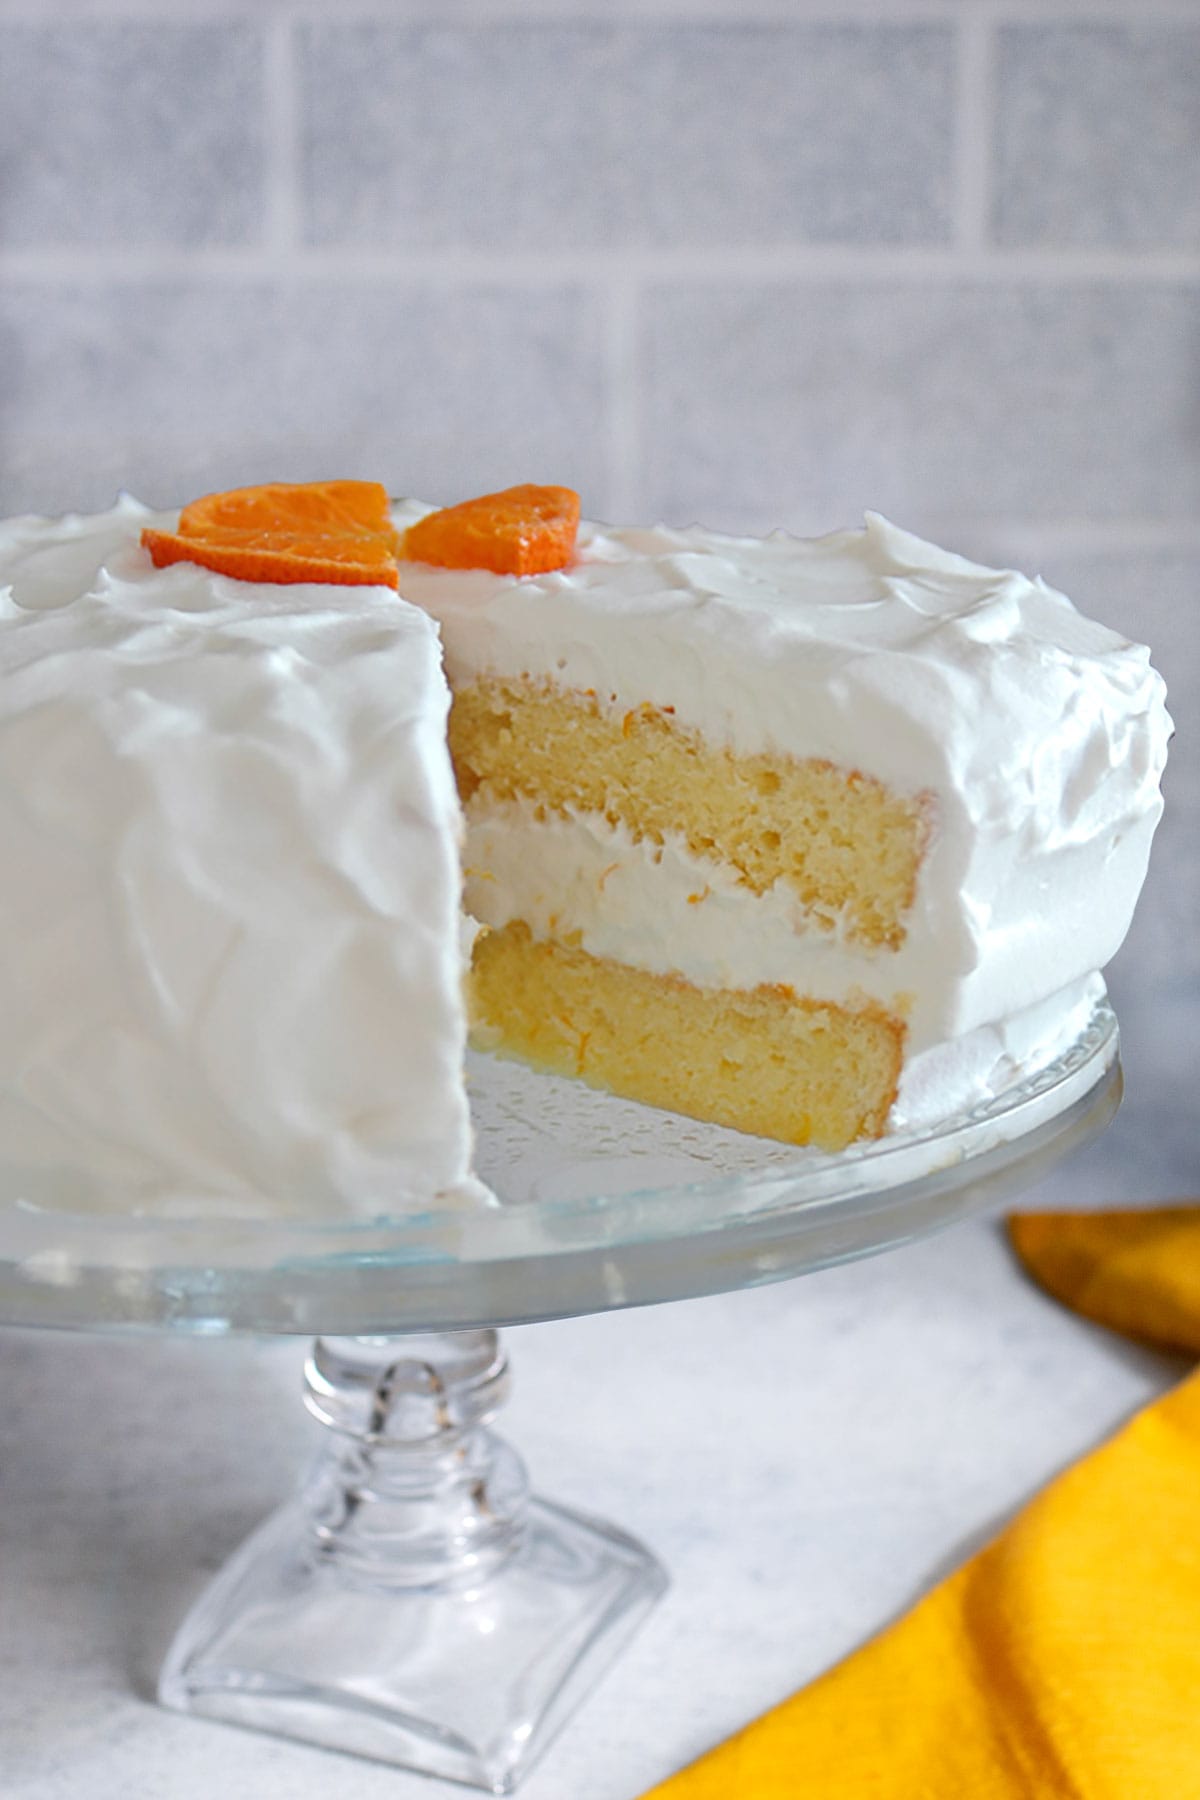
Behold, the most delicious, refreshing, Orange Creamsicle Cake! It's one of the best cake recipes! It's legendary in my family and will be in yours too.
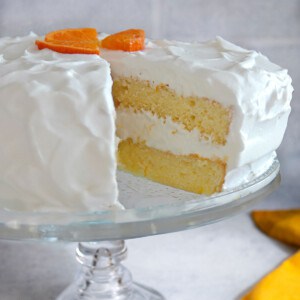
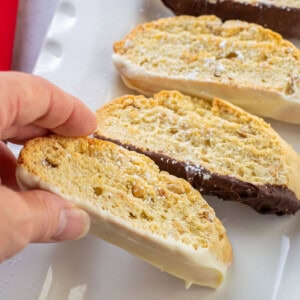
It starts with two layers of orange sponge cake. They're light and airy, thanks to beaten egg whites baked into the batter.
Then comes my favorite part - the orange meringue filling. It's a delicate, citrus cloud, thanks to more beaten egg whites that get folded with a blend of fresh orange juice, sugar and orange zest. Yum!!!
This divine fluffiness gets spread atop each cake layer so it will be absorbed (ideally overnight). Then, fresh, vanilla whipped cream gets added in between the cake layers and frosted on the top and sides.
Perfection, I tell you!
If you love fresh oranges, you need to try this orange cream cake! It's special enough for holidays like Easter, Mother's Day, and Thanksgiving or for birthdays and anniversaries.
Recipe ingredients
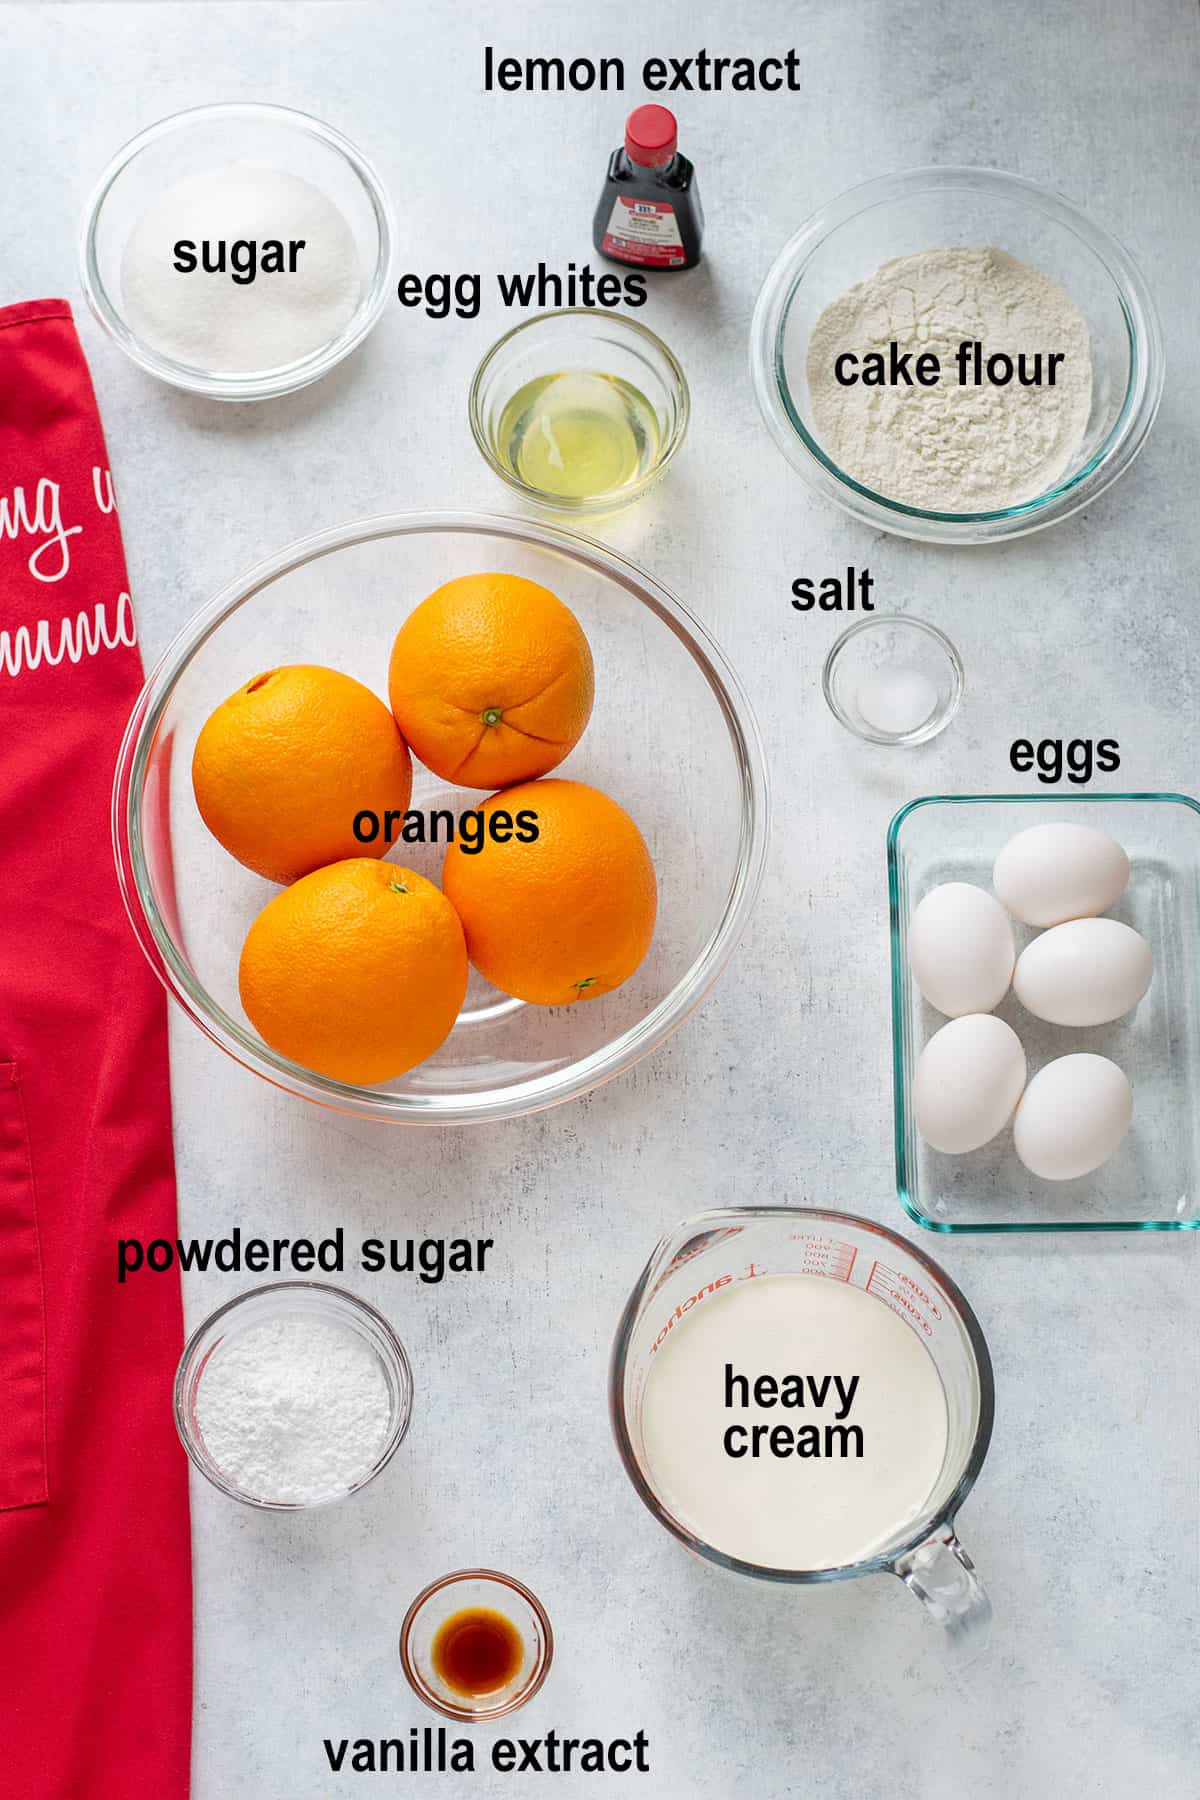
Cake Flour: Cake flour is finer than regular flour and will produce light, airy, tender sponge cake layers. Don't worry ― you can substitute all-purpose flour with good results too. Either way, you'll have to sift the flour first.
Eggs: This European cake contains two raw egg whites in the orange meringue filling. I feel comfortable using raw egg whites here because the Egg Safety Center says yolks are a more likely breeding ground for bacteria than whites.
However, if you prefer to be extra-safe, you can use whites from pasteurized eggs and beat them with a little cream of tartar. I've included those instructions in the notes of the recipe card at the end of this post.
Oranges: You'll need four large oranges for this recipe to make sure you have enough for the freshly squeezed juice. You'll also need a tablespoon of orange zest.
Orange is the star ingredient here, so you want to use the freshest orange juice possible. We've never tried using store-bought orange juice in this cake, but it could work if it's high-quality.
Lemon Extract: This brings a delicious citrus accent to the sponge cake. I wouldn't substitute anything in its place, since there's already orange juice in the batter. You could try skipping it, if needed.
But I also add lemon extract to these Lemon Ricotta Pancakes and this Pecan Lemon Pie, if you need more ways to use it.
How to make orange creamsicle cake
See the card at the end of this post for the full recipe, but here's an overview.
Make orange sponge cake
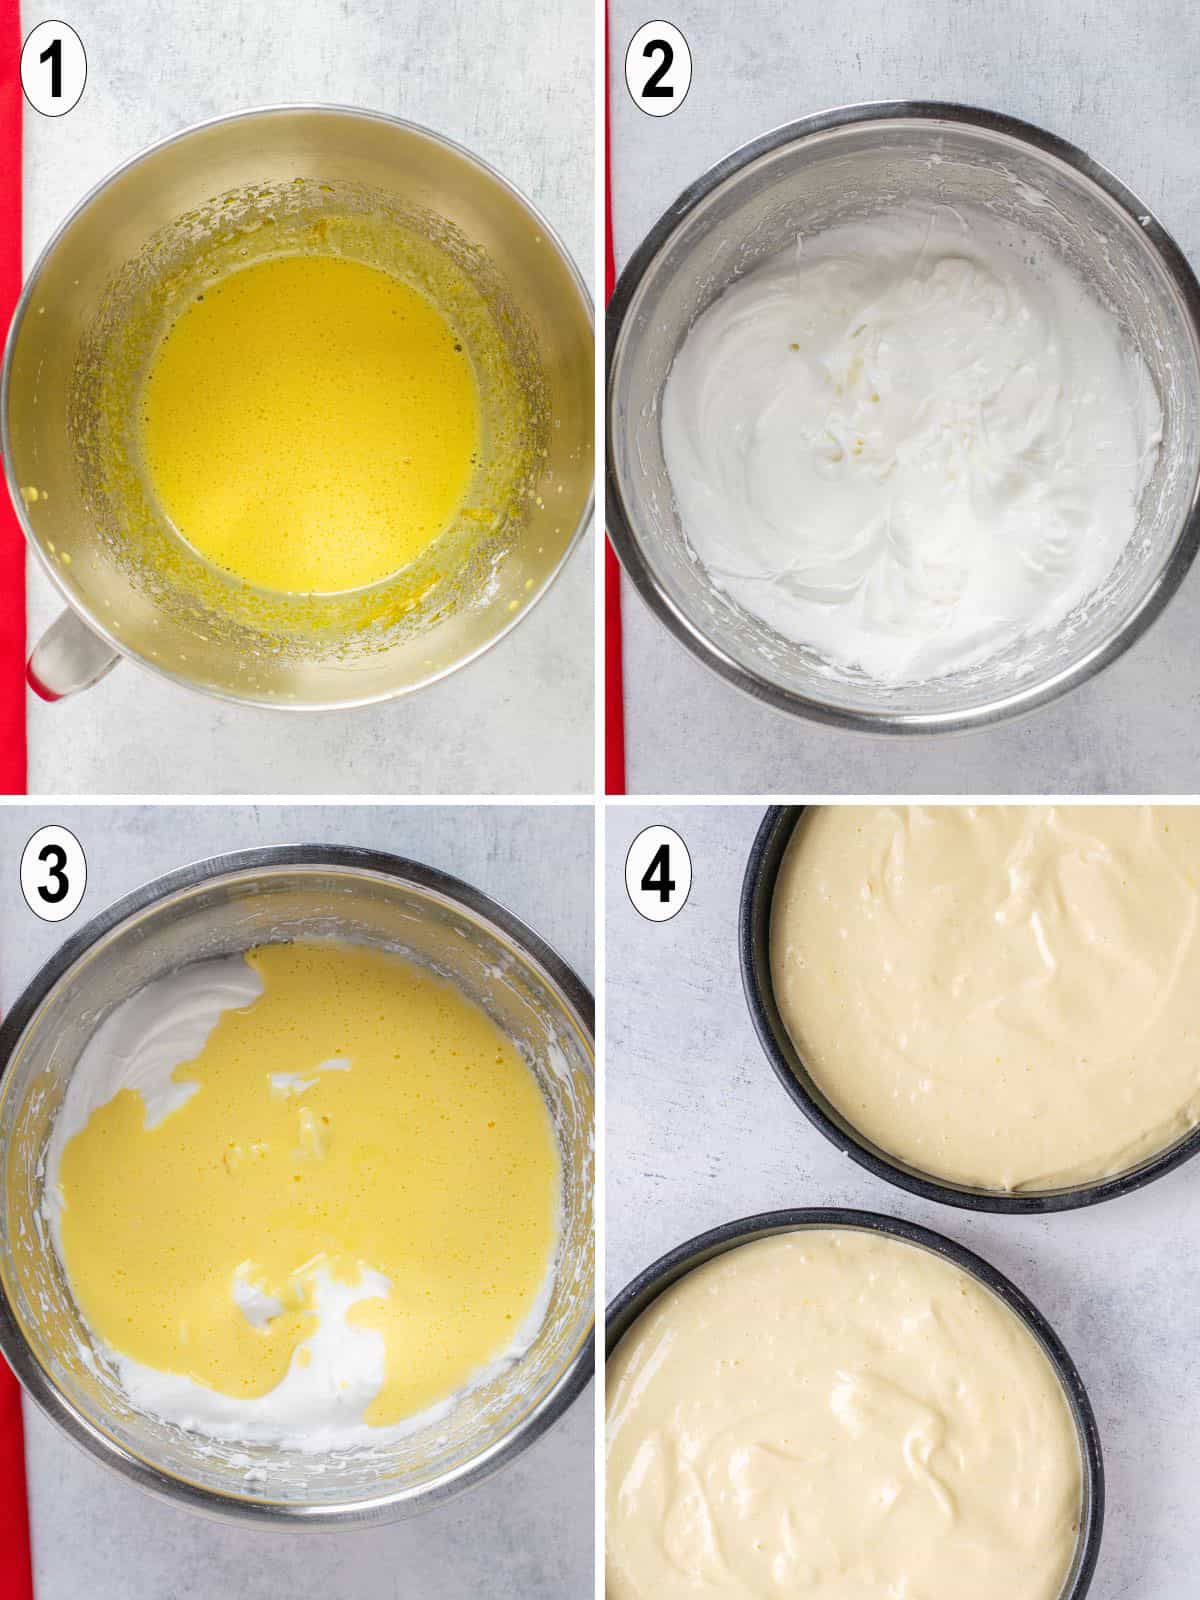
- Beat the egg yolks with orange juice, powdered sugar, lemon extract and salt until it is thick and lemon-colored.
- Beat the egg whites and gradually add in granulated sugar until you have a meringue with soft, rounded peaks.
- Spread the egg yolk mixture over the beaten egg whites and fold it in.
- Fold in the sifted flour and transfer the batter to two greased, round cake pans. Bake the sponge cake layers until a cake tester comes out clean. (See the recipe card for details.)
Tip for cooling sponge cake
Cool the cake layers by standing them up on a clean towel and leaning them against a wire rack placed against your counter's backsplash. This will prevent the sponge cake from collapsing.
Make orange meringue filling
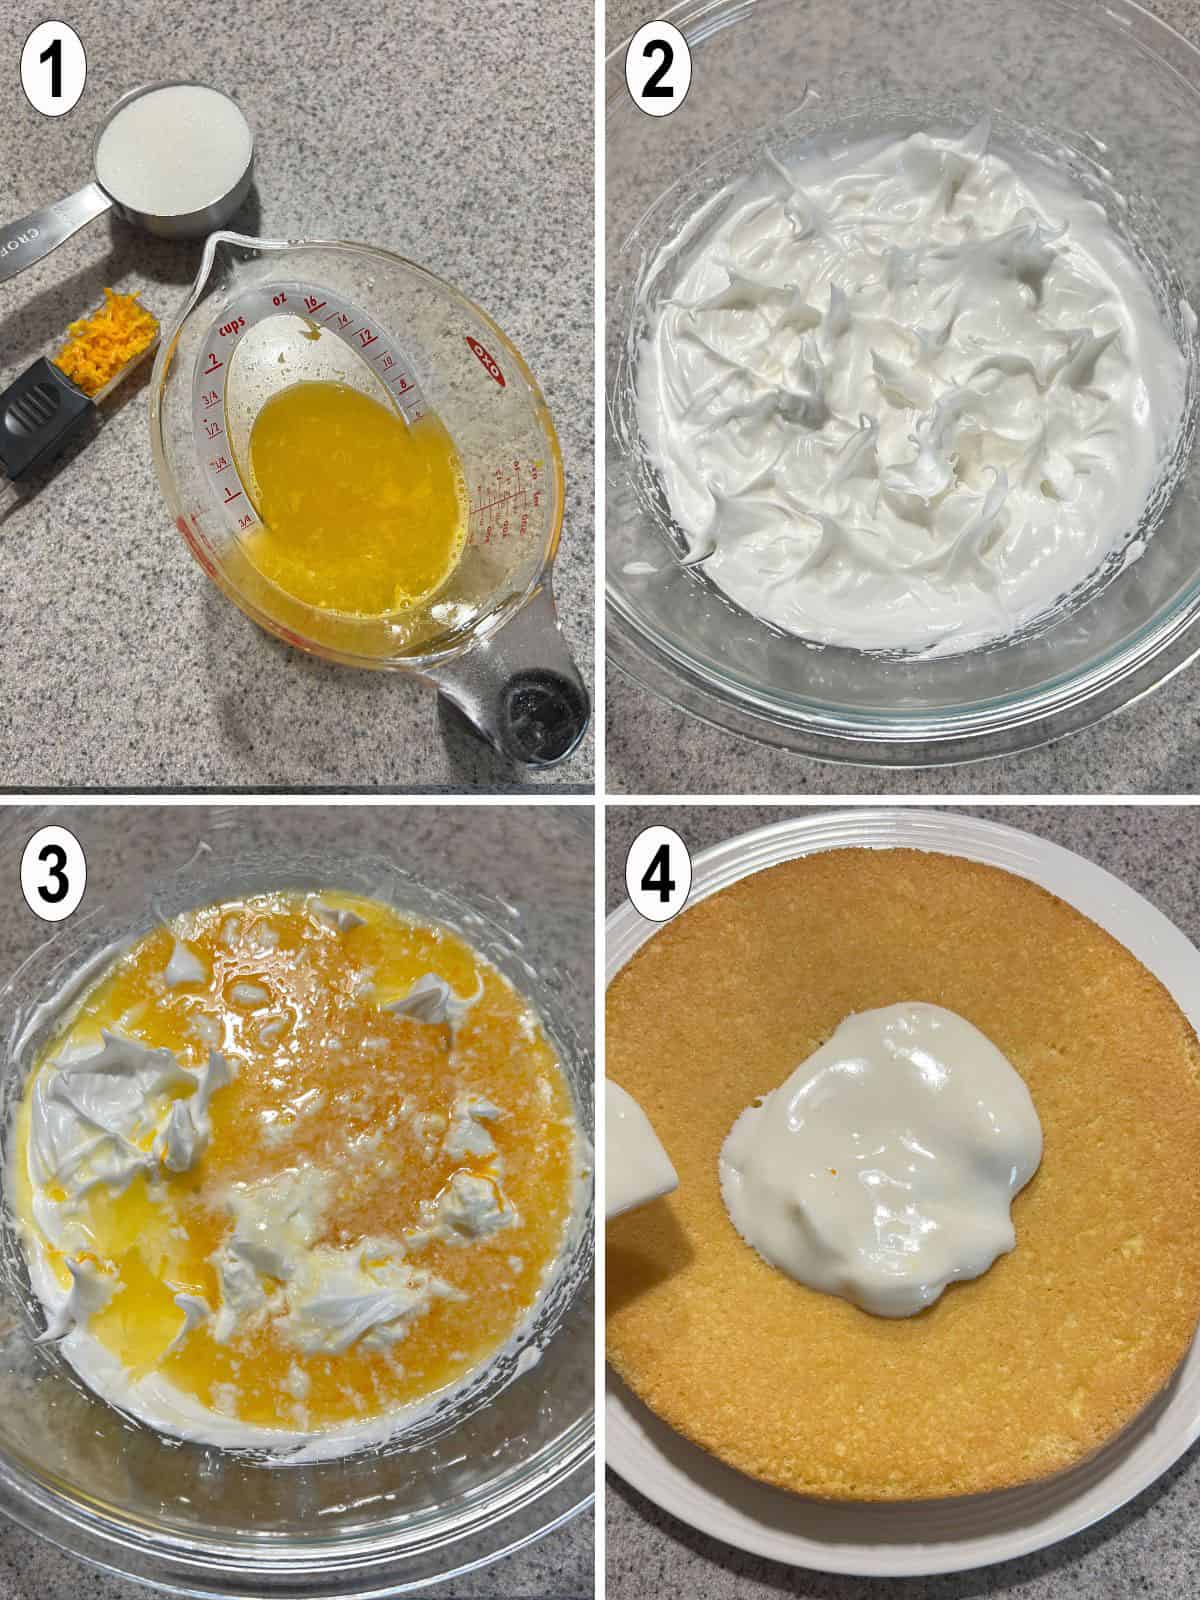
- Mix freshly squeezed orange juice with sugar and orange zest.
- Beat two egg whites and gradually add granulated sugar, until you have stiff peaks.
- Gently fold in the orange juice mixture into the meringue until there is no more liquid visible.
- Add the orange meringue filling onto the center of the two cake layers and gently spread it, letting it absorb a bit as you go. Cover and refrigerate the cake layers overnight.
Tips to make meringue
- It's easier to separate eggs when they're cold.
- There must not be any trace of yolk in the egg whites, or they won't beat properly into a meringue.
- It helps to add one egg white at a time to a small bowl, and one yolk at a time to another small bowl. Then, you can pour them into your larger bowls as you go. If you get any yolk in an egg white, you can start over with another egg.
- It's easier to beat egg whites into meringue when they're at room temperature.
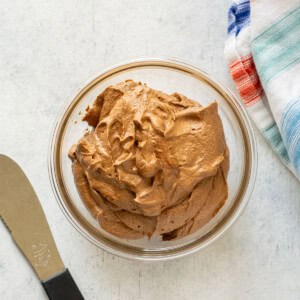
Make whipped cream frosting
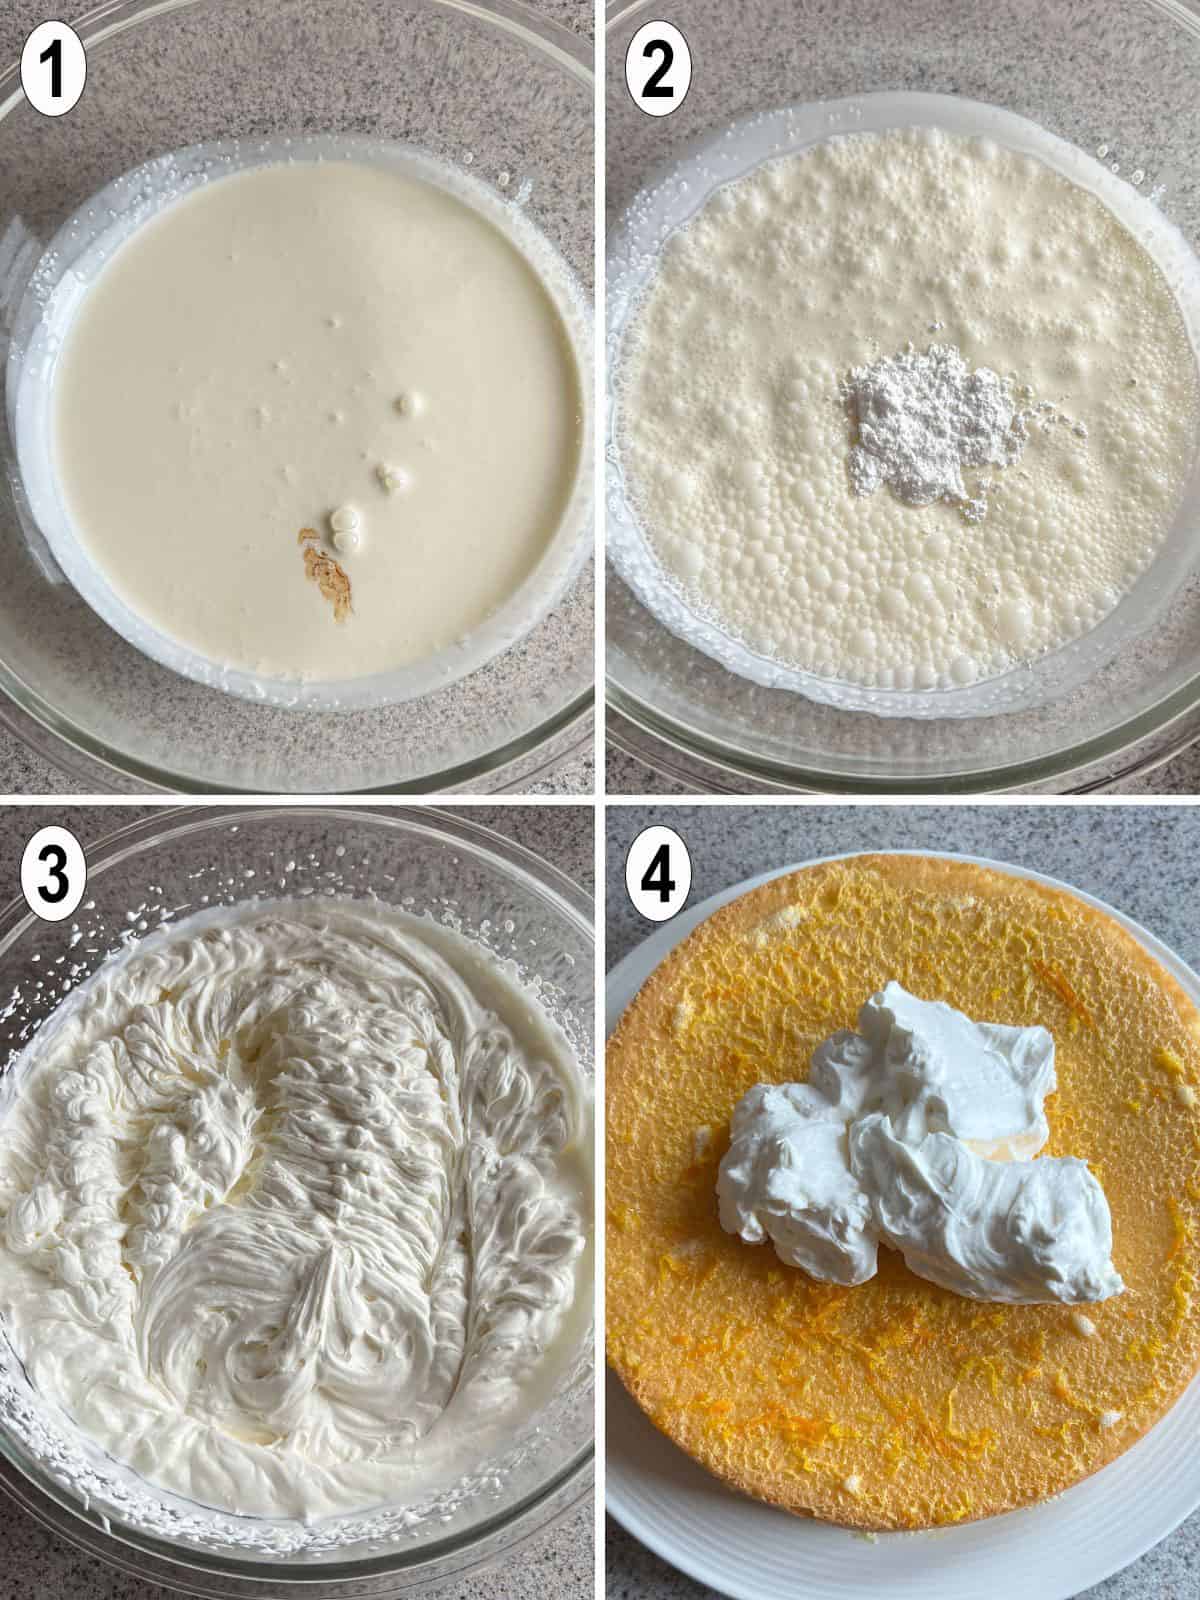
- Add the heavy whipping cream and vanilla extract to a large, stainless steel bowl. (It will work better than the glass bowl shown here.)
- Beat until frothy, then gradually add the powdered sugar.
- Beat until the whipped cream is stiff (stiffer than what is shown in the photo).
- Spread a one-inch thick layer of whipped cream onto the bottom cake layer. Then add the top layer and frost the whole cake.
How to store it
Store the layered orange sponge cake in the refrigerator until you're ready to serve it. Cover it with a large mixing bowl if you don't have a cake dome.
The covered cake can stay in the refrigerator for up to four days. It's best not to freeze it because of the whipped cream.
More cake recipes
- Angel Food Cake with Raspberries and Cream
- The Best Jewish Apple Cake
- Torta Caprese (Flourless Chocolate-Almond Cake)
- Amaretto Pear Cake with Canned Pears
- Traditional Tiramisu
- Single-Layer Carrot Cake Without Nuts
And, if you love orange desserts, don't miss these chocolate citrus bars!
Enjoy!
If you try this Orange Creamsicle Cake Recipe, please leave a comment and a rating!
Orange Creamsicle Cake
Equipment
Ingredients
Cake Batter
- 5 egg yolks (jumbo or extra large)
- ½ cup confectioners sugar
- 2 tablespoons fresh orange juice
- 1 teaspoon lemon extract
- ½ teaspoon salt
Meringue for Cake Batter
- 5 egg whites (jumbo or extra large)
- ½ cup granulated sugar
Flour for Cake Batter
- 1 cup cake flour, sifted (or use all-purpose flour, sifted)
Orange Juice Mixture for Filling
- ¾ cup fresh orange juice (from about 4 large oranges)
- ½ cup granulated sugar
- 1 tablespoon grated orange zest
Meringue for Filling
- 2 egg whites jumbo or extra large (See notes if you want to use pasteurized eggs for the raw whites.)
- ¼ cup granulated sugar
Whipped Cream
- 2 ½ cups heavy whipping cream
- 5 tablespoons confectioners sugar
- 1 ¼ teaspoons vanilla extract
Instructions
Orange Sponge Cake
- Separate 5 eggs while they're cold, adding the yolks to a large bowl (use a stand mixer bowl if you have one) and adding the whites to a large stainless mixing bowl. (It helps to first use two small bowls, adding one egg white at a time to one, and one yolk at a time to the other, then pouring those into your larger bowls as you go. If you get any yolk in an egg white, you can start over with another egg.) Wash your hands after touching raw eggs.
- Preheat the oven to 325 degrees F. Grease and flour two, 9-inch, round cake pans.
- Rinse an orange and dry it. Grate 1 tablespoon of orange zest and set it aside for the filling.
- Squeeze two tablespoons of orange juice and add the juice to your bowl with the egg yolks. Add ½ cup confectioners sugar, the lemon extract, and salt to the egg yolks. Beat the egg yolk mixture for 10 minutes on medium-high speed, until it is very thick and lemon-colored. (If you have a stand mixer, use it.)
- If you also have a hand mixer, you can make the meringue while the stand mixer beats the egg yolks. If not, just wait until the egg yolk mixture is done. To make the meringue, using clean beaters and a large, clean stainless bowl, beat the five egg whites and gradually add in the ½ cup of granulated sugar, beating well after each addition. Beat until soft, rounded peaks form. (It will take several minutes. The peaks will turn over slightly when the beater is slowly lifted out of the meringue.)
- Gently spread the egg yolk mixture over the beaten egg whites, and gently fold them together, (use an under-and-over motion with your spatula.) Sift the flour into a small bowl (if you have a fine mesh strainer, you can use that to sift). Gradually add the sifted flour to the batter (add ¼ cup of flour at a time), gently folding in the flour as you go.
- Transfer the cake batter to the two cake pans, distributing it evenly and smoothing the tops with your spatula. Bake for 15-25 minutes on the center rack (they both should fit diagonally), until a cake tester or toothpick inserted in the center comes out clean. Cool the cake layers by standing them up on a clean towel and letting them lean on a wire rack against your counter's backsplash wall. Turn the pans counter-clockwise occasionally, as the cakes pull away from the edges of the pans.
Orange Meringue Filling
- While the cake layers are cooling, make the filling. Squeeze ¾ cup of orange juice and whisk it with ½ cup granulated sugar and the 1 tablespoon of orange zest you prepared earlier. Set that aside.
- Separate two eggs, placing the egg whites in a clean and dry medium, stainless bowl. (You won't need the two egg yolks but can refrigerate them for another use.) Using clean beaters, beat the egg whites until frothy, then gradually add in ¼ cup granulated sugar, beating well after each addition. Beat the egg whites until stiff peaks (not dry) are formed. (It will take several minutes. The peaks will remain standing when the beater is slowly lifted out of the meringue.) Add the orange juice mixture to the meringue and gently fold it in until you no longer see any liquid.
- When the cake layers have cooled, loosen them from the pans (run a knife around the edges of the pans if you need to). Place a dinner plate over each cake layer and invert one cake layer onto each plate. Carefully turn over each cake layer until the rounded side is up.
- Gently spread the orange meringue filling over the surface of each cake layer, starting in the center and being careful not to let the filling run over the sides. If it's runny, you can add some filling, wait a couple of minutes, then add some more in the center so it will stay on the cake. Try to use an equal amount of filling on each layer.
- Wash and dry your cake pans and use them to cover each plate. Place the covered cake layers in the refrigerator overnight or for at least 10 hours.
Whipped Cream Frosting
- The next day (or after 10 hours), the filling should mostly be absorbed into the cake layers. Make the whipped cream an hour before serving the cake. In a large, stainless mixing bowl (don't use a glass bowl) add the cream and vanilla. Use clean beaters to beat them until frothy. Then gradually add the confectioners sugar while beating the mixture. Beat until you have stiff whipped cream.
- To assemble the cake, place one cake layer on your serving dish, with the filling side on top. Gently spread a 1-inch thick layer of whipped cream over the cake's surface. Place the other cake layer on top, keeping the filling side up. Frost the top and sides of the cake, making swirls if you wish. Decorate with orange slices, if desired.
- Store the cake in the refrigerator until you're ready to serve it. Cover it with a large mixing bowl if you don't have a cake dome. Store leftover cake covered in the refrigerator for up to four days. It's best not to freeze it because of the whipped cream.
Notes
There are no raw egg whites in the sponge cake itself. If you decide to use pasteurized eggs anyway, you'll need six large egg whites for the meringue in the batter. You'd need 1 ½ teaspoons of cream of tartar. Recipe Source: Barely adapted from a recipe given to my mother in the 1960s.
Nutrition
(Recipe Source: Barely adapted from a recipe given to my Mom by a friend she met in her Italian Club when she first came to America. Originally published on March 12, 2015 and updated now with additional photos and information.)

Jayne says
Hello,
How much cream of tartar do you use to whip the eggs, and when do you add it?
Mamma C says
Hi Jayne - If using large pasteurized eggs in this recipe, you'd need six large egg whites for the meringue in the batter and two of them for the meringue filling. Use 1/4 teaspoon of cream of tartar per large egg white. So, for six large egg whites, you'd need 1 1/2 teaspoons of cream of tartar, and for the two large egg whites, you'd need 1/2 teaspoon cream of tartar. Add the cream of tartar when the eggs are frothy, and then it will take about 6 1/2 minutes to beat into a meringue.
Liz says
Hello,
Just came across your site, googling crustless cheesecake.
So glad I did!
What are your thoughts on making this cake with a gluten free all purpose flour? Since it is only 1 cup, I'm thinking it may come out nice!
Thanks, in advance for your reply.
Mamma C says
Liz, I'm so glad you found my site too! I wish I knew how to advise you on using gluten-free flour here. I've never used gluten-free flour, so I have no idea how it would turn out here. I'd love to hear back if you try it!
Liz says
OK Mamma! 🙂
I'll let you know. I will definitely make this. I printed it off. It may be after new year though.
Mamma C says
Okay. Good luck! 🙂
Cheryl "Cheffie Cooks" Wiser says
Oh my Andrea, this is calling my name! Citrus really ought to be my middle name (wonder if that's why months ago I started one of the other web sites devoted to cooking with Citrus? Or was it because I have citrus growing on our land?), but wait... I do make something similar but wait...I really love this recipe...but wait... I'll just have to make this!!! Have a good weekend and I hope the sun will shine in Ohio this weekend for you!!! Your Florida Bud, Cheryl "Citrus" Wiser!
Mamma C says
Cheryl, you've got to use those fresh Florida oranges in this recipe! You have the best advantage right there. Thanks, and enjoy your weekend. 🙂
Tammy Renea says
I'll be right over for my slice! hahaha I'm with you, I love European desserts. The are always just right as far as sweetness goes. This cake looks AMAZING! I can't wait to try it out.
Mamma C says
Thanks, Tammy. I hope you enjoy it! It's very special.
annie@ciaochowbambina says
Mmmm, the words, "delicate citrus cloud", have me wishing for this torte, right now. Such a beautiful dessert...clearly made with love. I want to know more about your mom's Italian Club! I love the thought of that! Thanks for sharing your special family recipe, Andrea...that's the best!
Mamma C says
This cake definitely requires love! I guess the club was for Italian women who had moved to America. They got together a few times a month in each other's homes and sometimes went out. Kind of like a book club without the books... My mom says it was lots of fun.