
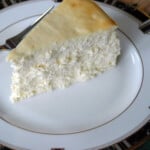
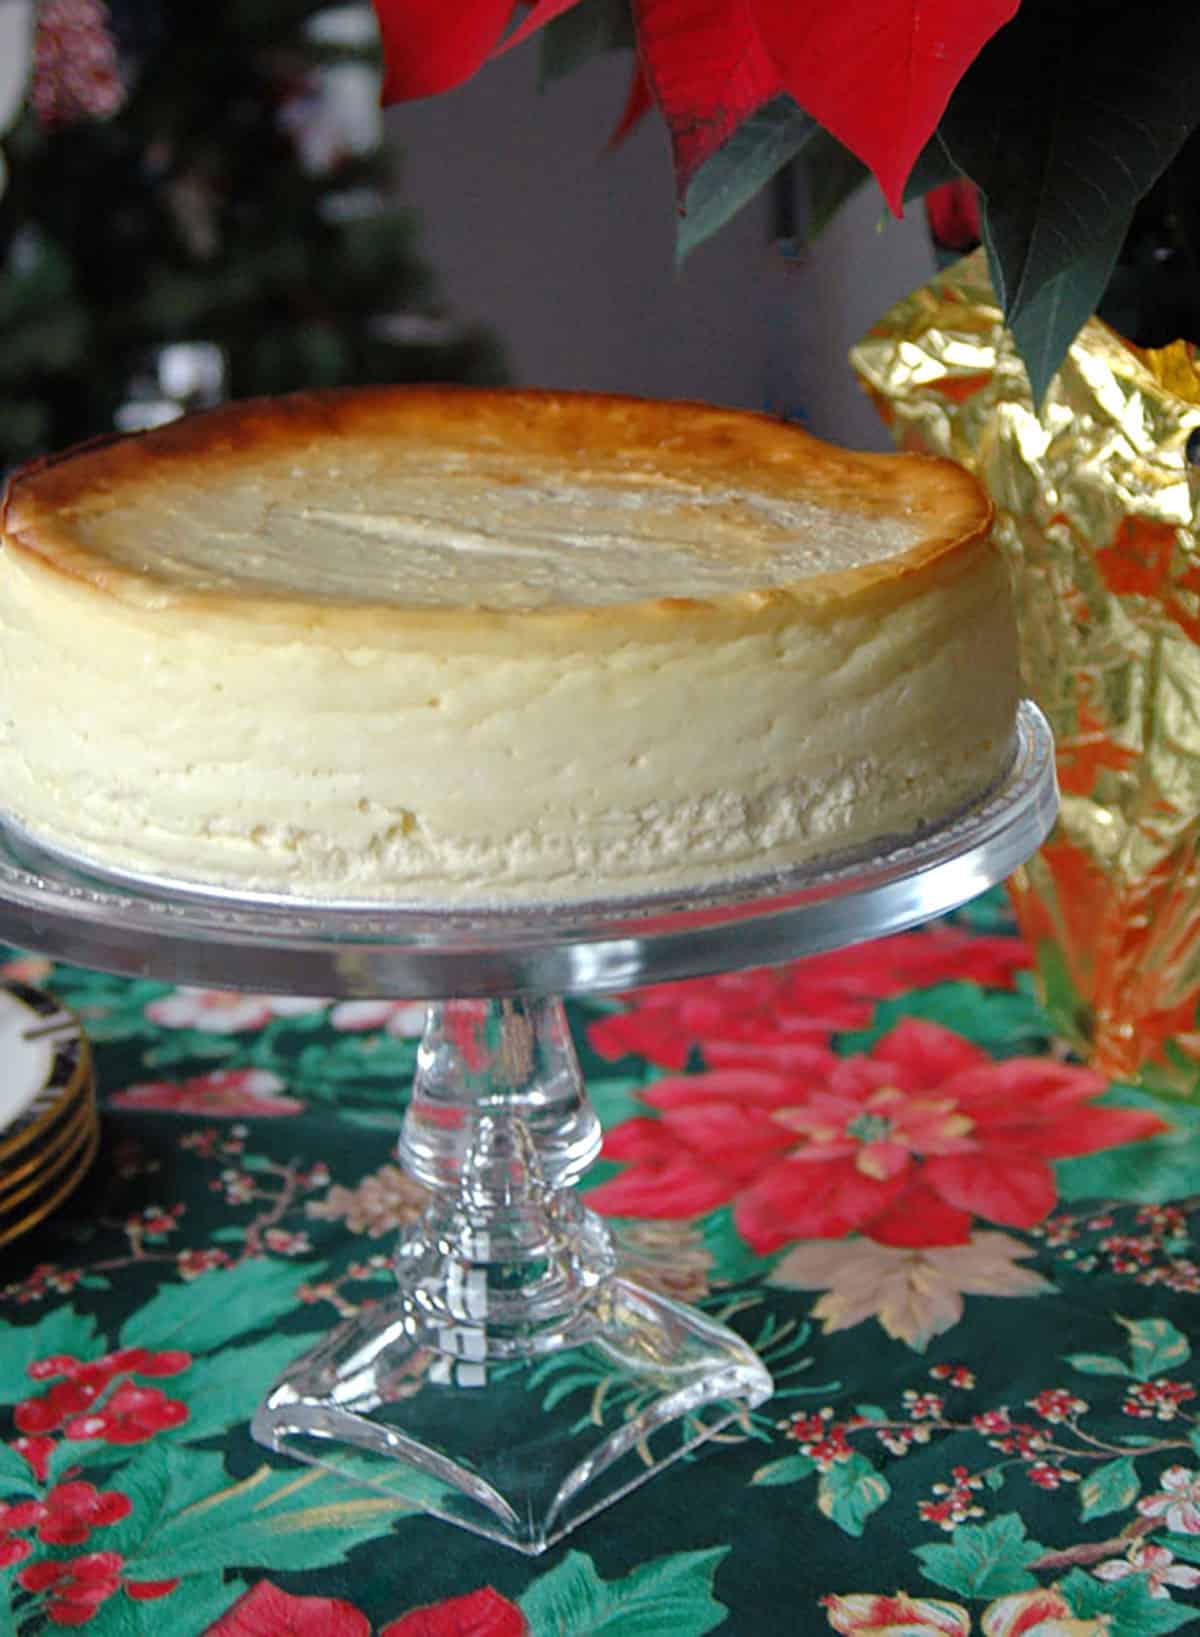
This Fluffy Crustless Cheesecake is simply the best, and it happens to be gluten-free! This New York-style cheesecake has fans all over the world! It's one of the most popular recipes on Cooking with Mamma C.
This Fluffy Crustless Cheesecake is the best cheesecake I've ever tasted! And it's become a holiday tradition for many Cooking with Mamma C visitors, ever since I posted the recipe in 2014.
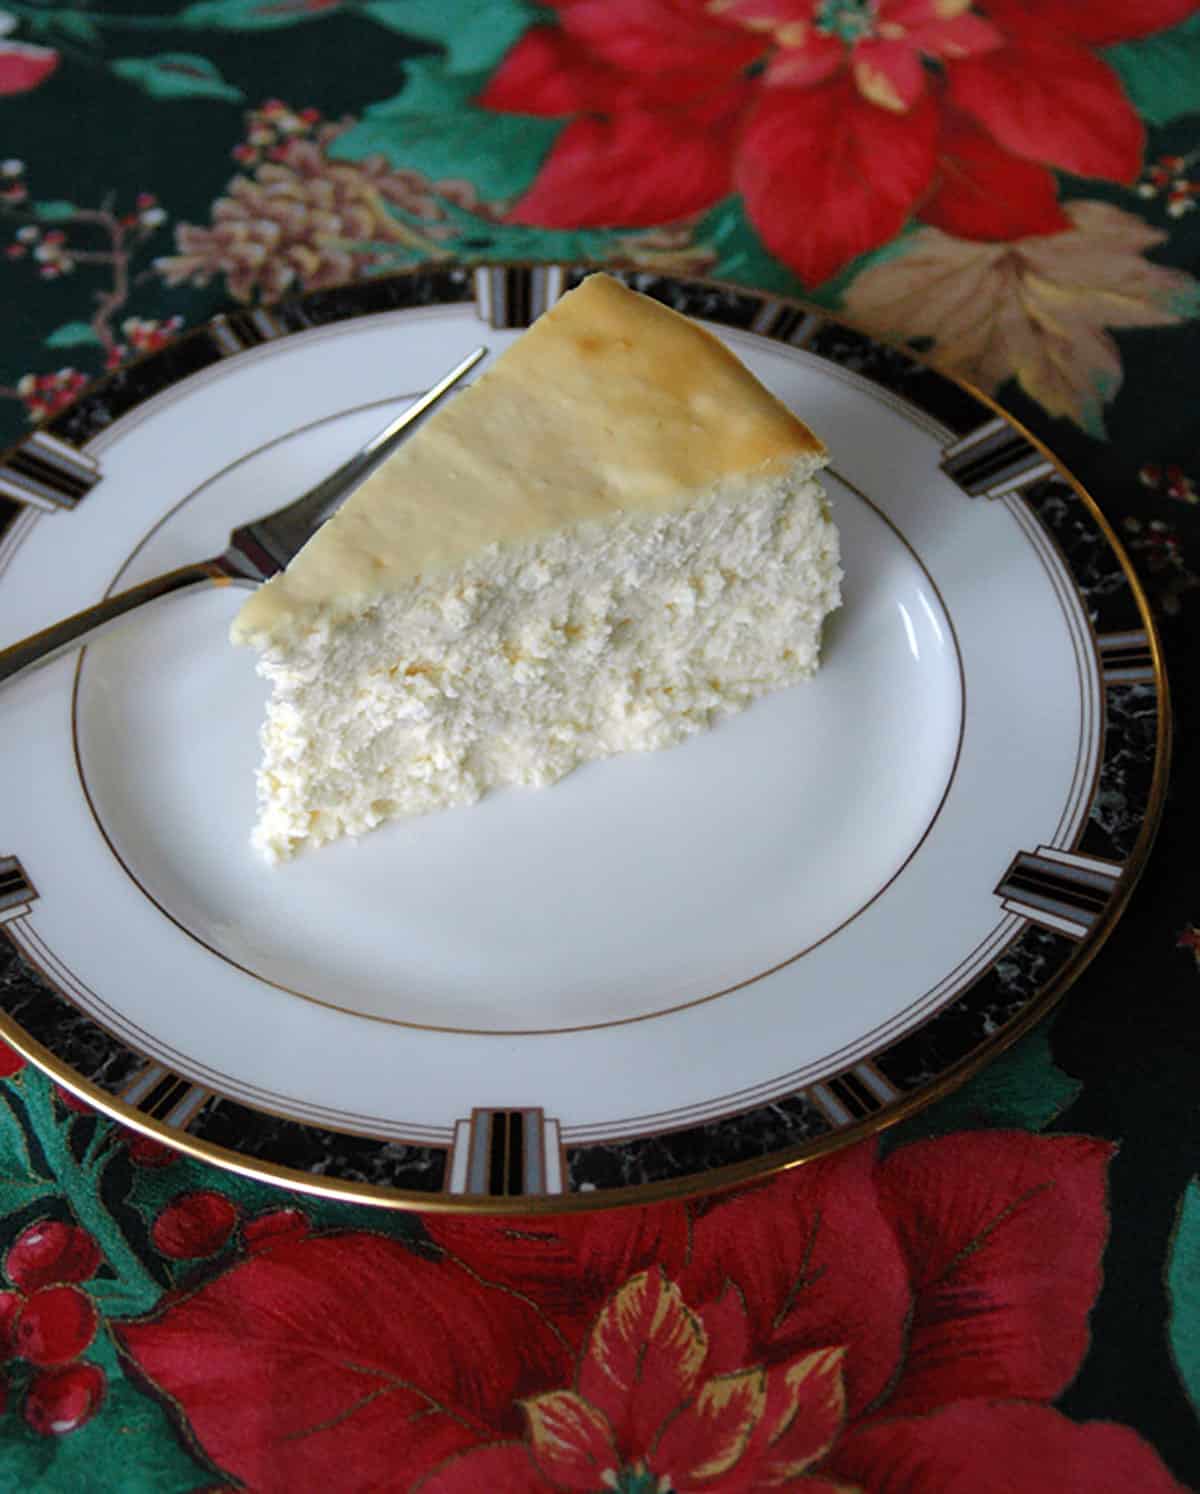
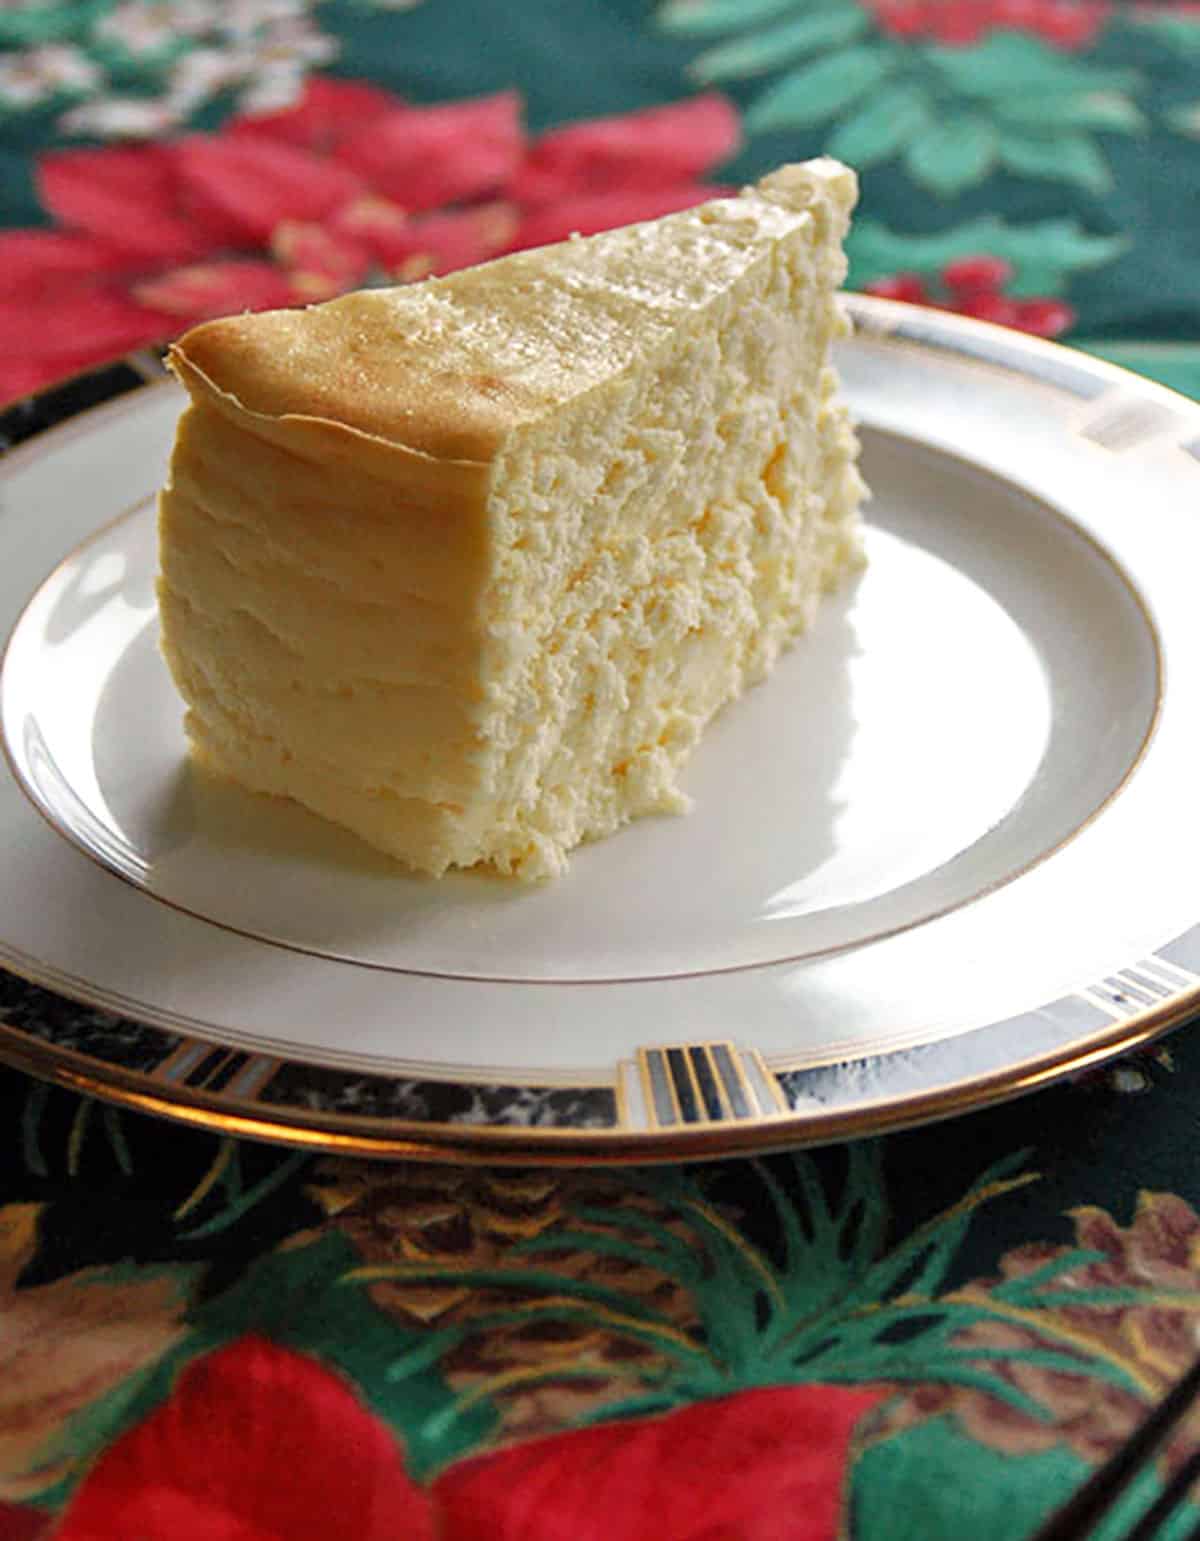
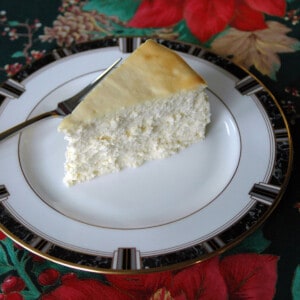
I'm almost at a loss for words in trying to describe this New York cheesecake without crust. It's fluffy, airy, luscious, creamy and so delicately soft.
It's pure decadence! And, since it's flourless, this is a gluten-free cheesecake.
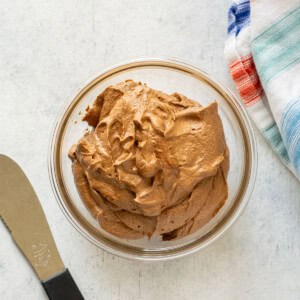
Delicious on its own, it's flavored with vanilla and is just begging to be accented with your favorite cheesecake topping. I've tried it with homemade versions of chocolate liqueur, strawberry liqueur and limoncello.
I know. To die for!
But it's excellent with non-alcoholic toppings like Italian Strawberries with Sugar and Lemon, caramel sauce and raspberry coulis.
We enjoy this crustless cheesecake on our trips to Connecticut to visit my in-laws for the holidays. A dear family friend makes it, and my mother-in-law stores it in the freezer to thaw when we arrive.
I asked for the recipe several years ago, and the rest is history!
Recipe ingredients
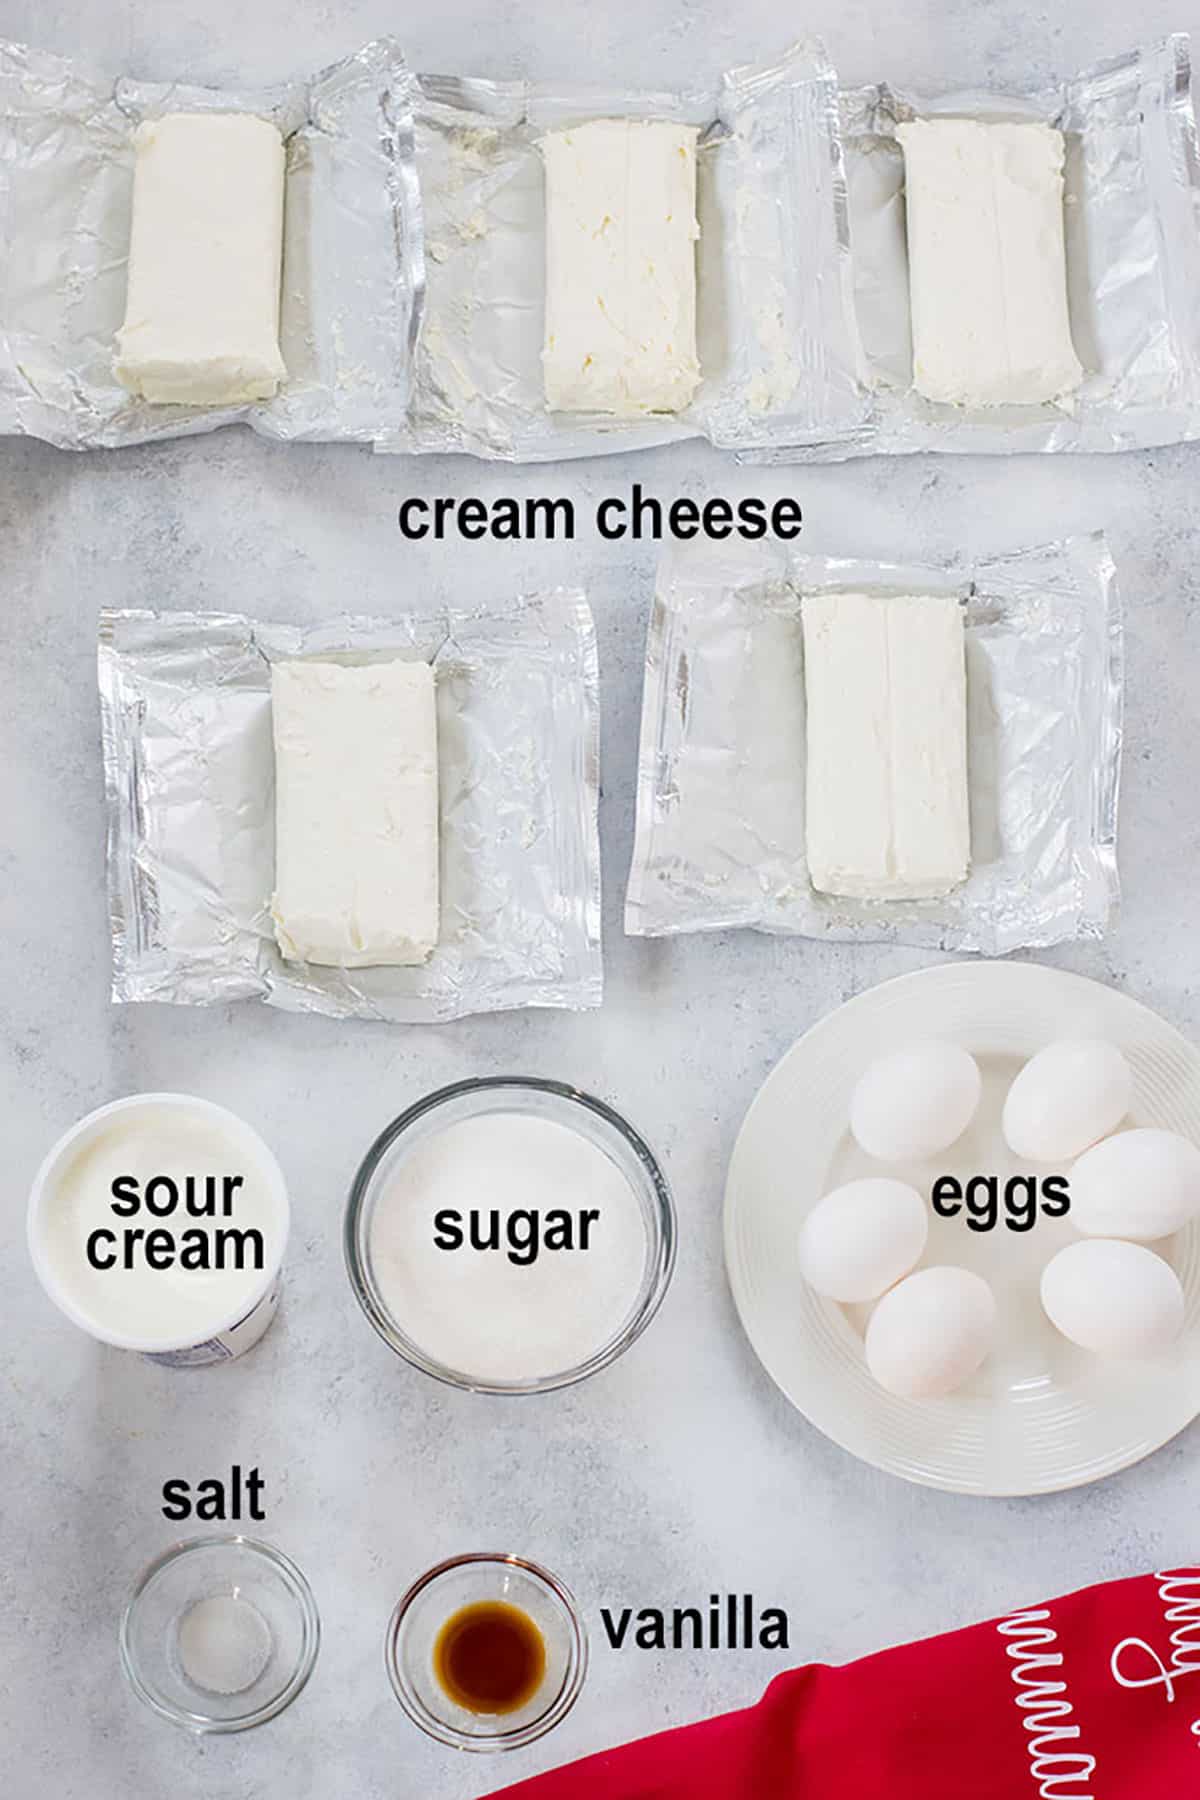
Cream Cheese - You'll need five, 8-ounce blocks for this tall cheesecake. We're not messing around!
You can use full-fat or low-fat cream cheese. Just make sure it's softened.
Sour Cream - The addition of sour cream to the batter makes this a New York-style cheesecake recipe. Use regular or low-fat sour cream.
Eggs: We're using large eggs here. I haven't tested this with other sizes.
For a keto cheesecake
You can easily make this no-crust cheesecake low carb. To make a keto crustless cheesecake, replace the sugar with a keto-friendly sweetener. Monk fruit sweetener (affiliate link) has the best taste, in my opinion.
How to make fluffy cheesecake
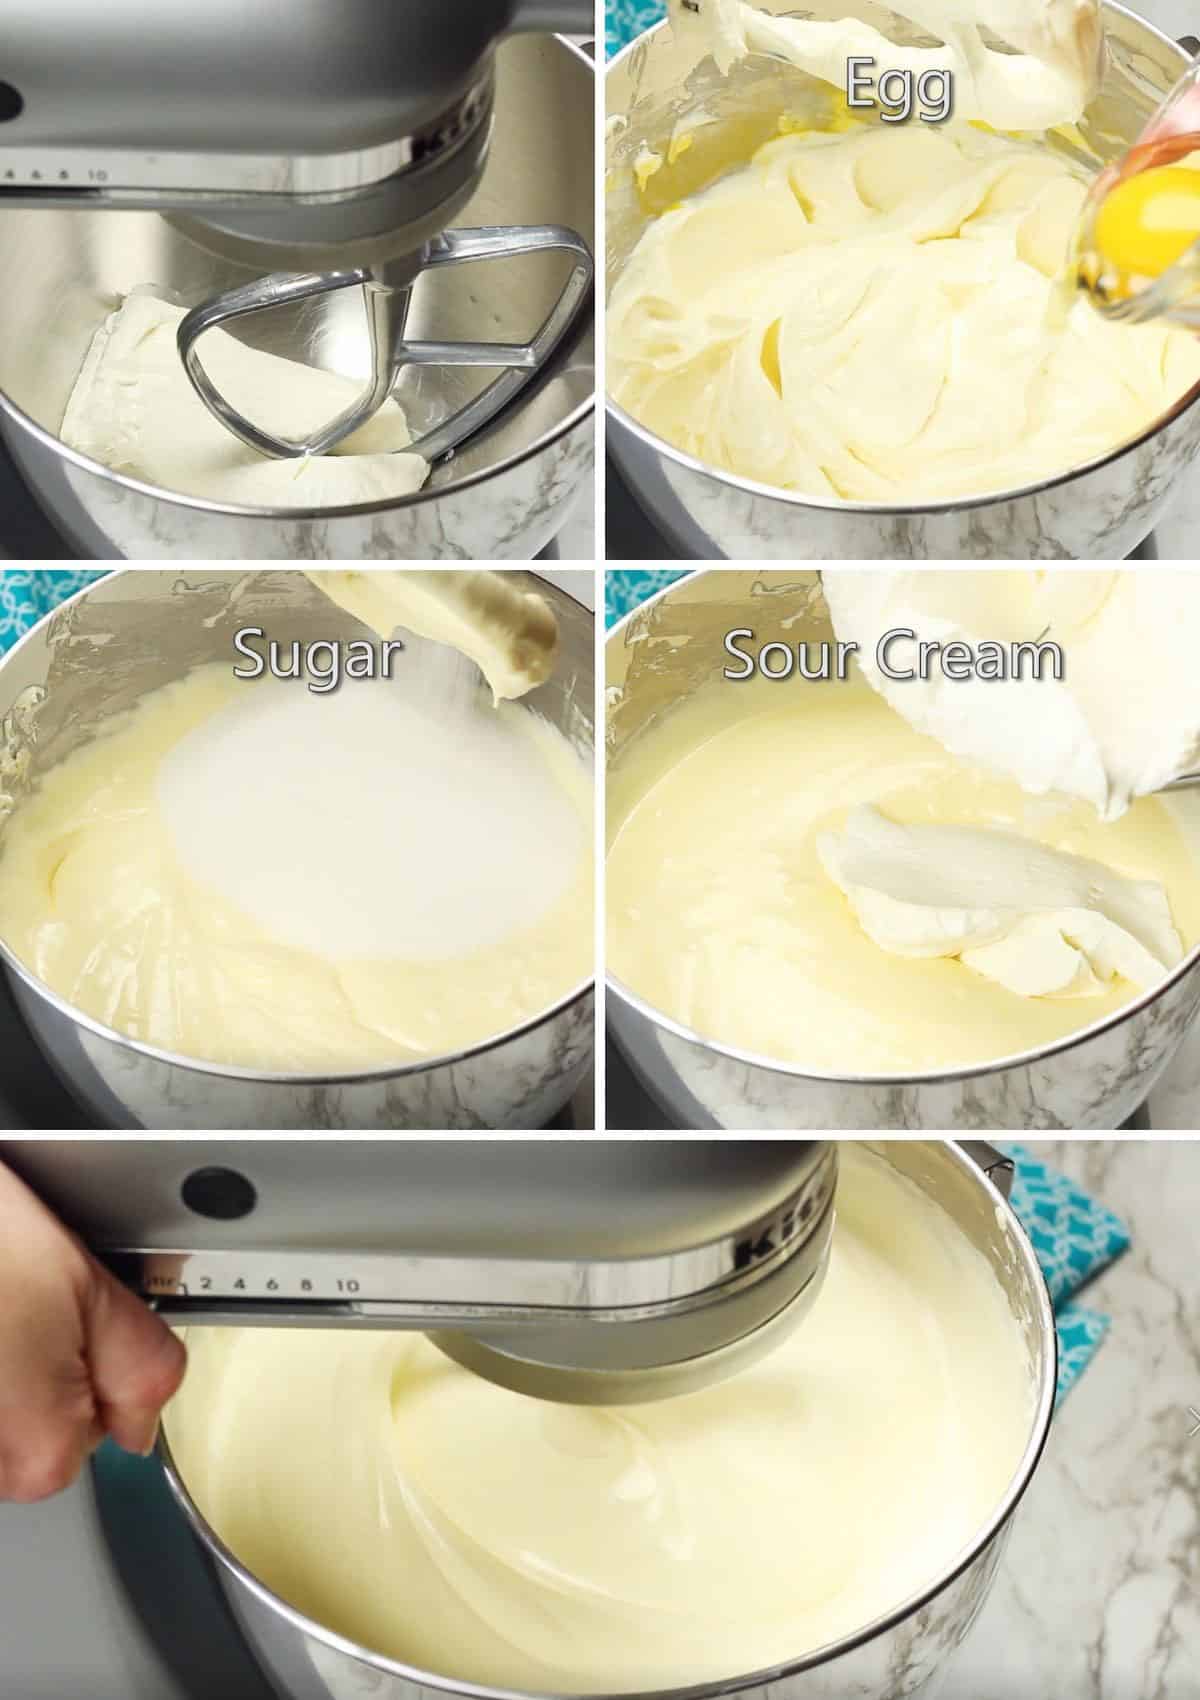
The key to this fluffy cheesecake recipe is beating in lots of air for volume! Besides beating after adding each ingredient, you'll beat the cheesecake filling for seven minutes.
See the recipe card at the end of this post for full instructions, but here's an overview.
Tips for the best crustless cheesecake:
- To prevent lumps, let the cream cheese, eggs and sour cream come to room temperature before starting. Beat each block of cream cheese one at a time, until it's smooth and creamy. Add each ingredient one at a time, beating after each addition, just until combined, then mix everything for seven minutes.
- To prevent over browning, move your top oven rack down to the second lowest position and bake your cheesecake there, with nothing above it so there's room. Also, if you have a dark springform pan, you'll need to reduce the oven temperature by 25 degrees. Note that your cheesecake will still taste good if it does get brown on top.
- To prevent cracks, bake your cheesecake in a water bath (bain marie) by filling a roasting pan ¼ full with hot water and placing your springform pan (affiliate link) with the batter in it. When done baking, leave the cheesecake in the oven with the door ajar for one hour.
- To prevent water from seeping into your springform pan, place your springform in a large pie dish first. Then set the pie plate with the springform in the water bath and proceed. If you don't have a pie dish large enough, you'll need to wrap the outside of the springform pan with heavy-duty foil (or a double layer of regular foil), covering the bottom, up the sides and inside the top of the rim.
How to tell when cheesecake is done
The cheesecake is done when the top is set, except for a small circle in the middle. Don't insert anything into the cheesecake to test it, or it will crack.
Turn off the heat and let the cheesecake stay in the oven with the door ajar for one hour. This allows the cheesecake to finish cooking in the center while the cake cools down gradually.
Frequently asked questions
You can freeze this cheesecake for up to three weeks with good results. The texture starts to change after that, but it can be used within two months.
Cover the cheesecake (whole, partial or sliced) with plastic wrap, then foil. You can leave the cheesecake in the springform pan and just wrap the whole thing.
Thaw the cheesecake in the refrigerator overnight or let it sit out at room temperature for 2-4 hours. You can thaw an individual slice in the microwave on the defrost setting for less than a minute.
You just need to release the buckle, then lift the sides of the pan to remove the circular frame. Keep the cheesecake on the bottom portion of the pan, however. You can even place the cheesecake with the base of the pan on a cake stand.
More dessert recipes to love
- Chocolate Cheesecake - A chocolate version of this gluten-free crustless cheesecake!
- Creamy Cheesecake with Sour Cream Topping - A family favorite for decades!
- Lemon Lush Dessert - A recipe made from scratch!
- Torta Caprese - A flourless chocolate-almond cake that's gluten free!
If you try this Fluffy Crustless Cheesecake, be sure to leave a comment and a rating!
Fluffy Crustless Cheesecake (NY Style)
Video
Ingredients
- 5 (8-ounce) blocks cream cheese (at room temperature)
- 6 eggs (large)
- 1 ⅓ cups granulated sugar
- ¼ teaspoon salt
- 1 teaspoon vanilla extract
- 1 pint sour cream (low-fat is fine)
Instructions
- Two hours ahead of time, unwrap the cream cheese blocks and set them out at room temperature to soften. Set out the eggs and sour cream also. When the cream cheese is softened, start the recipe.
- Move the top oven rack down to the second lowest position in your oven, with nothing above it (to prevent over browning the cheesecake). Preheat the oven to 400 degrees F. (If using a dark springform pan, you'll need to reduce the oven temperature by 25 degrees F for this recipe, or the cheesecake will brown too much. You'll start at 375 degrees, then lower to 350 degrees.)
- Grease a 10-inch springform pan. (See notes if you have a 9-inch springform.)
- Fill a roasting pan ¼ full with hot water. Prepare your springform pan to prevent water from seeping into it during baking. If you have a large pie dish, place the springform in it. If you don't have a pie dish large enough, you'll need to wrap the outside of the springform pan with heavy-duty foil (or a double layer of regular foil), covering the bottom, up the sides and inside the top of the rim.
- In a large mixing bowl, add one block of cream cheese and beat it until creamy. Continue adding one block of cream cheese at a time and beating well, scraping the bowl as needed. There must not be any lumps in your batter. Add the eggs one at a time, mixing after each addition on low. Add the remaining ingredients one at a time, mixing to combine after each addition. When all ingredients have been added, beat on high (or as high as you can without splashing) for seven minutes.
- Transfer the batter to the springform pan (filling it no more than ¾ of the way to the top; see notes for what to do with extra batter). Place the springform and bottom pie dish in the water bath and bake for 10 minutes at 400 degrees F. (Use 375 degrees for a dark pan.) Then lower the temperature to 375 degrees (use 350 degrees for a dark pan) and bake for 40-55 minutes, or until the top is set except for a small circle in the middle. Do not insert anything into the cheesecake to test it, or it will crack. Turn off the heat and let the cheesecake stay in the oven with the door ajar for one hour.
- Leave the cheesecake in the springform pan and let it finish cooling on a wire rack. Refrigerate it overnight before slicing it. Leave it uncovered the first night if you can, unless you have strong odors in your fridge from onions or something. (See notes.)
- To slice, remove the outer circle of the pan and dip a knife in warm water to make the cuts, wiping the knife clean after each slice. (Keep the bottom of the pan under the cheesecake. You can even place the cheesecake with the bottom portion of the pan on a cake stand.)
- Store the cheesecake covered in the refrigerator (you can keep it in the springform) for up to three days or freeze it for up to 3 weeks. Wrap it in plastic, then foil before freezing it. Thaw the cheesecake in the refrigerator overnight or let it sit out at room temperature for 2-4 hours. You can thaw an individual slice in the microwave on the defrost setting for less than a minute.
Notes
- Even if you have a 10-inch springform, just fill it ¾ full so it doesn't overflow.
- If you only have a 9-inch springform pan, fill it ¾ full with the batter. Bake the remaining batter in two ramekins or another suitable baking dish, in a water bath, ideally in a separate oven, so you can pull out them out earlier without affecting the springform cheesecake. I bake my extra batter in a separate oven for 10 minutes at 400 degrees, then 25 minutes at 375 degrees, then leave it in the oven with the door ajar for 20 minutes. If you don't have a separate oven, bake the ramekins/baking dish in the same oven with the springform cheesecake for the full amount of time (it's important not to open the oven during baking) and just know that the ramekins/baking dish will come out a bit overcooked, but tasty.
- Some readers have halved the recipe with good results.
- Whenever I cover the cheesecake with foil or wrap the first night, a few drops of moisture pool on top of the cheesecake, leaving a water stain on its surface. If you don't have strong odors in your fridge, try leaving the cheesecake uncovered for the first night.
- I have never tried making this with a crust.
- This cheesecake is barely adapted from a Williams Sonoma recipe.
Nutrition
(Recipe Source: Barely adapted from family friends Lee and Carol, who said it originally came from Williams Sonoma. Originally published on December 22, 2014 and updated now with additional photos and information.)

maria in nj says
Hi, this is just going in the oven now...when you say beat it for seven minutes are you using a paddle or whip attachment? I started using a paddle and then switched over to a whip...we will see...oh this is a lot of ingredients if it doesn't come right...
maria in nj says
also I made this in a 12 inch spring form and the ting was HUGE!!! filled it almost to the top...I am praying !
maria in nj says
also I think that it would be helpful to tell people to make sure they scrape down the mixer a few times...even though I did that there was still some cream cheese left on the bottom...had to scoop some out of the pan and mix again! scrape the mixer bowl well, from the bottom! Also I don't know how this would have fit in a 10 inch pan...I used a 12 inch and it is to the top and then some!
Mamma C says
Hi Maria - To answer your first question, I use a paddle attachment when mixing. Also, the directions state to fill your pan 3/4 full and bake any extra batter in ramekins or a baking dish. I hope you don't have overflow. I can add the info about scraping the bowl. Thank you!
maria in nj says
Mamma C...I just took it out of the oven...it looks good, but like another commenter noted mine got very brown on top...do you have any idea why that happened...it was still jiggly when I took it out so i know its not overcooked but it is very brown and does not look like your picture... :/
actually the 12 inch spring form worked perfect no overflow!
Mamma C says
I'm so glad it didn't overflow! I wouldn't worry about it being brown on top. It could be that your oven runs hotter than mine. I just had this cheesecake over the holidays, made by our friends who gave me the recipe. The cheesecake was brown on top, but still delicious.
maria in nj says
But I just did a google search for the Japanese cheesecakes and if you look at them all of them are pretty brown on top...things that make you go ummmm....I will serve this to my sisters on Sunday...they don't hold back...lol
Gail Dingman says
I am baking this cheesecake for the first time. You don't mention whether you bake in a convection over. When baking, I usually use the convection feature for even baking. My cheesecake is turning really brown on top with 20 minutes left to bake . . . EEK!
Mamma C says
Gail, this recipe is written for a standard oven. I don't own a convection oven, but my understanding is that it cooks everything faster.
Sarah Williams says
I wanted to use this recipe to create a red velvet cheese cake, do you think it would hold up well as a center layer?I.e. base of dessert later of RV cake, cheesecake center and another layer of RV cake on top. With a white chocolate cream cheese icing.. Let me know your thoughts please..looking forward to trying this out.
Mamma C says
Wow, that sounds like a fabulous dessert, Sarah! The only thing I can think of is to bake the cheesecake separately and freeze it. Then cut it in half (to make two layers) while still partially frozen. (You'd probably want a thinner layer of cheesecake than this tall one, so maybe use one layer and freeze the other for another time.) Then assemble all the layers and refrigerate the dessert. The cheesecake layer, when thawed, will probably get smooshed a bit with the cake layer on top of it, but that's not necessarily a bad thing. If you try it, let me know how it turns out!
natakie says
Can this batter be used for making cupcakes and if so what is the baking time for these cupcakes?
Mamma C says
I've never tried making them into cupcakes, but I do bake a couple ramekins with the extra batter when I use my 9-inch springform. I researched pan conversions, and it looks like you should get at least 24 cupcakes out of the batter. You would have to experiment to see what works. You'd probably have to grease the cupcake liners well to prevent sticking. Use a water bath. Keep the temperatures the same, but keep an eye on them to figure out the time (don't open the oven door to check, or they'll crack.) Maybe do the initial 10 minutes at the higher temp, reduce the temp, then try for 20-30 minutes? When I bake them in ramekins, I do bake them for the full time, since they're in the oven with the full cheesecake, and I don't want to open the door in the middle of it. The ramekins turn out just a little more cooked. Please let me know if you try it!
Natakie says
Thank you so much for responding! Will let you know how they turn out!
Rosa Petriglia says
have you ever made this in a pumpkin flavor? do you think I could add a can of Ed Smith Pumpkin Pie filling and it would work?
Mamma C says
I've never tried making this with pumpkin, Rosa. I don't know how it would turn out. Let me know if you try it!
Jeannette says
Just made my first cheesecake,came out good.
Mamma C says
How exciting, Jeannette! I'm so glad this worked for you.
Rebecca Brady says
I made this as a low carb dessert for Easter by using Swerve instead of sugar. IT WAS FANTASTIC! Thank you so much for this simple and EXCELLENT recipe! I also hate springform pans so I just used a 10 inch cake pan that is six inches deep. I followed the other instructions exactly. It worked perfectly.
Mamma C says
Rebecca, thanks for reporting back! It's good to know about the alternative to sugar, and I love hearing that a different pan worked. I'm glad you enjoyed the cheesecake!
Patty says
What do you do if you have a springform pan that leaks?
Mamma C says
Patty, I place my springform pan into a pie dish, then place the pie dish with the springform in a roasting pan that has the water bath. The recipe has the details.
Jamie Timmins says
I'm planning on making this for a birthday cake. How many days ahead can I make this?
Mamma C says
Jamie, the cheesecake can be stored in the refrigerator for up to three days or frozen for up to 3 weeks.
Matt Barnett says
Yum!
Mamma C says
This is a keeper, Matt!