

My Mom's Italian Cookies have a soft texture, thanks to a secret ingredient! Flavor them with vanilla or use anise to make anisette cookies.
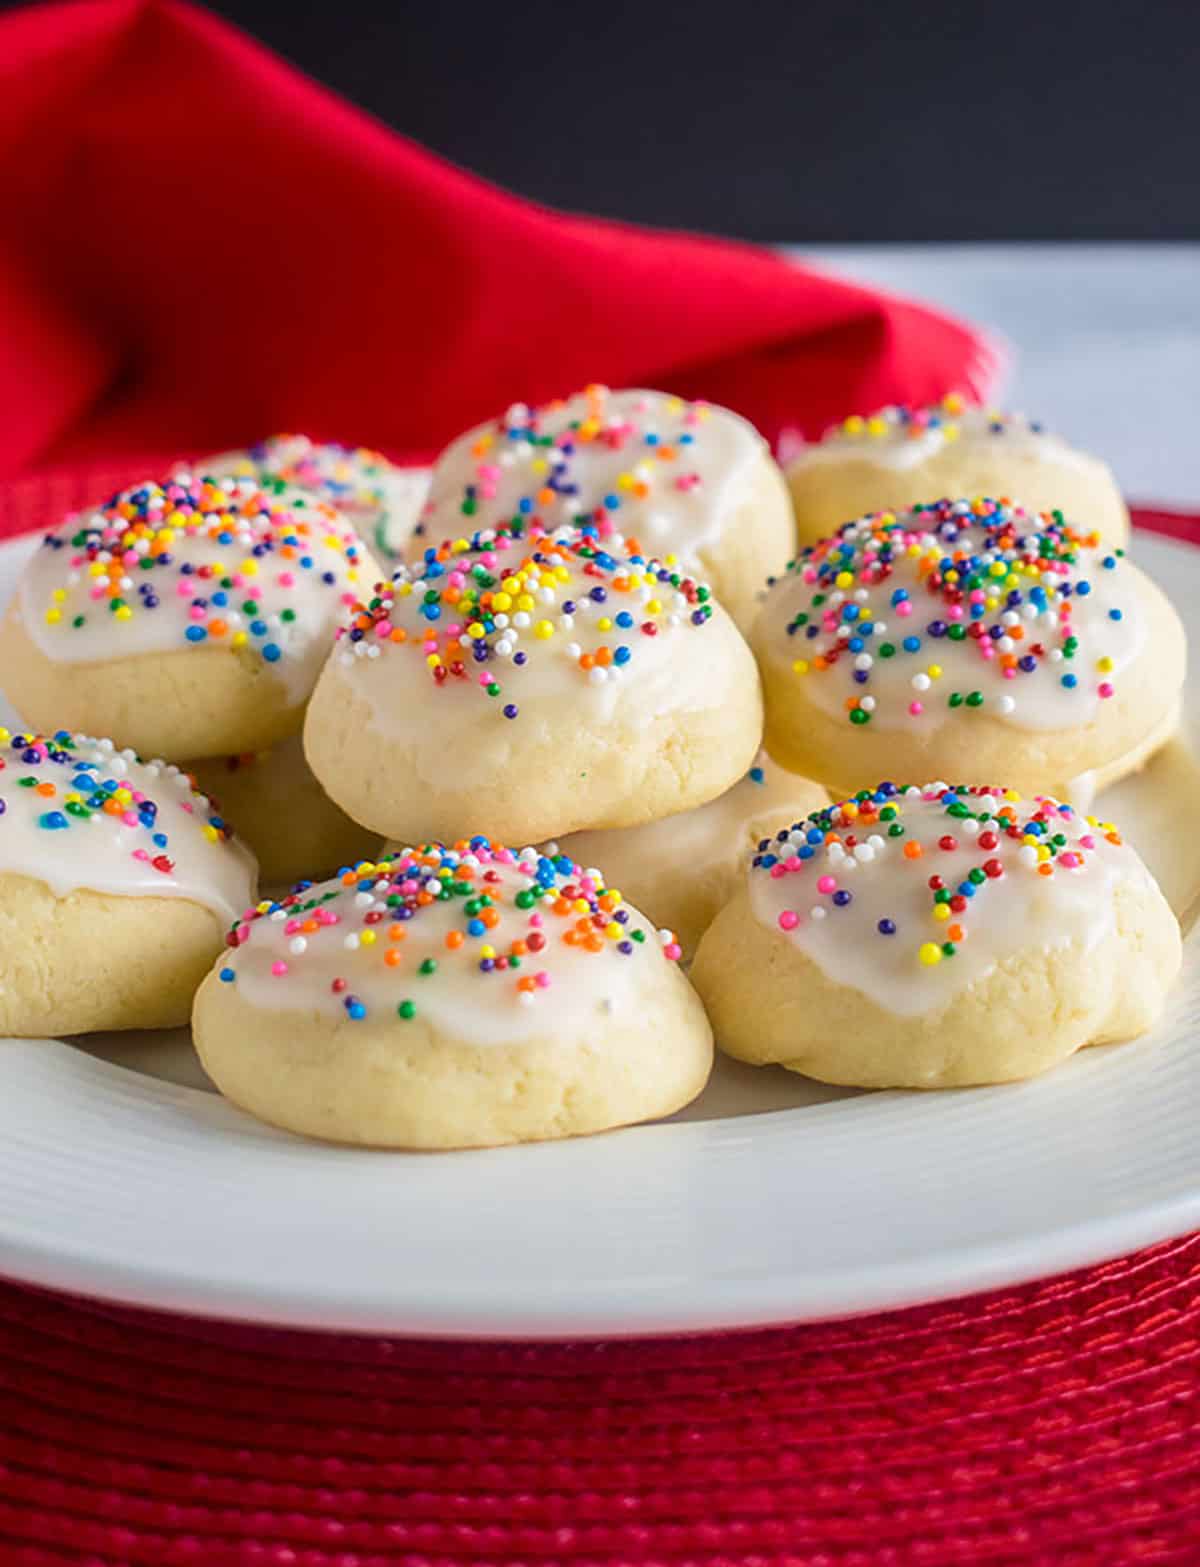
Behold, my favorite cookies of all time. I can almost smell their aroma through the screen!
Just about every Italian family has its own version of these cookies, known by various names such as Italian Christmas cookies, Italian wedding cookies, or even anginetti cookies, which are usually lemon-flavored.
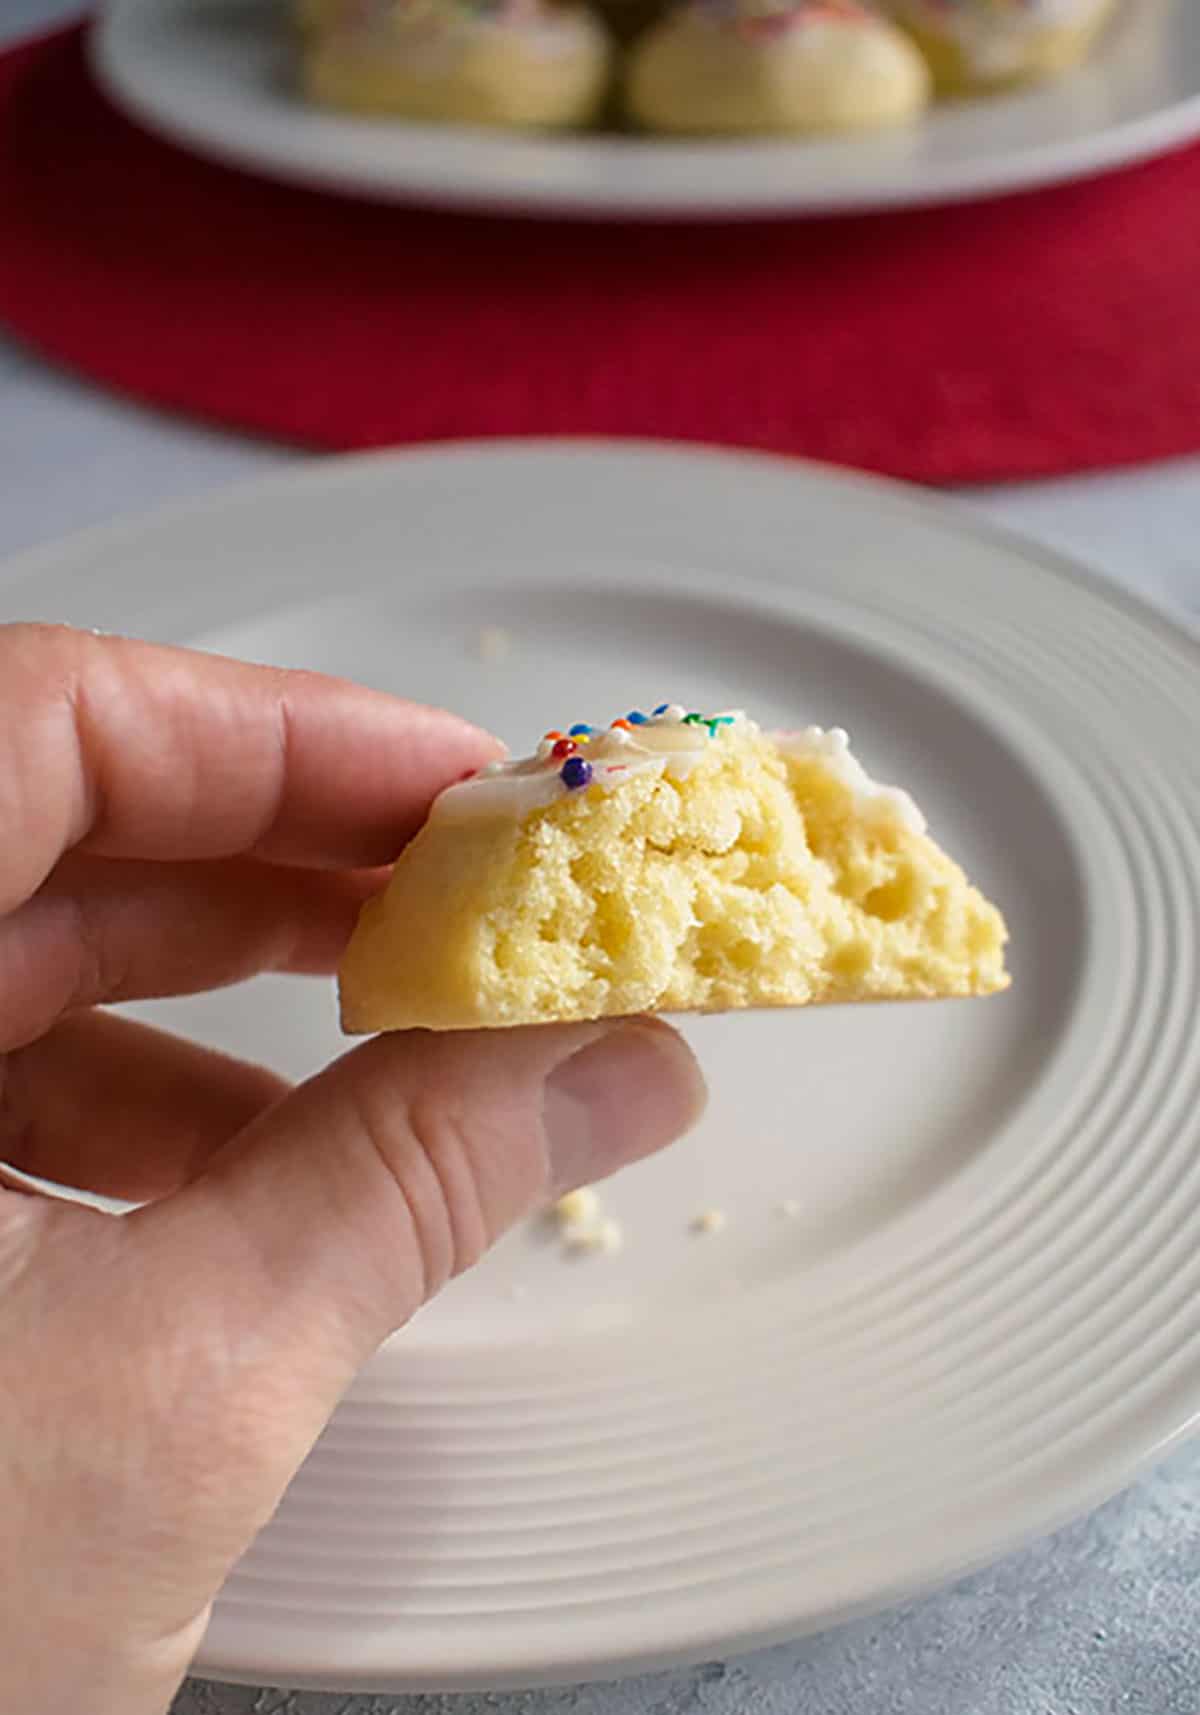
I'm sharing an adaptation of Mom's recipe, based on how she used to make them when I was a child. The result is fluffy, tender cookies with a cake-like texture, thanks to the half-and-half in the dough. They're similar to ricotta cookies.
I like to think of them as Italian sugar cookies!
Recipe ingredients for the dough
See the card at the end of this post for the full recipe, but here's an overview.
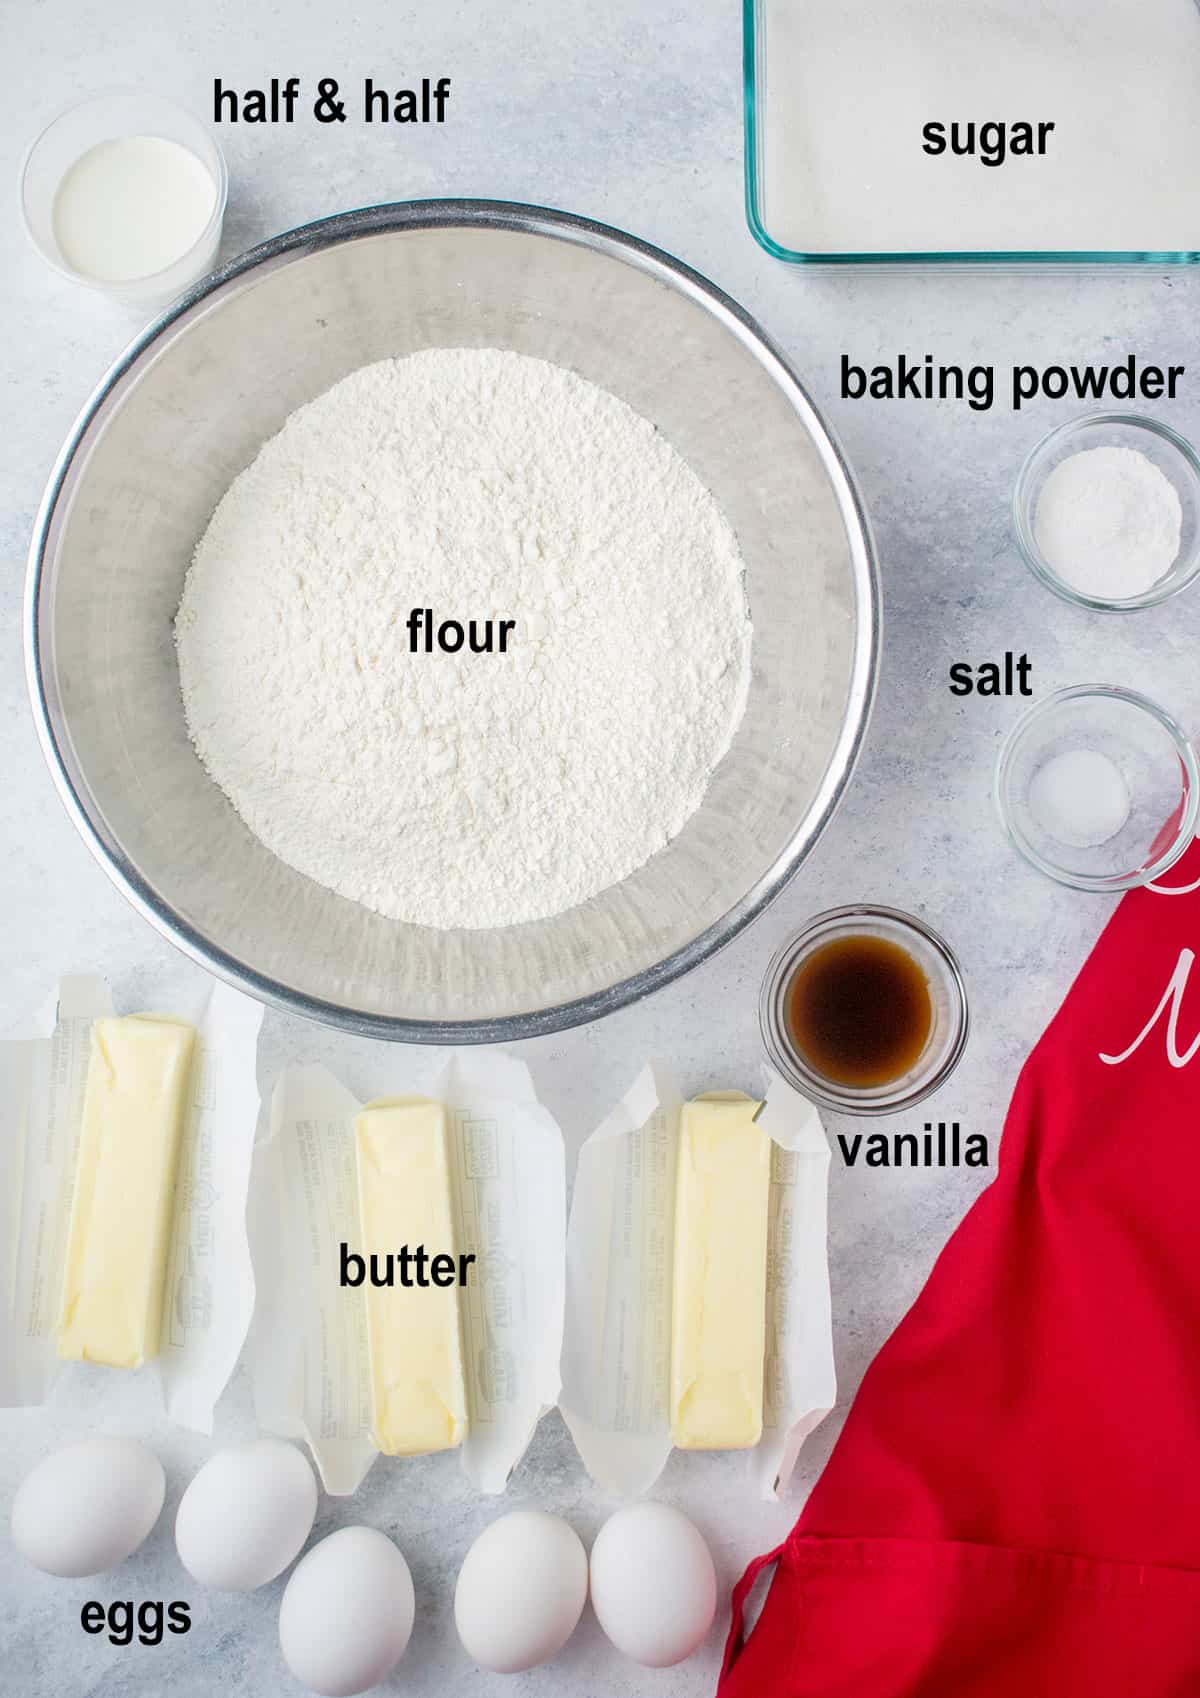
Butter: I always use salted butter here. If you use unsalted butter, you'll need to add a little extra salt.
Make sure to soften the butter before using it in this recipe. You can use the lowest defrost setting on your microwave for 6-8 seconds if you forgot to let the butter sit at room temperature.
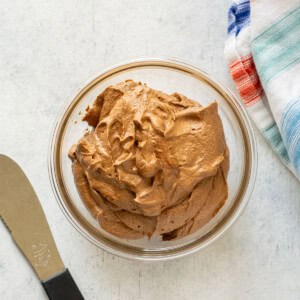
Half & Half: This is the secret ingredient that brings the X-factor to these Italian cookies, making them soft and not dry. You could substitute whole milk if needed.
Vanilla Extract: I love flavoring these cookies with a generous amount of vanilla. But if you're a fan of the black-licorice taste of anise, you can make anise cookies. I've included both variations in the recipe, and you could even use lemon extract.
Recipe ingredients for the glaze
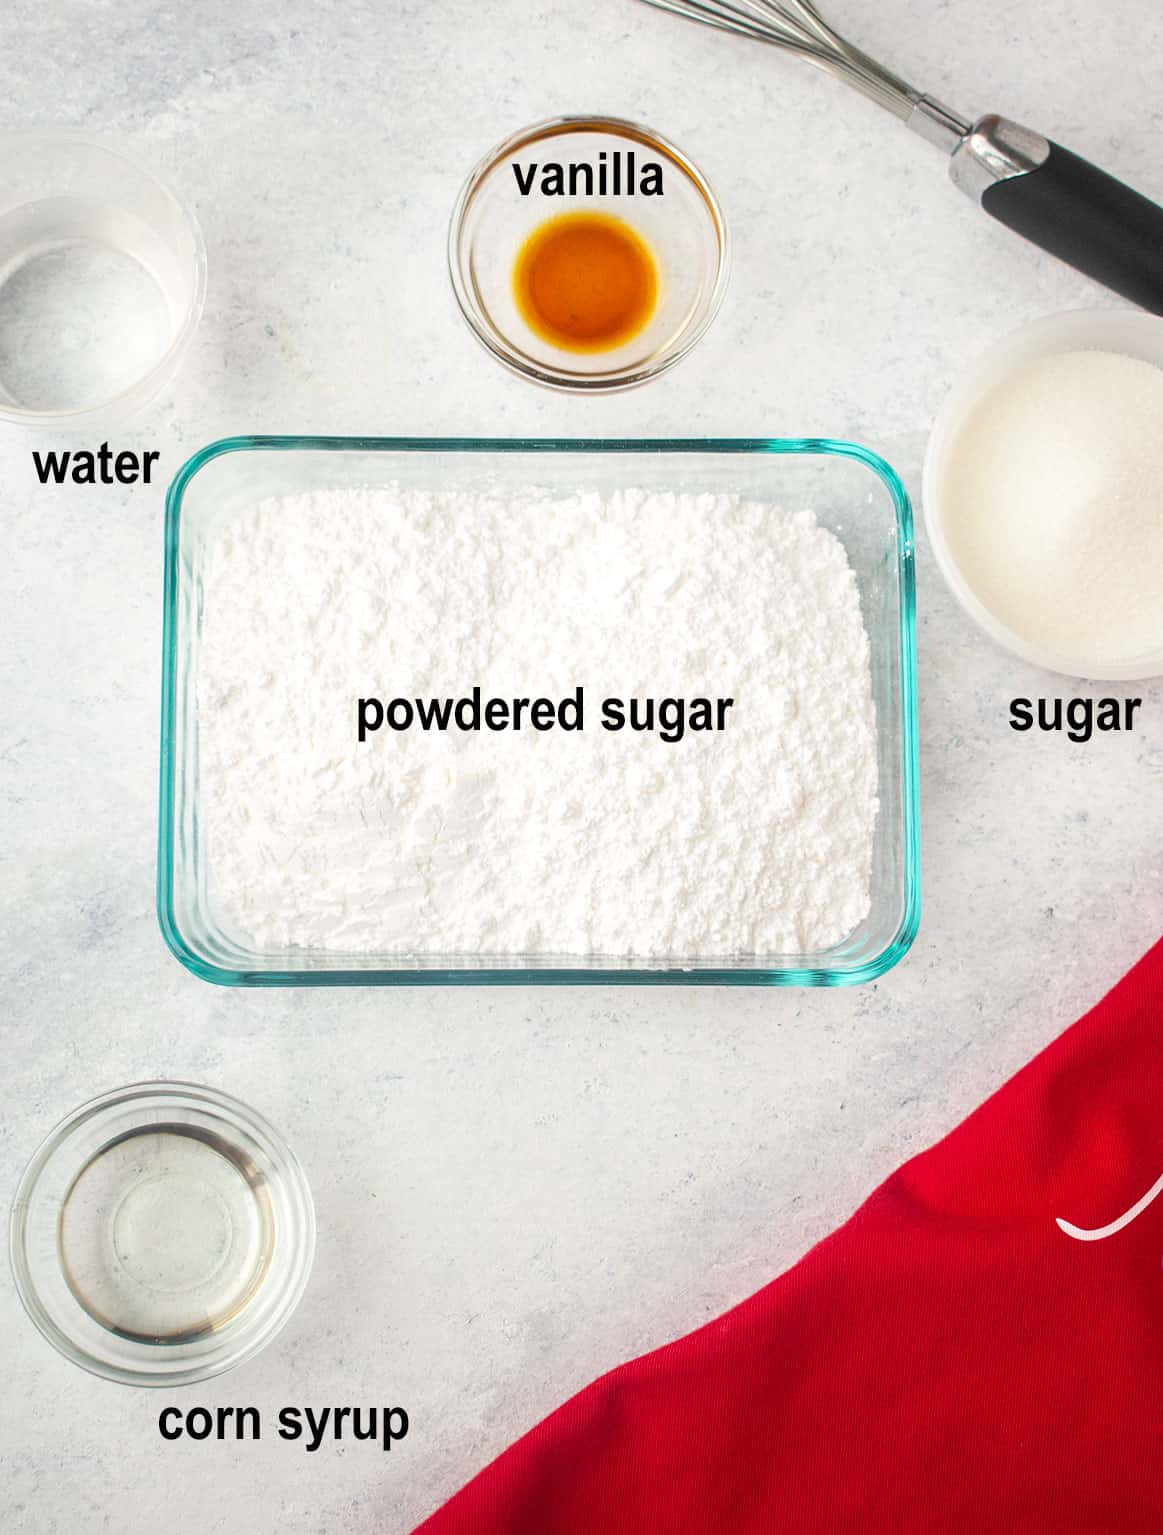
Corn Syrup: Using light corn syrup in the glaze gives the Italian cookies a glossy, smooth finish.
Water: This will thin out the goopy corn syrup.
Granulated Sugar: This will help sweeten the corn syrup mixture without making it thicker.
Powdered Sugar: My dessert recipes are never overly sweet. We're using just enough confectioners' sugar to thicken the glaze and sweeten it while keeping the texture smooth.
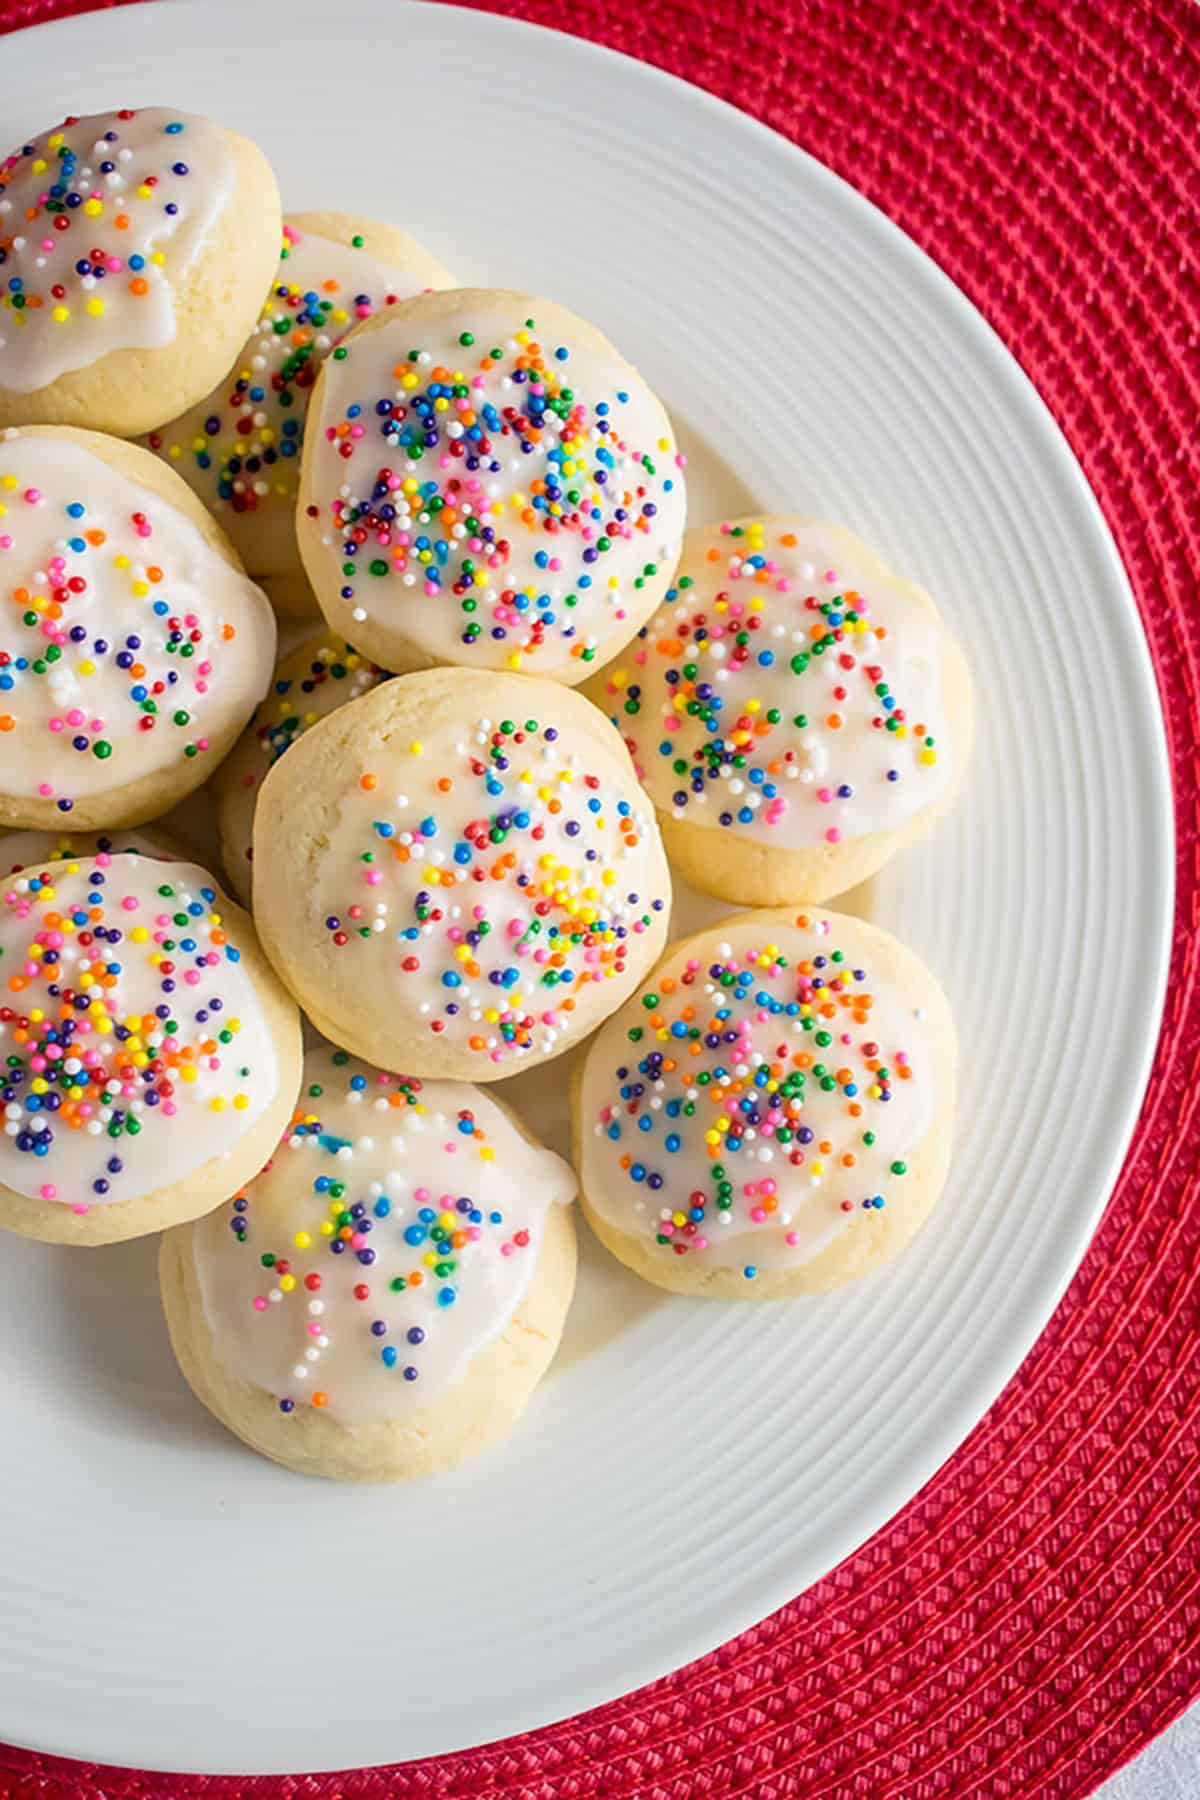
Nonpareils for Decorating: These wouldn't be Italian sprinkle cookies without the sprinkles! I buy rainbow ones (affiliate link) so I can use them for any occasion, but you can buy red and green ones for Christmas cookies.
How to make Italian cookies
See the card at the end of this post for the full recipe, but here's an overview.
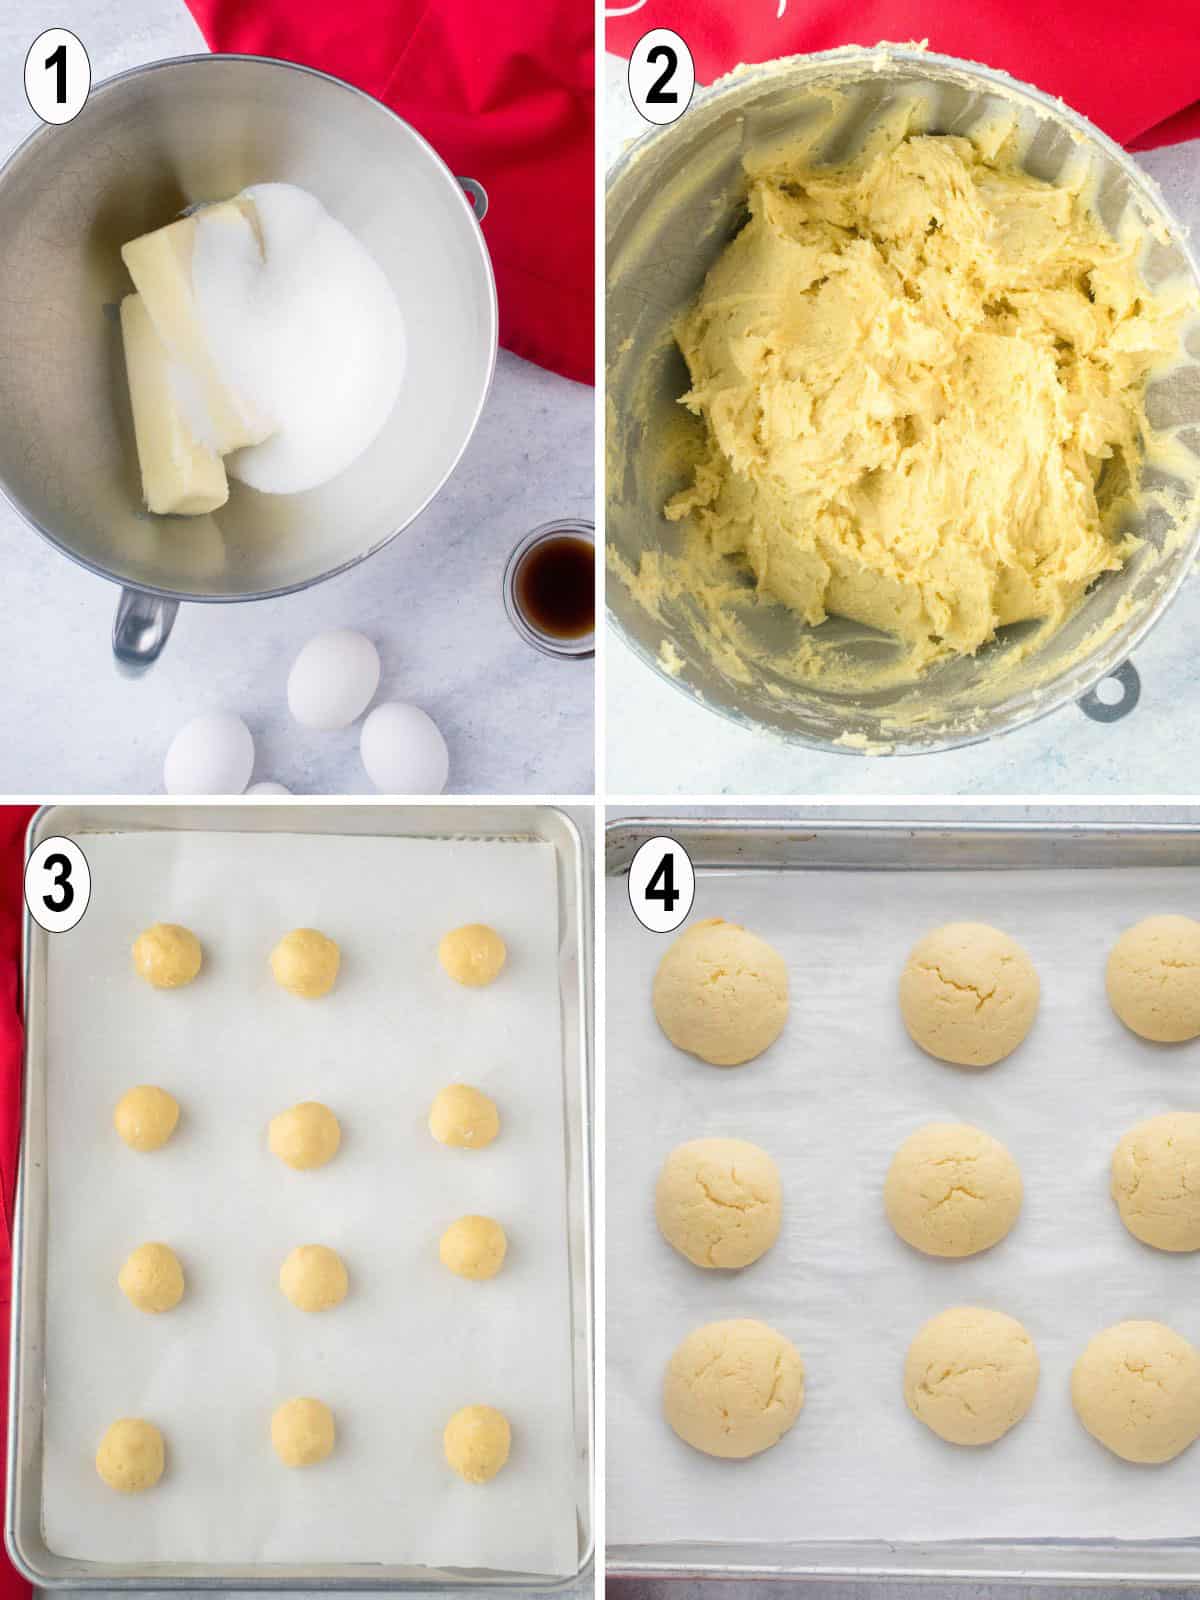
- Cream the butter and sugar with a mixer.
- Beat in the remaining ingredients according to the recipe instructions, until you have a sticky dough.
- Chill the dough and roll it into 1 ½-inch balls, placing them two inches apart on a parchment-lined or greased baking sheet.
- Bake at 350 degrees until the tops are set and the bottoms are lightly browned.
Tips for working with the soft cookie dough
- Chill the dough for 30 minutes before working with it.
- Use floured hands to roll the dough into balls. (You can use a cookie scoop (affiliate link) before you roll.)
- Refrigerate the remaining dough while some of the cookies are baking.
Tips for baking the cookies
- This recipe yields 53-55 cookies. If you need to reuse your sheet pans as you go, make sure they're cool first, so the cookies don't spread while baking.
- You can rinse the pans in cold water and line them with fresh parchment paper before reusing them.
How to make the cookie glaze
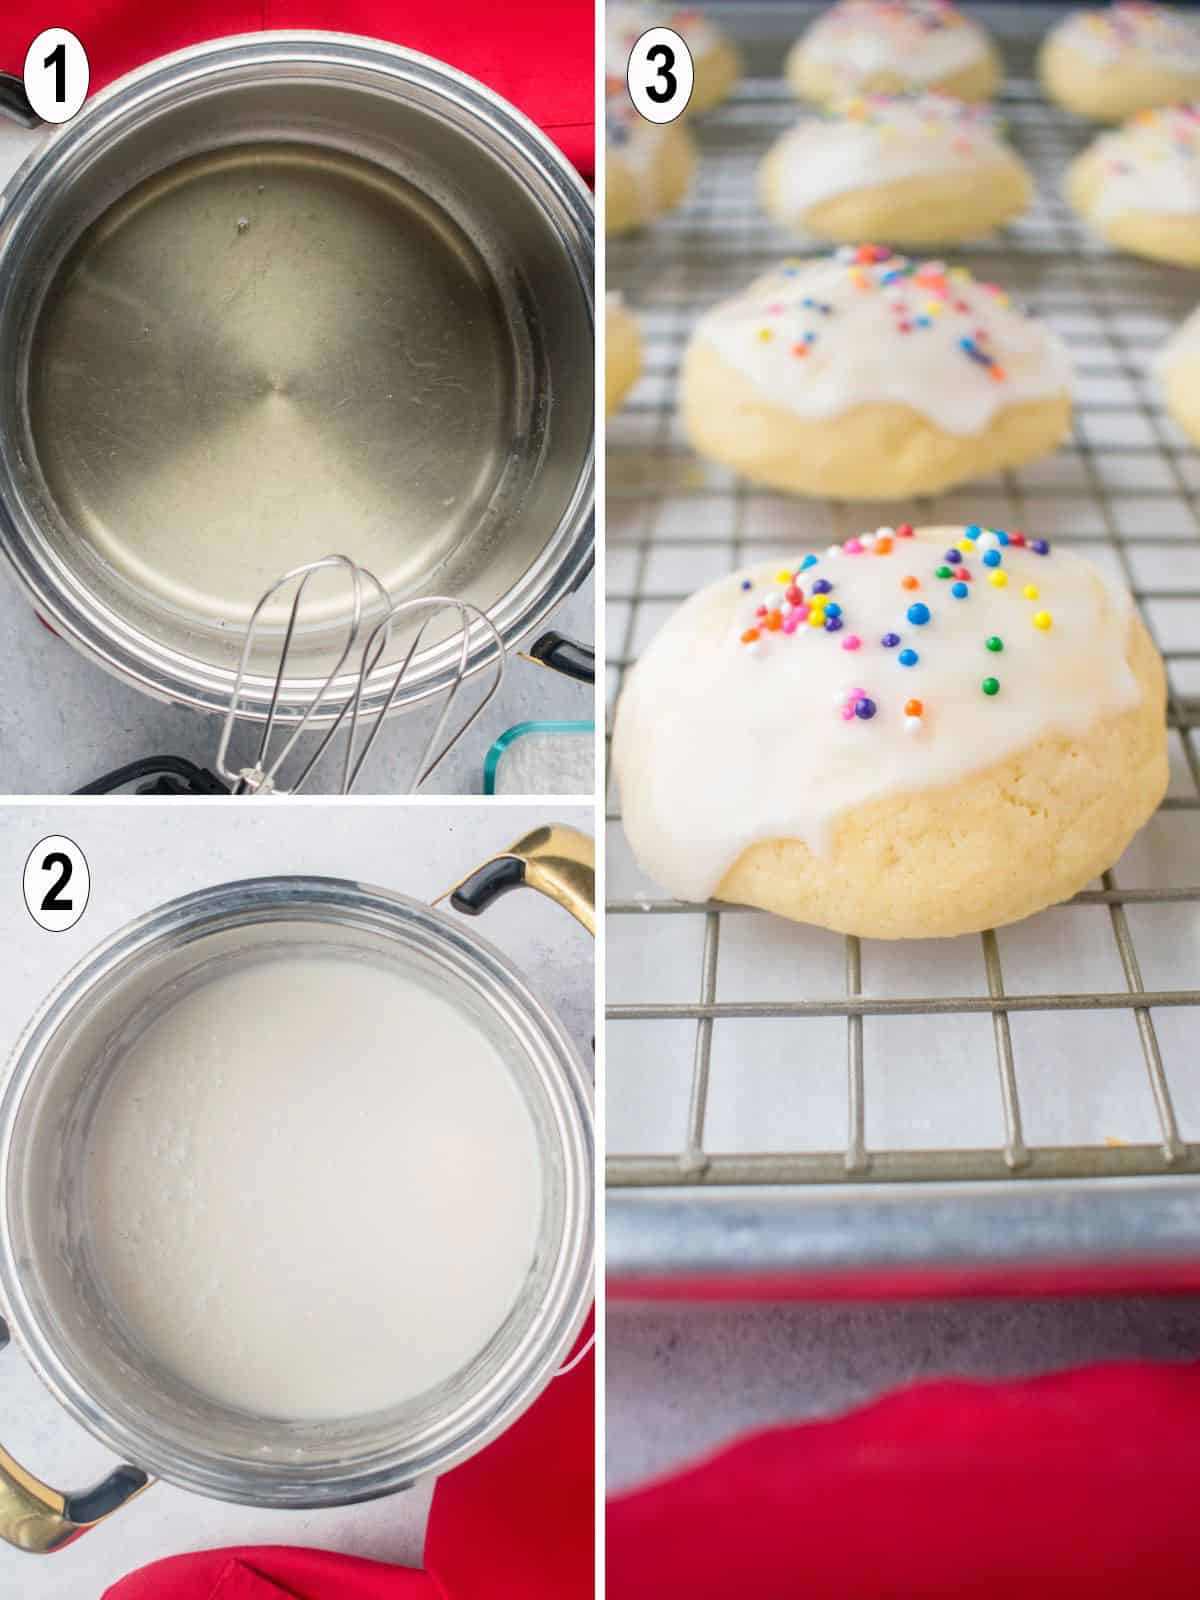
- Whisk the granulated sugar, water and corn syrup in a pan (ideally a stainless steel one, so you can use a hand mixer in it later). Heat the pan and stir until the mixture comes to a boil.
- Off the heat, stir in vanilla and let the mixture cool for five minutes. Then, use a hand mixer to beat in the powdered sugar until combined.
- Wait until the cookies have cooled, then top them with glaze and sprinkles.
Tips for glazing and adding sprinkles
After trial and error, I've found the best method is:
- With one hand, hold a cookie top down in the glaze and twist.
- Use the index finger from your other hand to spread the glaze on the cookie's surface.
- Immediately sprinkle on nonpareils, before the glaze starts to dry. (Once the glaze dries, the sprinkles won't adhere.)
- Place the wet cookies on a baking rack (affiliate link), over a sheet pan lined with parchment or wax paper. The glaze will drip onto the paper below.
Storage tips
- Allow the glaze to dry for four hours before storing the cookies.
- The cookies can stay covered at room temperature for up to a week.
- It's best to place them on a tray and cover them loosely with plastic wrap. (The cookies will become very moist if you place them in a plastic container.)
- Any leftover glaze can be kept at room temperature for three days, then refrigerated for a week. You also could freeze the glaze.
Frequently asked questions
You can store unglazed cookies in the freezer for up to three months. Thaw and glaze them when you're ready.
I don't recommend freezing the cookies once they've been glazed and sprinkled, because the nonpareil colors will bleed.
More Italian dessert recipes
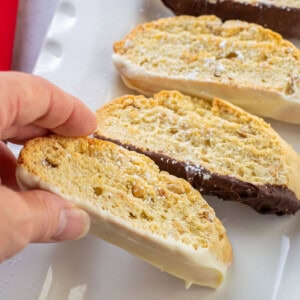
You also might want to fill your cookie tray with pignoli cookies, pizzelle cookies, hazelnut biscotti or rainbow cookies made with almond paste. If you love chocolate, don't miss this Torta Caprese.
At Christmastime, don't forget some homemade panettone. And these Italian dessert strawberries are always delicious.
Enjoy!
If you make these Italian Cookies, please leave a comment and a rating!

Italian Cookies (Vanilla or Anisette)
Video
Ingredients
Cookies
- 12 ounces salted butter (softened; 3 sticks)
- 1 ¼ cup granulated sugar
- 5 eggs
- 1 ½ tablespoons vanilla extract (or 1 tablespoon anise)
- 5 cups all-purpose flour (measure by fluffing the flour, scooping a cup and leveling it off)
- 5 teaspoons baking powder
- ¼ teaspoon salt
- 3 ½ ounces half and half (or whole milk)
- extra flour to dust your hands while rolling
Glaze
- ½ cup granulated sugar
- 2 tablespoons light corn syrup
- ⅓ cup water
- 2 cups confectioners sugar
- ½ teaspoon vanilla extract (or anise)
Sprinkle topping
- 1 ounce nonpareils in festive colors
Instructions
- Set out 3 sticks of butter to soften at room temperature. In a large bowl, use a mixer to blend the softened butter with the 1 ¼ cups granulated sugar until creamy. Add eggs and vanilla; mix.
- In a separate medium bowl, use a fork to toss together the flour, baking powder and salt. Add some of the flour mixture to the butter mixture, mixing well. Add the half and half and mix. Gradually add the rest of the flour mixture in, beating well after each addition. You will end up with a sticky dough.
- Cover the bowl of dough with plastic wrap and refrigerate for 30 minutes. During that time, prepare the glaze. In a small saucepan (stainless steel if you have one), whisk the granulated sugar, water and corn syrup together. Cook over medium heat, stirring until the mixture just comes to a boil. Remove the pan from the heat and stir in the vanilla. Let the mixture cool for five minutes.
- After five minutes, use a mixer on low speed to gradually blend in the confectioners sugar until smooth. (If you used a stainless steel pan, you can do this right in your pan. Otherwise, transfer the glaze to a mixing bowl first.)
- Preheat the oven to 350 degrees F. Line two (four, if you have them) sheet pans with parchment paper (or lightly grease the pans with cooking spray).
- Place a few tablespoons of flour in a small bowl (for dusting your hands). When the dough is chilled, use two teaspoons or a scoop to measure out some dough. With floured hands, roll the dough into a 1 ½-inch ball and place it on the baking sheet. Continue scooping and rolling, dusting your hands each time. Place the cookies two inches apart on the pan. Refrigerate the dough whenever it gets too soft to work with.
- Bake the cookies at 350 degrees F for 10-15 minutes, until the tops are set, and the bottoms are lightly browned. (Mine took 13 minutes.) Let the cookies rest for a couple of minutes before placing them on a cooling rack.
- When the cookies are completely cooled, you can glaze them. One at a time, dip the cookie in the glaze, top down, and give it a twist. Use your finger to spread the glaze around the surface of the cookie. Immediately sprinkle it with nonpareils.
- Place the glazed cookies on a cooling rack and set it over a parchment-lined or wax-paper-lined pan to catch the drips. It will take about 4 hours for the glaze to fully dry, so wait to store or package the cookies.
- Once the glaze has dried, store the cookies covered at room temperature for up to a week. Note that if you use a plastic container, the cookies will become very moist. I like to keep mine on a tray loosely covered with plastic wrap. Any leftover glaze can be kept at room temperature for three days, then refrigerated for a week. You also could freeze the glaze. You can freeze unglazed cookies for up to three months, then thaw completely and glaze them.
Notes
Nutrition
(Recipe Source: Adapted from my Mom. Originally published on December 15, 2014. Updated in 2020 with new photos and in 2023 with additional information.)

John Rinaldo says
following all the instructions , why do my cookies split open on top while baking. All the pictures i see of the cookies on the computer are all perfectly round and smooth?
Mamma C says
Hi John - Mine cracked a little this last time, but the glaze covered it. I'm wondering if it has something to do with your oven. Cookies can split open during baking when a crust forms before the interior dough has finished expanding. If there are convection fans running in your oven, they could dry out the top of the cookies.
Dina says
My family & friends love these cookies! Question - how long can you keep the unbaked dough refrigerated?
Mamma C says
Hi Dina - We've always used the dough right away, but refrigerating it up to two days should be fine. I'd wrap it in plastic and then put it in a sealed container so it doesn't get dry. I'm glad these cookies are a hit!
Jan A. says
Try them with almond extract. We also used annisette. My mom used to make Italian cookie trays for weddings and Christmas. I not only helped her, but I was the official taster.
Mamma C says
Hi Jan - I love almond extract and can't wait to try it with these cookies! Official taste tester is a tough job, but someone has to do it, Lol.
Christine says
How much almond or anise and should we still use the vanilla?
Mamma C says
Hi Christine - That information is in the recipe card at the end of the post. You can substitute almond extract for the anise.
Patty Fredericks says
Can these cookies be frozen for a month or so?
Mamma C says
Hi Patty - That should be fine, but for best results, I would freeze them without the glaze and sprinkles.
Betty says
I wish you would have put in regular measurements the half n half
3 ozs ?? = what in regular measurements
All ur recipe is in regular measurements except this
Mamma C says
Hi Betty - I'm not sure what you mean. Are you asking what is half and half or are you asking what is 3.5 ounces? The recipe calls for 3.5 ounces of half and half. That means a little less than half a cup of "half and half," which is like coffee creamer. Half and half is a product that is half cream and half milk.
Maryanne @ the little epicurean says
Such cute cookies! My childhood neighborhood neighbor sends a dozen similar cookies every Christmas and I devour them within the hour. I'm sure your vanilla version is even BETTER!
I love that the cookie swap wasn't just about cookies- but also helping others. That's why I'll be participating again next year 🙂
Mamma C says
The beauty of these cookies is that everyone can flavor the batter to their liking. I'll probably try some variations in the future. 🙂 I'm glad to have been a part of the cookie swap with you and other talented bakers!
Kathy@ Olives & Garlic says
These are beautiful cookies for a beautiful cause.
Mamma C says
Thanks, Kathy. It's been a rewarding experience to help out, even in a small way.
Annie @ ciaochowbambina says
Italian cookies, of course, hold a very special place in my heart! And I was never big on the anise flavor, either! Yours are beautiful...And I love the foundation you're baking for!
Mamma C says
I'm glad I'm not the only Italian who isn't crazy about anise. Thanks, Annie!
Angie says
These are so cute and sound wonderful! Your photos are amazing!
Mamma C says
I'm glad you think so, Angie! I struggled with the photos for this one and had many rejects, lol.
Christy @ Confessions of a Culinary Diva says
We loved your Italian Cookies - they were so festive & delicious! So happy to have met you through The Great Food Blogger Cookie Swap, it is such a great cause and fun way to give back 🙂
Mamma C says
Thanks, Christy. I'm so glad to have found you and your site!