
You have to try these Italian Peppers in Oil! My family's authentic Italian recipe calls for roasting bell peppers then sautéing them in olive oil with garlic to marinate for delicious flavor.
I need to introduce you to one of my top favorite vegetable dishes, one that I'd be content to eat as the main meal - with a side of crusty Italian bread, of course.
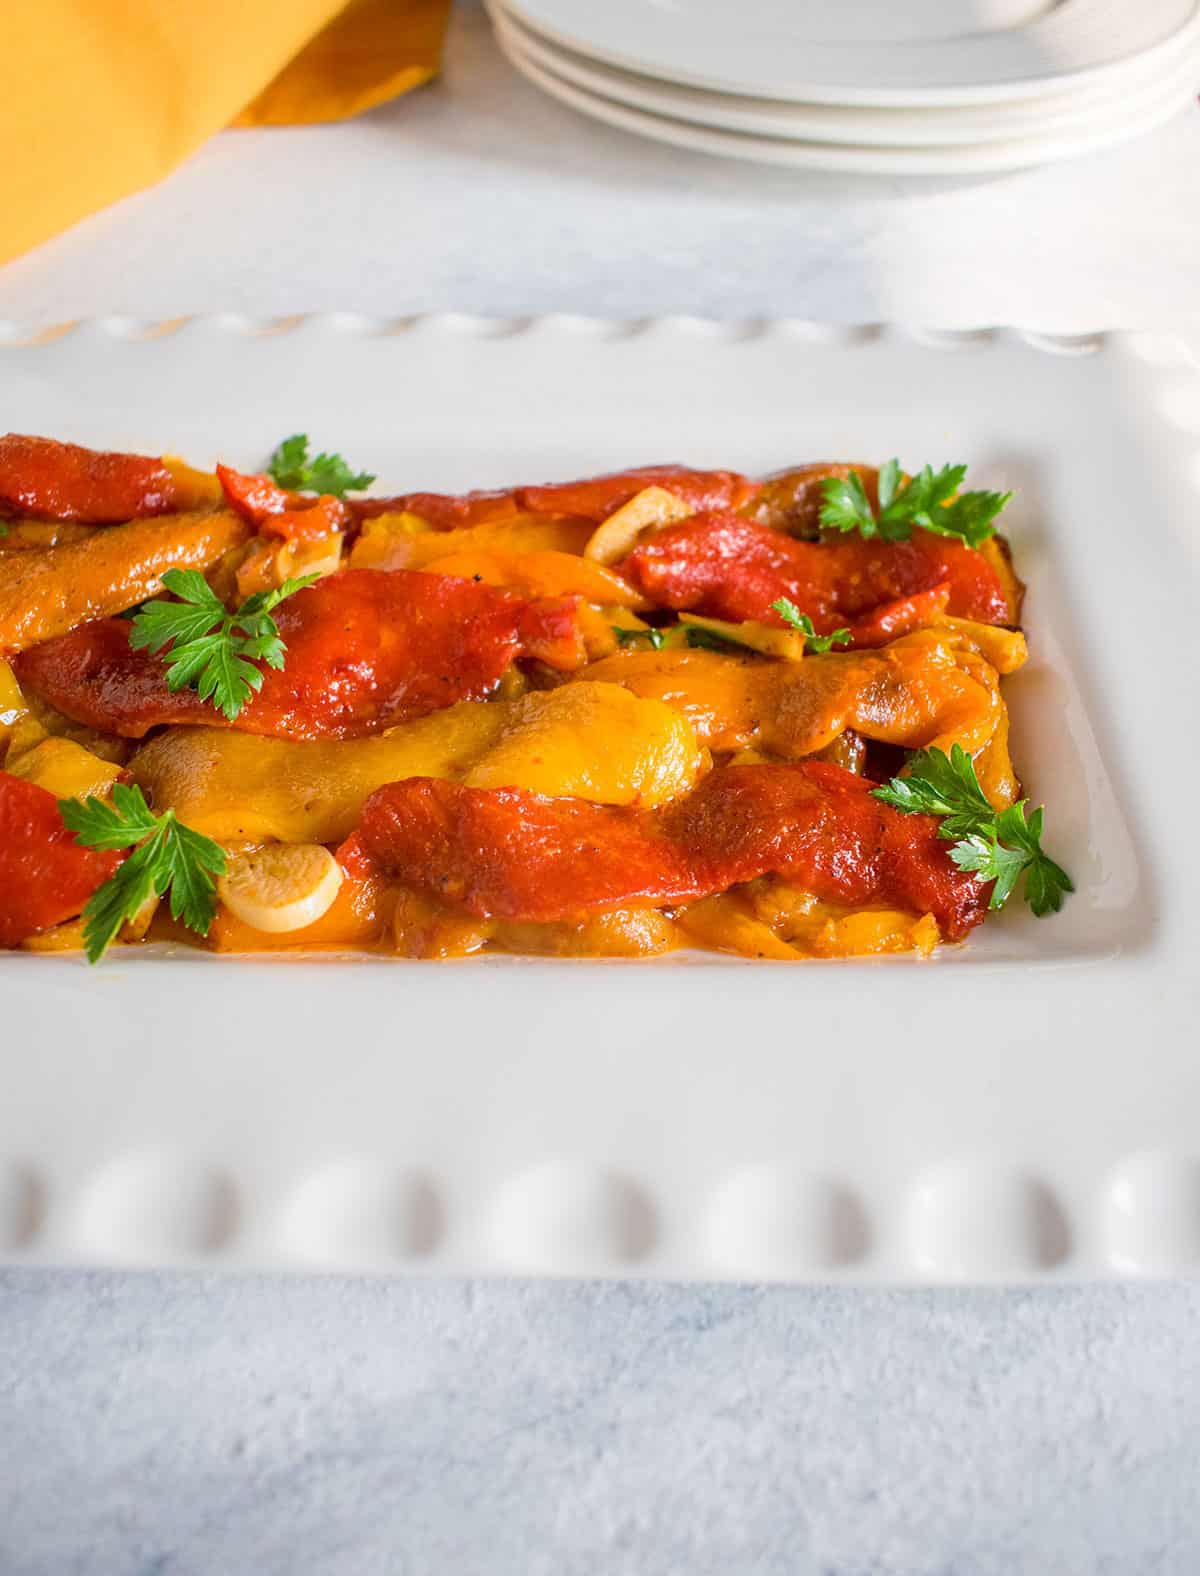
Marinated roasted bell peppers are so divine, I'm pretty sure angels serve them on platters just inside the gates of heaven.
Their aroma alone is enough to make me swoon. Their smoky, savory flavor seals the deal.
Recipe ingredients
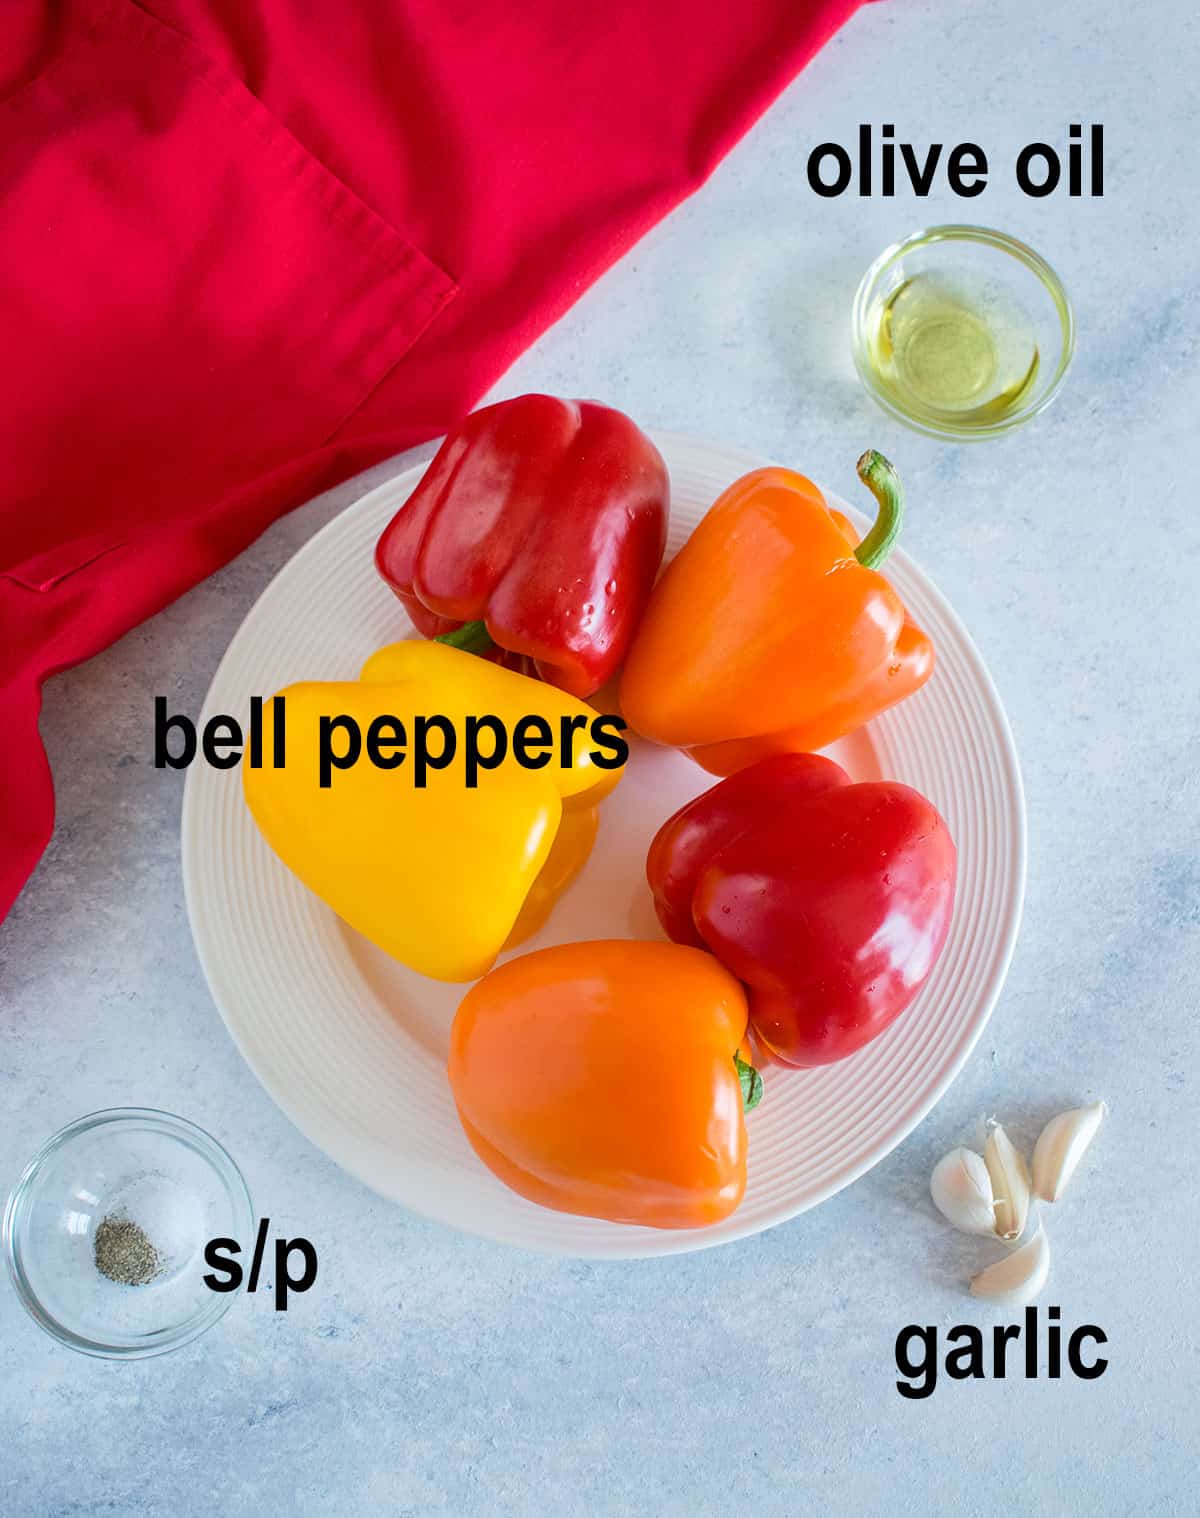
As you can see, you just need five simple ingredients, including salt and pepper, for this naturally vegan recipe. You can add fresh parsley for garnish, but that's optional.
I prefer using red, yellow and orange bell peppers, because they're sweeter than green ones. When I want to use just one color, I make roasted red peppers.
How to roast peppers
See the recipe card for full instructions, but here's a summary.
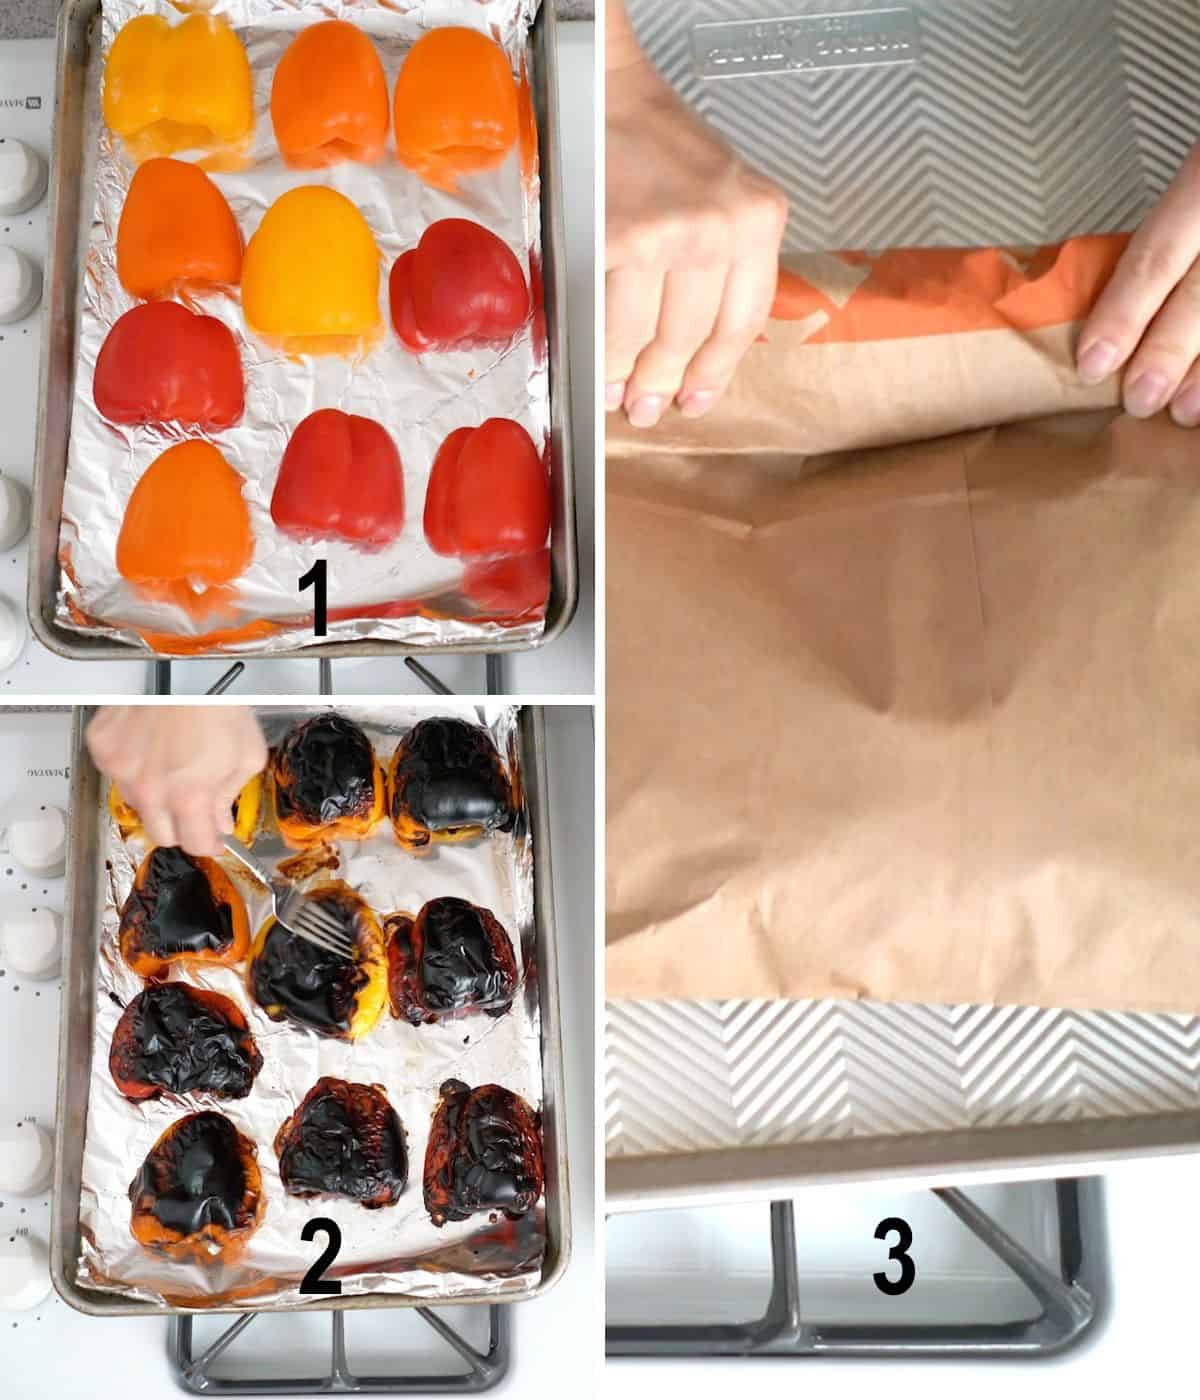
- Cut the peppers in half and clean out the seeds and membranes. Place the peppers face-down on a foil-lined sheet pan (affiliate link).
- Broil the peppers for around 12 minutes, or until they are charred (blackened).
- Enclose the peppers in a paper bag for 20-30 minutes so the skins will peel easily.
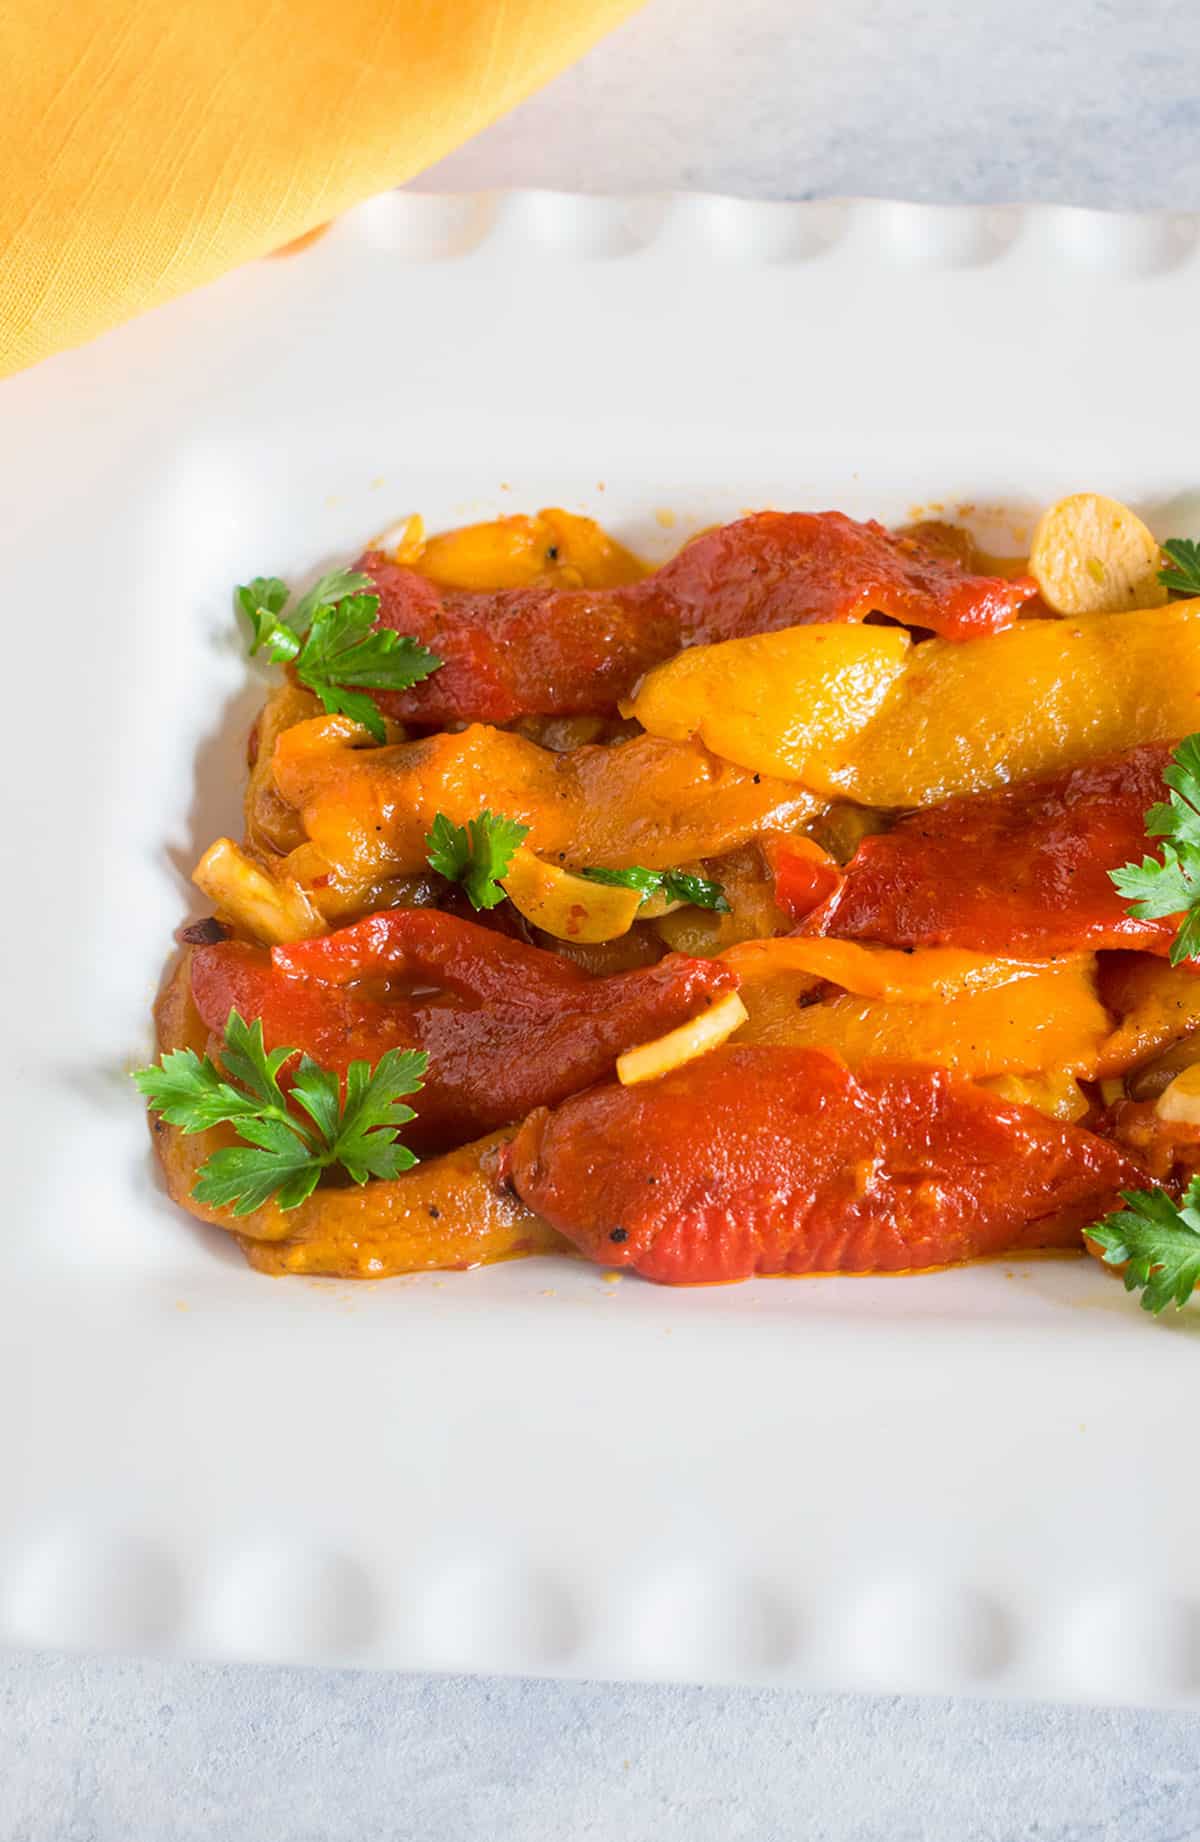
Making Italian peppers in oil
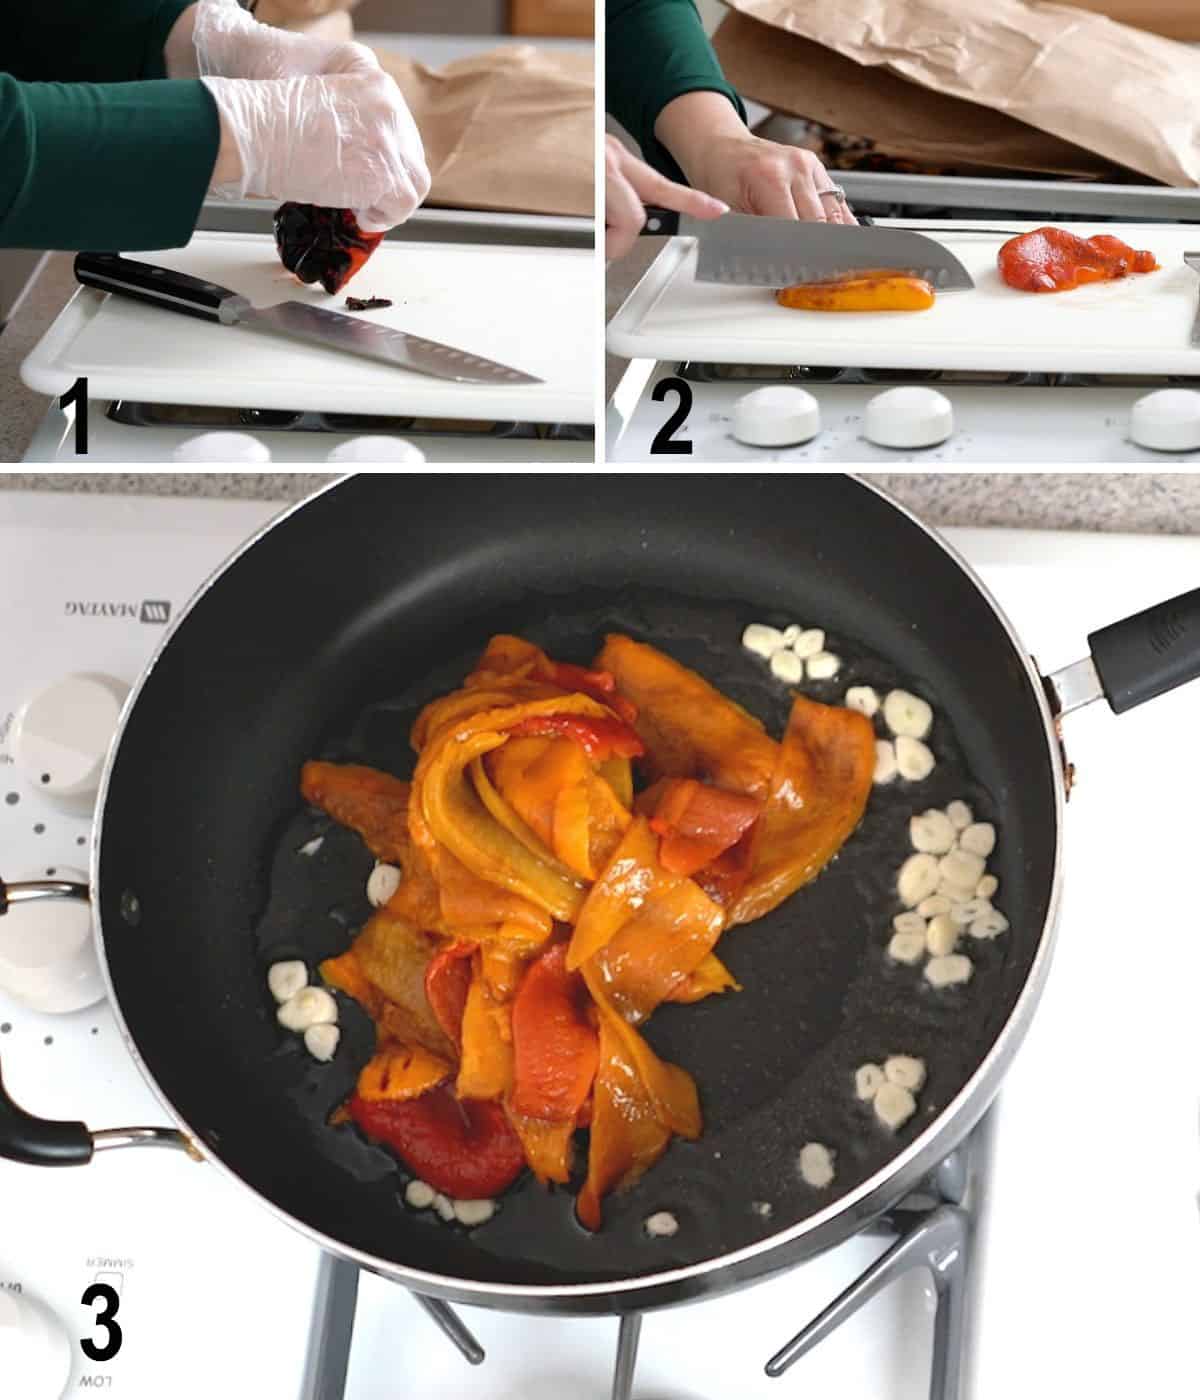
- Peel the peppers, ideally while wearing gloves.
- Blot the peppers dry and slice them about two inches wide.
- Briefly sauté the peppers with garlic in olive oil.
So, so good!
Recipe tips
- Let the charred peppers steam in a paper bag, instead of a plastic one. Plastic will create more steam, and the peppers will be softer.
- Wearing food-prep gloves while peeling the charred peppers will prevent your hands from getting blackened.
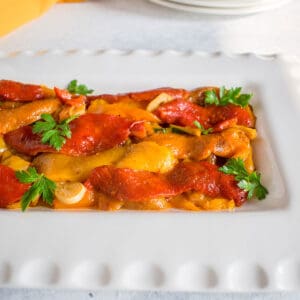
How to serve them
It's best to serve these Italian peppers at room temperature. They make a great Italian side dish or appetizer and are so delicious on a sandwich. Try them with chicken cutlets!
I can still remember Nonna making these and putting them in a huge sandwich for my lunch at school. Let me tell you, nothing screams "I'm the child of an immigrant" louder than greasy olive oil stains on your brown bag!
I'd be so embarrassed in front of the other kids, who were all eating neat little white bread sandwiches.
But one bite later...I couldn't care less if I had olive oil dripping down my chin!
Frequently asked questions
Yes, you can turn the heat on the highest setting and place whole peppers on the burners to char in the flames. Turn them with tongs as needed. This is the traditional way to do it, but I find it safer to roast the peppers under the broiler.
Refrigerate leftover peppers in a sealed container for up to five days. Don't freeze them.
The peppers should be served at room temperature, so it's best to take them out of the refrigerator about 30 minutes before eating them. If you don't have time, just heat them briefly in the microwave or in a pan on the stove to take the chill off.
More bell pepper recipes
- Italian Stuffed Peppers
- Baked Sausage, Peppers and Onions
- Italian Sausage and Egg Casserole
- Sausage and Peppers Hero
And don't miss these Italian Stuffed Artichokes or these 63 Italian Appetizer Recipes!
Enjoy!
If you try these Italian Peppers in Oil, be sure to leave a comment and a rating!
Italian Peppers in Oil (Roasted & Marinated)
Video
Ingredients
- 5 bell peppers (red, yellow or orange are best)
- 3-4 cloves garlic (peeled & sliced)
- 2 tablespoons olive oil (see notes)
- ⅛ teaspoon salt
- ⅛ teaspoon black pepper
- fresh parsley (optional garnish)
Instructions
- Set the top oven rack as high as it will go. Preheat the broiler.
- Rinse peppers and pat dry. For each pepper, use a knife to cut a circle around the stem to remove and discard it. Cut the pepper in half the long way (from top to bottom) and remove the membranes and seeds, discarding them.
- Line up the pepper halves on a foil-lined sheet pan with sides, flattening the peppers a bit with your hands. Broil the peppers for 10-12 minutes, or until they are blackened all over.
- Place the blackened peppers inside a clean, brown paper bag and fold the top closed. (A plastic Ziploc bag will create extra steam and cook the peppers more, but it's OK to use if you don't have a brown bag.) Keep the peppers in the bag for 20-30 minutes to enable the skin to be removed easily.
- While the peppers are steaming in the bag, peel and slice your garlic.
- After 20-30 minutes, peel the peppers with your fingers or a knife. (This gets messy, but it helps to wear food-prep gloves, if you have them.) Blot the peppers with paper towels to absorb any liquid and cut the peppers into strips about 2 inches wide.
- Heat the olive oil in a 12-inch skillet over medium-high heat. Add the garlic slices and cook them for a couple minutes before adding the peppers to the pan. Gently toss the peppers to mix with the oil and garlic. Add salt and pepper. Lower the heat to medium and sauté the peppers, stirring occasionally, for about 8 minutes, or until the garlic is done to your liking.
- Garnish with fresh parsley, if desired. Serve the peppers at room temperature with crusty bread. Store leftovers in the refrigerator for up to five days.
- To serve leftover peppers after they've been refrigerated, let them sit out at room temperature for 30 minutes first. Or, just heat them briefly in the microwave or in a pan on the stove to take the chill off.
Notes
- If you'd rather char peppers on the stove instead of under the broiler, you can turn the heat on the highest setting and place whole peppers on the burners to char in the flames. Turn the peppers with tongs as needed. This is the traditional way to do it, but I find it safer to roast the peppers under the broiler.
- If you have food-safe gloves, wear them when peeling the charred peppers. This will prevent your fingertips from blackening.
- My family prefers to use regular olive oil here, since it's more mild than extra virgin. Use what you like.
Nutrition
(Cooking with Mamma C. Adapted from my Nonna's method, via my Mom. Originally published on December 8, 2014 and updated now with new photos, additional text and a video.)


Andrew says
These sound grest but are not marinated peppers, they are sauteed pepers.
Mamma C says
Hi Andrew - I hope you try them!
Bob Vannini says
Nonno’s peppers & egg or peppers & sausage or peppers and fresh mozzarella sandwich with red, yeoow, orange and long hots for green and of course... the oil soaked brown bag! How I miss that!
Mamma C says
Hi Bob - So delicious! I'm glad this brought back nice memories for you.
Ileana says
This sounds delicious! Is it possible to make the first part (up to the brown bag) in advanced? Like the night before?
Thanks, can’t wait to make this recipe!
Mamma C says
Hi Ileana - Yes, you can do the first part ahead of time. I'd peel the peppers after roasting them, then store them in the fridge.
Margarita says
I haven't even tried making the peppers and my mouth is watering! I'm an immigrant too, I love how you mentioned the embarrassment of having a different lunch. Who woulda knew we would look back and say "thanks god for my foreign family" 🙂
Mamma C says
Too funny, Margarita! I hope you enjoy the peppers, and the many other family recipes here. 🙂
Melissa says
I have been looking for this recipe forever my mom passed away and I only made them once with her but vaguely remembered what was needed thanks so much!!
Mamma C says
Melissa, I'm so glad you found the recipe here! The whole reason I started this blog was to document the family recipes so we wouldn't have to lose our culinary traditions. I hope you visit often. 🙂
Andi S. says
My Nonna made this dish except added black olives as well. One of my all time favorite side dishes. Can't wait to make this again.
Mamma C says
Andi, aren't Nonnas the best? I bet the black olives looked beautiful with the peppers. Thanks for your comment, and I hope you enjoy this!
Sandy says
These look amazing! I'm always so happy to see traditional mediterranean dishes on food blogs. My spanish grandma used to make a similar side dish. We add thinly sliced raw onions in the end and eat the peppers with fried fish and bread. I definitely have to try your version though, because the garlic and olive oil sounds like a great idea.
Mamma C says
Thanks, Sandy! I find myself drawn to the Mediterranean dishes as well. I love the sound of your grandmother's peppers, especially if using red onions. I'm so glad you stopped by and am happy to "meet" you. 🙂
Adri says
These look great! We make a similar dish all the time, eating it as a side dish or as an antipasto atop bread. Your photographs really bring this one to life. This is my first visit to your lovely site, but it certainly will not be my last! Complimenti!
Mamma C says
Grazie, Adri! I'm so happy you visited and look forward to diving into your site!
Annie @ ciaochowbambina says
I cannot even tell you how much I love this post as it is one more proof of our soul sisterhood and evidence of being raised in a family of Italian immigrants. The first time we took my "Mema" to Disney...we brought our own green pepper sandwiches which, as you know, left beautiful greasy olive oil stains on the very large brown paper grocery bag we used to carry all around Disney until it was lunch time. Thank you so much for bringing me back to that cherished memory. And, yes, Greek Wedding, is an all-time favorite in our house...as are roasted red peppers as you've shared here. My my my! 10 stars!!
Mamma C says
Annie, thank you for your beautiful comment and friendship. I'm so moved. And I am cracking up about your family at Disney World. So funny! Not quite the Griswalds...
Annie @ ciaochowbambina says
Not quite...but very close!!
Tammy Renea says
Yes, I have been looking for a recipe like this! Thanks so much for sharing it.
Mamma C says
You're welcome, Tammy. I hope you enjoy it!