

This Sugar Cookie Pie Crust will make your pies look and taste amazing! One batch of this recipe will give you a sugar cookie crust for the base, plus delicious sugar cookies for the top. You can customize the flavor, too!
I've been making this recipe since 2014. I wanted a homemade cookie crust to go with our beloved blueberry pie.
That dessert is legendary in my family, but always seemed too sweet with store-bought sugar cookie dough. So, I experimented until I had a cookie crust recipe that knocked my family's socks off.
And over the years, I perfected it even more. I needed to make it fool-proof, so the buttery dough is easy to work with, and it won't slide down the sides of the pan while baking.
Now, as your resident fool, I can attest this works! And, just wait until you taste it!
Ingredients
See the card at the end of this post for the full recipe, but here's an overview.
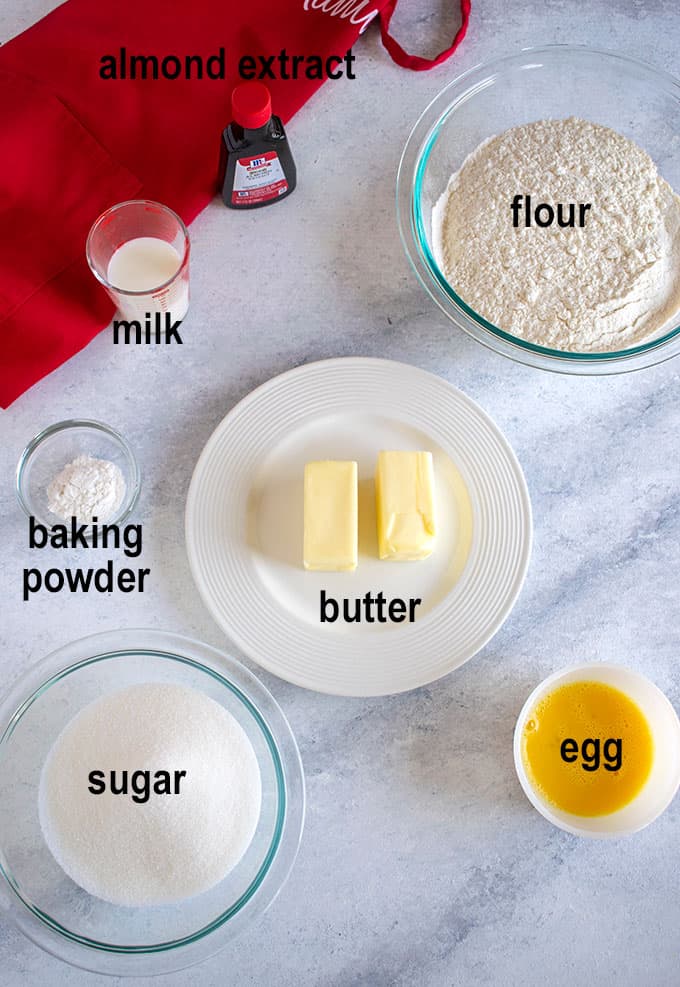
I use almond extract in the dough for my base recipe, but you can substitute another flavor, if you prefer. (More on that later.)
Note, you'll need to sift your flour for this recipe. I use my fine-mesh strainer (affiliate link).
How to make sugar cookie dough
1. Start with butter softened just enough to mix. I leave mine at room temperature for an hour, but if your home is very hot, you'll need less time. Add the butter to your bowl with sugar.
2. Beat the butter and sugar just until you have fluffy pieces. It's important not to overbeat the dough, or it will be too soft to work with and will cause problems later.
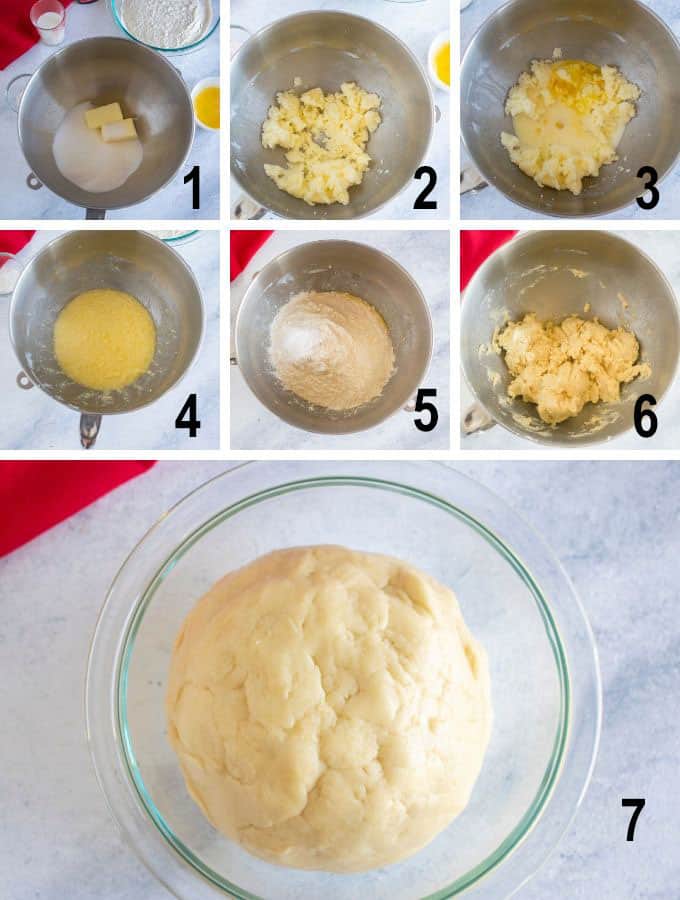
3. Add in the egg, milk and extract.
4. Beat until blended.
5. Add the baking powder and sifted flour.
6. Beat on low, then medium, until the dough is smooth and combined.
7. Shape the dough into a ball, wrap it in plastic and freeze it for 25 minutes. You need the dough chilled so it's easy to roll.
How to make the crust
1. You'll use ¾ of the dough for the bottom.
2. Roll it into an 11-inch circle.
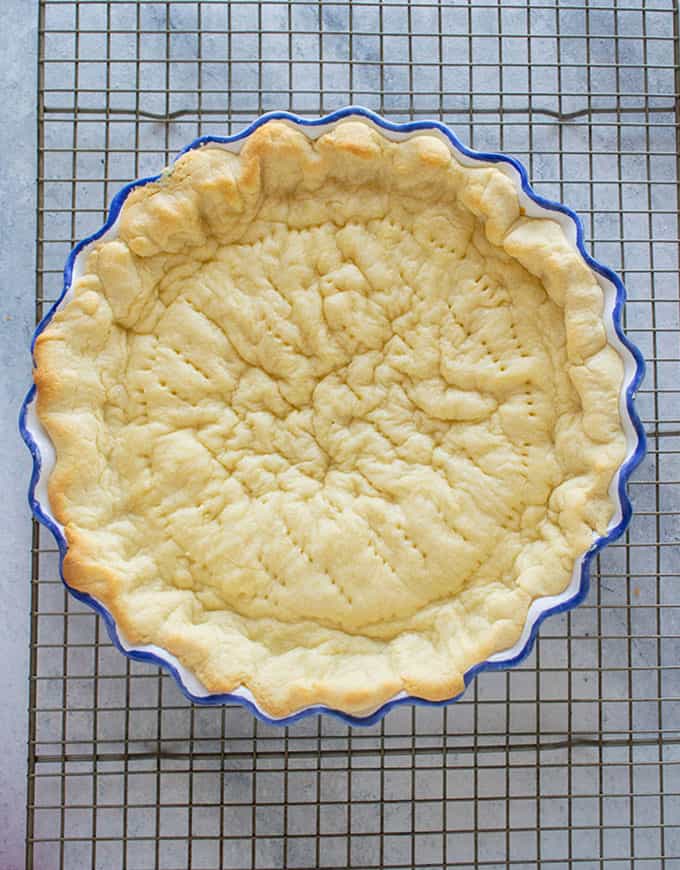
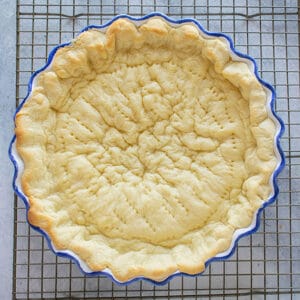
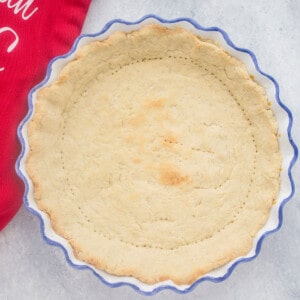
3. Transfer it to your pie plate. If you mess up, just press the dough into place! Poke holes to keep it from puffing up too much. Freeze it for 10 minutes before baking. This will prevent the dough from sliding down the sides of the pan during baking.
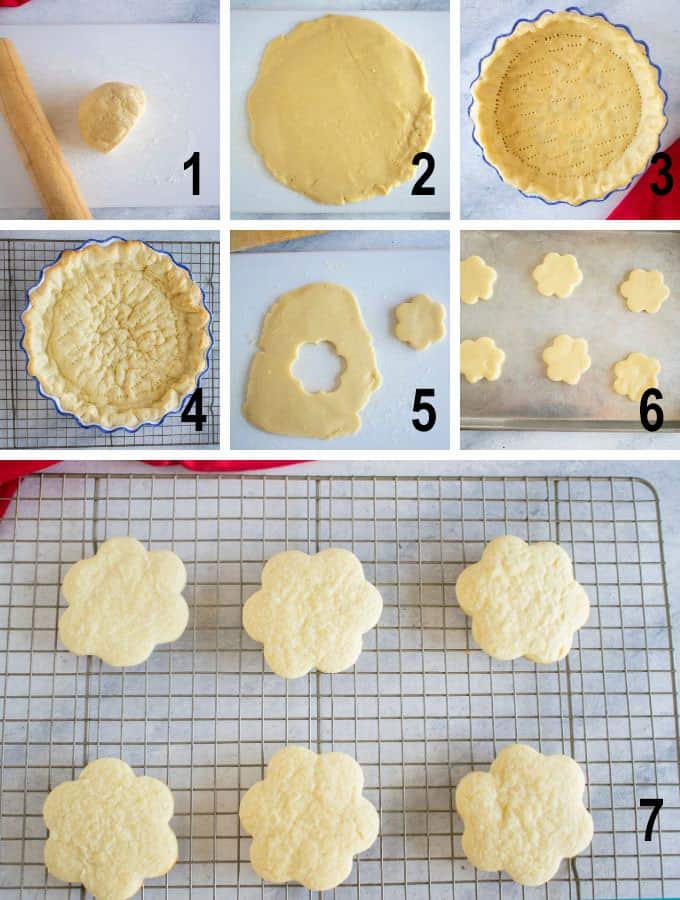
4. Let the baked crust cool before filling it. It will look puffy.
5. Roll out the remaining ¼ section of dough and cut out fun shapes with a large cookie cutter. (Large cookies work better than small ones. You want the pie to be easy to slice.)
6. Bake the cookies on a half-sheet pan and let them cool on a wire rack (affiliate link). You'll just need 4-5 large cookies for the top, so feel free to eat any extras!
7. Assemble! Transfer your chilled filling into the cooled crust and top with the cooled sugar cookies in a decorative pattern.
Flavor variations
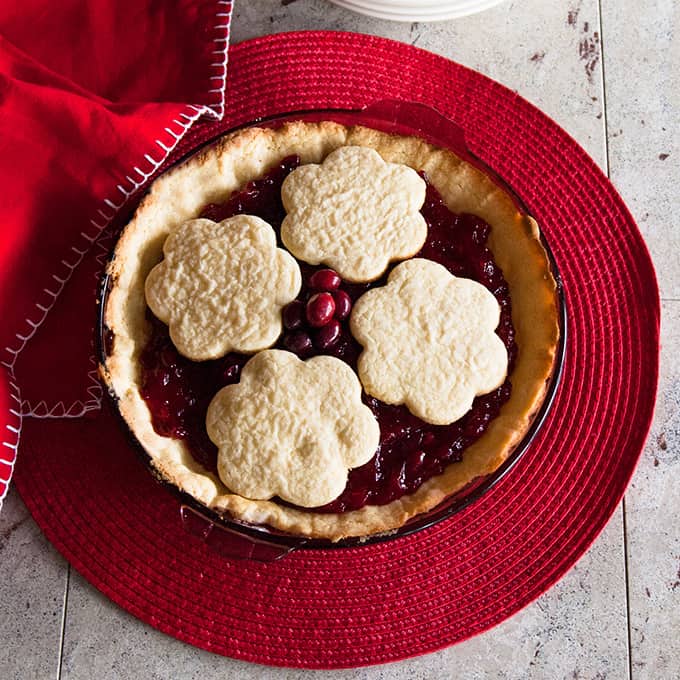
I use almond extract in the crust for my blueberry pie but use orange extract for my cranberry pie.
You also could try crust flavors such as:
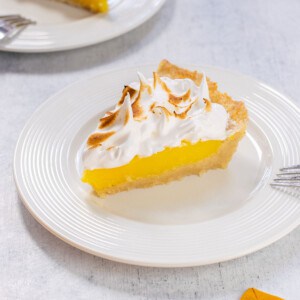
- Lemon, for lemon meringue pie
- Coconut, for coconut cream pie
- Vanilla, for chocolate pudding pie filling
- Cinnamon and/or ginger to go with stovetop apple pie filling.
Can you bake the crust with filling?
I have only experimented with baking it without filling. If you want to try baking the raw crust together with filling, such as for a pumpkin pie, I would choose a recipe that doesn't bake for more than 30-40 minutes.
Still, you'll need to make sure the crust edges don't get too browned. You may need to cover them with foil or a pie crust shield (affiliate link).
I still recommend baking the cookies separately on a sheet pan as directed, then adding them atop your baked, cooled pie.
Friends, this is a fabulous pie crust alternative. Use your imagination and have fun with it!
More recipes to enjoy
Sugar Cookie Pie Crust
Video
Ingredients
- 8 tablespoons salted butter (softened a bit)
- 1 cup sugar
- 1 egg (beaten)
- ¼ cup milk (low fat is fine)
- ½ teaspoon almond extract (or orange, lemon, coconut, vanilla, etc.)
- 2 ⅓ cups flour (sifted)
- 2 teaspoons baking powder
Instructions
Sugar Cookie Pie Crust
- Set out the butter at room temperature to soften just enough to mix. (I set mine out for an hour, but if your home is hot, you'll need less time.)
- Beat the butter and sugar until blended into fluffy pieces. (Do not overbeat, or it will make the dough too soft.)
- Add the egg, milk and flavored extract and mix. Add the sifted flour and baking powder, and beat on low, then medium.
- When the dough is smooth and combined, shape it into a ball, wrap it in plastic wrap, and freeze it for 25 minutes.
- When the dough has chilled, preheat the oven to 375 degrees. Grease a 9-inch pie plate and a rimmed baking sheet with cooking spray.
- Unwrap the chilled dough and cut away about ¼ of it to set aside for the cookie topping. If you have a kitchen scale, use it to weigh the larger portion of dough. You will need 16 ounces of dough for the bottom crust.
- On a clean work surface dusted with powdered sugar or flour, use a rolling pin to roll out the 16 ounces of dough into an 11-inch circle about ½ inch thick. Transfer the dough into the pie plate by wrapping one half of the dough around the rolling pin, and carrying the rolling pin with the dough over to the plate. Gently set the dough into the pie plate and use two fingers to flute the edges along the inside rim. If you mess up, just use your fingers to press the dough into place evenly.
- Use a fork to poke tiny holes in the bottom of the crust and where it meets the sides of the pan. Freeze the crust for 10 minutes before baking.
- Bake the crust for 13-15 minutes, or until it is golden around the edges, and a toothpick inserted in the center comes out clean. Let the crust cool on a wire rack.
Sugar Cookie Topping
- While the bottom crust is baking, prepare the cookie topping. Roll out the small portion of dough into a circle about ¼-inch thick. Use a large cookie cutter to cut out shapes. (You'll need 4 or 5 large cookies for the top of the pie. You may end up with one or two extra cookies.
- Bake the cookies on the greased baking sheet for 9 minutes, or until just barely turning golden at the edges. (You can bake them in the same oven with the crust.) Cool the baked cookies on a wire rack.
Assemble & Serve
- Spoon chilled pie filling into the cooled pie crust. Place the cookies on top in a decorative pattern.
Storage
- The unfilled sugar cookie crust and cookies can be stored, covered, at room temperature for up to five days. A pie with filling will need to be stored in the refrigerator for up to four days.
Notes
- I've improved the crust technique over the years so it will be easy to work with and holds its shape in the oven. Start with butter softened just enough to mix. Don't overbeat the butter and sugar, and be sure to freeze the dough for 25 minutes before rolling. Freeze the shaped, unbaked crust for 10 minutes before baking.
- If you're not good at rolling dough, no worries! Just press the pie dough into place.
Nutrition
(Recipe Source: Cooking with Mamma C)


Donna says
I would like to try this pie crust recipe, but… I need to make a gluten-free. For someone in the house. Can I just swap out a cup for a cup type gluten-free flour?
Mamma C says
Hi Donna - I haven't tested a gluten-free version of this crust. You should be able to use Cup4Cup GF flour in place of the regular flour. You'd also need to make sure the baking powder you use says it's gluten-free, so it's not produced in a facility that makes wheat. Let me know if you try it!
Esther says
It tastes really good, but even when cold the dough can be a pain to work with.
Mamma C says
Hi Esther - I'm glad you enjoyed the taste! The crust can just be pressed into place if needed.
Alli C says
decent sugar cookie recipe although either it's not there or it doesn't call for salt which was interesting but I found as a crust it was not great very kind of grossly sweet even with added salt also it was very soft to the point of not being a crust just a cookie with stuff on it. won't use again.
Mamma C says
Hi Alli - It sounds like the crust needed to be baked a bit longer if it was too soft. But as the title implies, this is a sugar cookie crust, so it's made from sugar cookie dough.
Erica says
My dough didn’t form and it was incredibly sticky. Butter too soft maybe??
Mamma C says
Hi Erica - It could have been the butter being too soft, plus you may have overbeaten the butter and sugar. It's important to have butter softened just enough to mix, and to beat the butter and sugar just until you have fluffy pieces.