
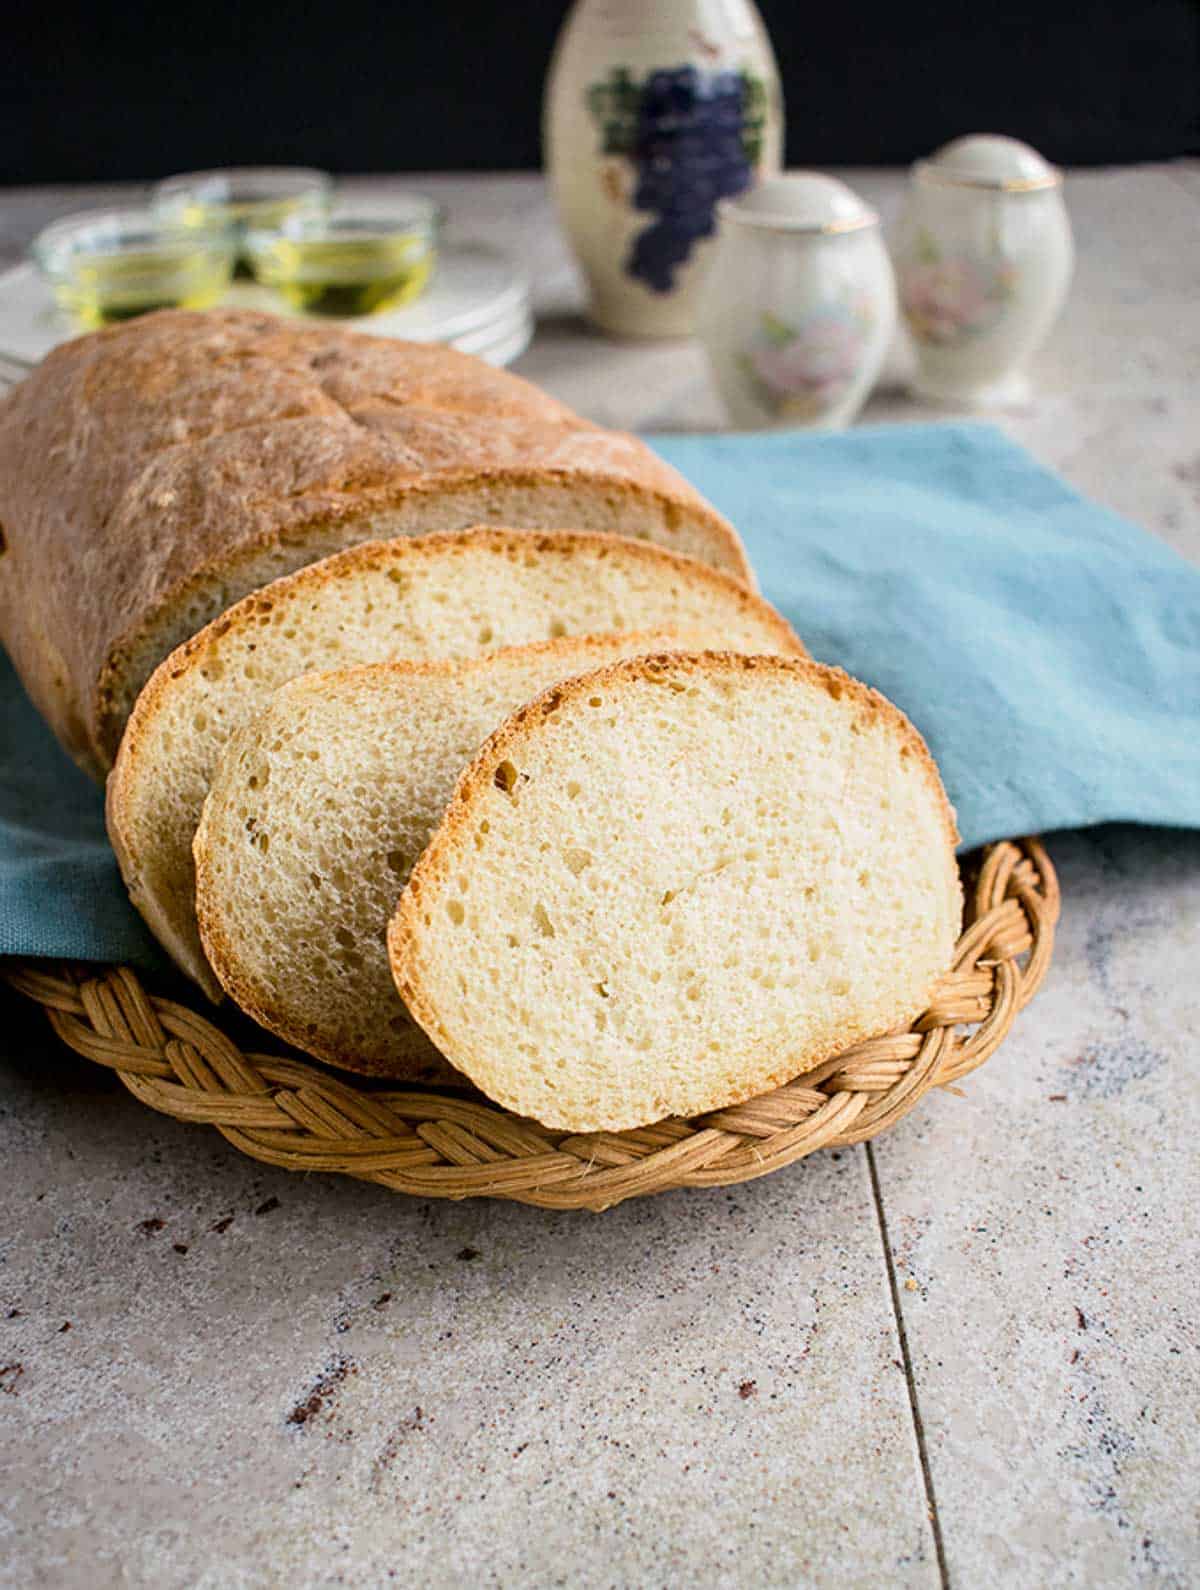
Homemade Italian Bread is easier than you think! You'll be so proud when this delicious, crusty loaf comes out of your oven. Don't miss the video and step-by-step photos and check out all of my Italian Bread Recipes!
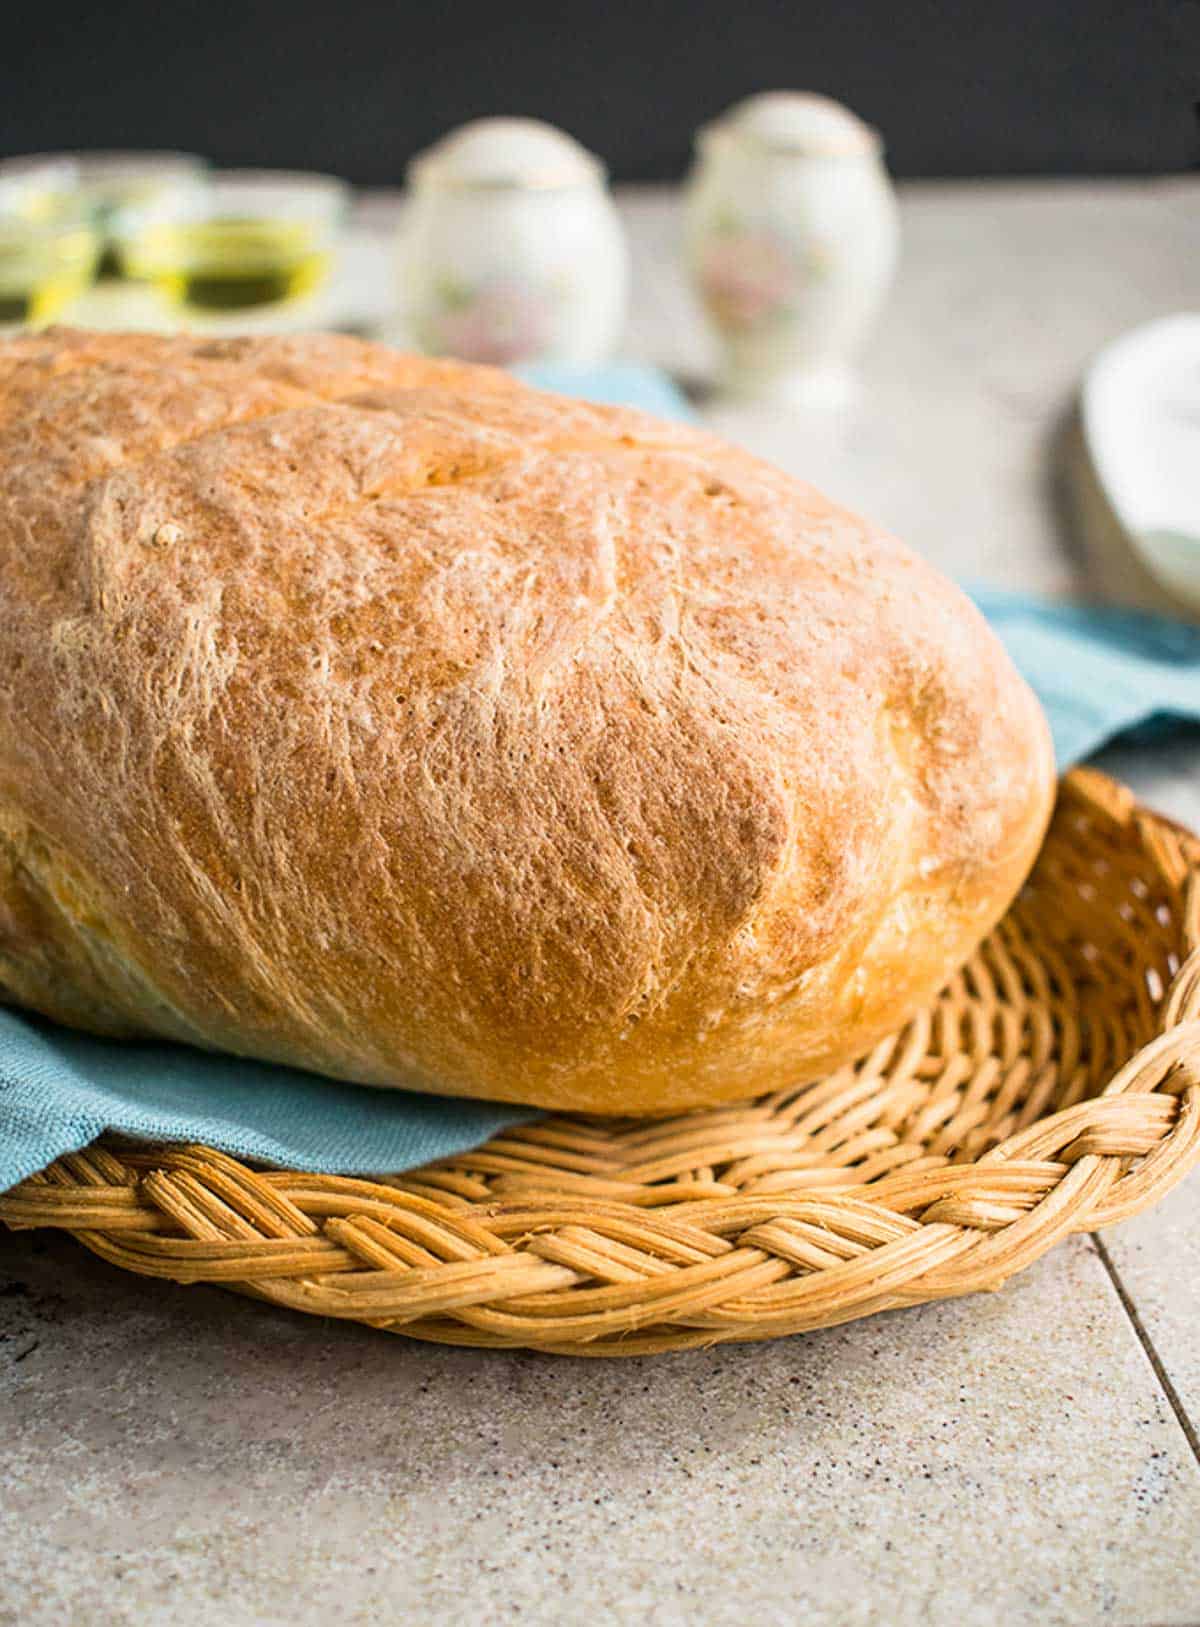
My goal today is to convince you to try this Homemade Italian Bread. It's so easy, crusty and delicious. I don't want you to miss out!
There's nothing like the sense of accomplishment that comes from baking your own bread, whether it be a loaf of Italian bread or Parmesan Focaccia with Rosemary.
"Did I do that?!!," you'll wonder, in your best Steve Urkel voice. Or maybe that's just me.
But, seriously. Why is it that as kids, we went to town with Play Doh and Silly Putty (now I'm aging myself), yet as adults, we shy away from making dough and shaping it into a simple loaf?
Yes, there's kneading involved. But if you have a stand mixer with dough hooks, all you need to do is throw in your ingredients and let the machine run for six minutes. By hand, you'll probably need a couple of minutes longer, but it's so therapeutic.
My son has been making this easy Italian bread for years, and kneads the dough by hand like a boss. I just use my KitchenAid (affiliate link).
And you can always make Bread Machine Italian Bread if you have that equipment.
Recipe ingredients
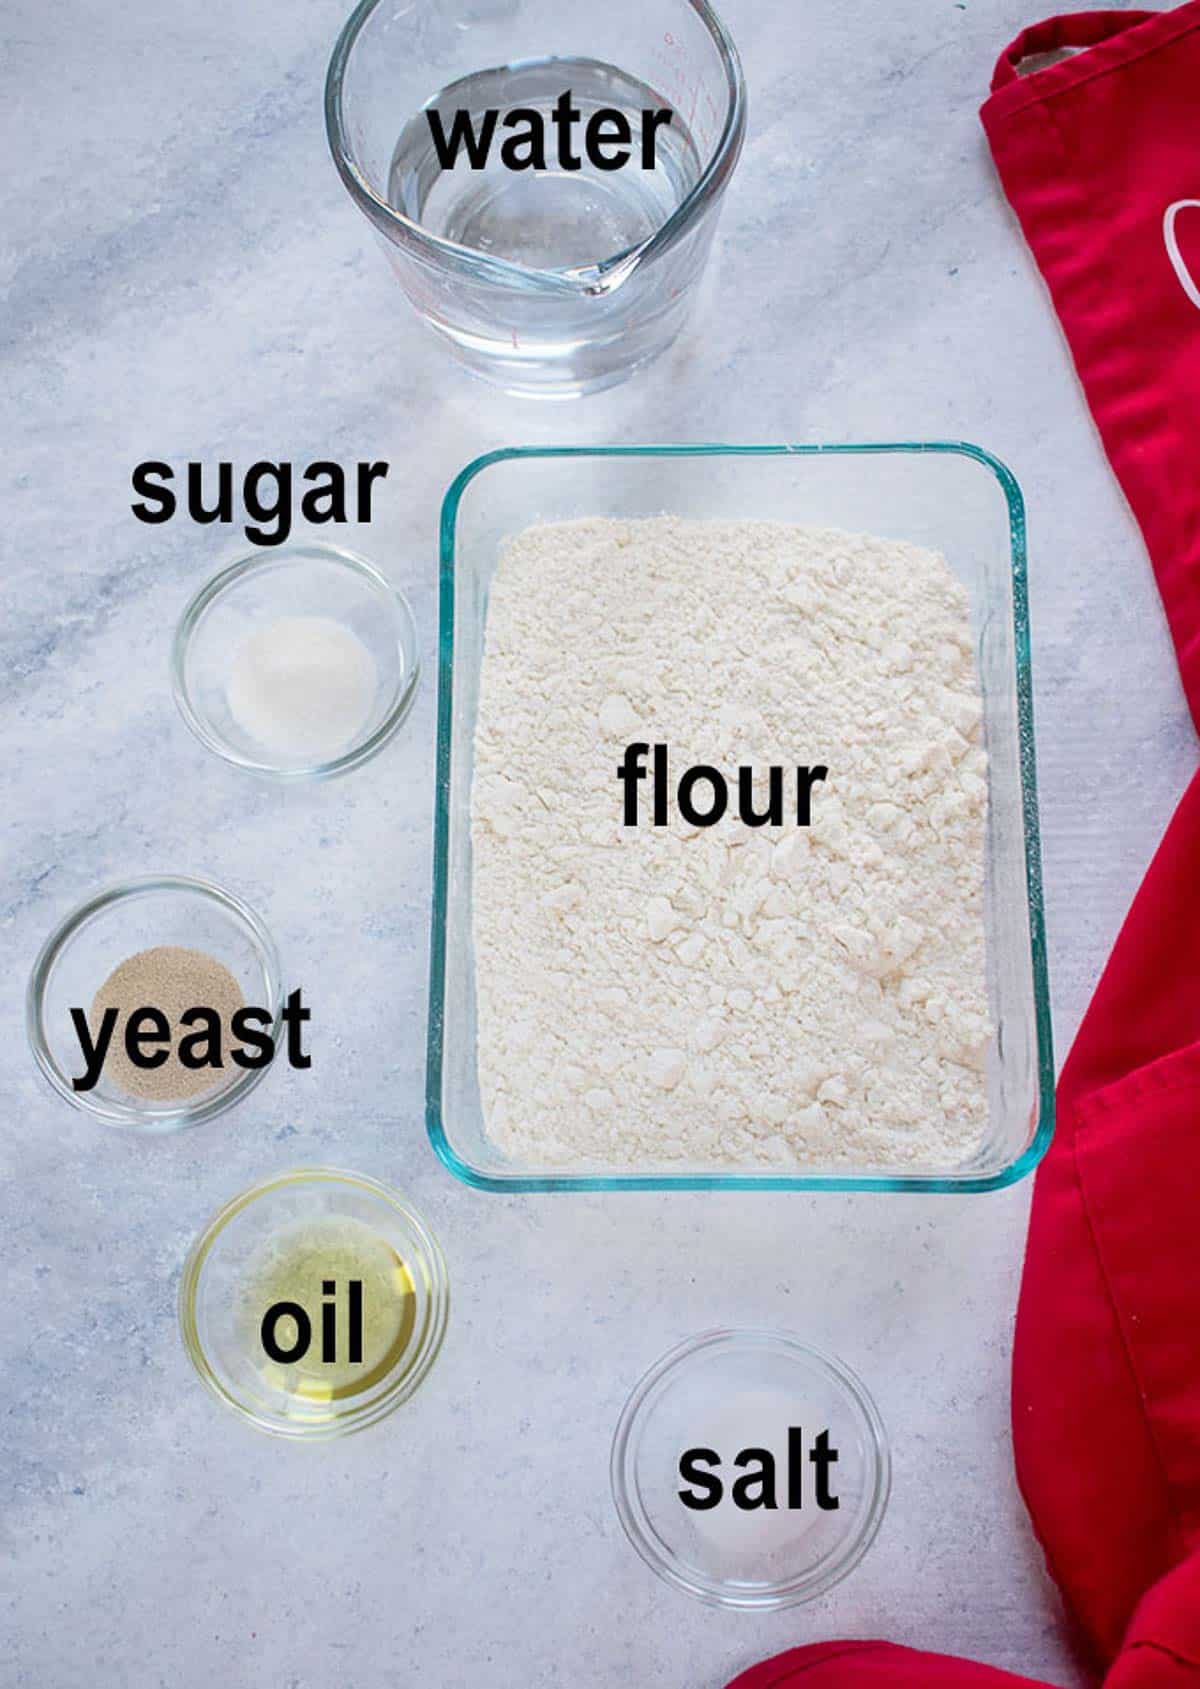
Yeast: Use instant or active yeast. If using instant yeast, you can just add it with all the other dough ingredients.
If using active yeast, you'll have to proof it first to activate it. Those instructions are included in the recipe card.
Flour: Use all-purpose flour or bread flour. I always use all-purpose, unbleached flour, since that's what I keep in the house.
Can you use whole wheat flour?
After being asked this question more than once, I recently tested this recipe with a 50-50 combination of all-purpose flour and white whole wheat flour. The dough had to be kneaded for at least 10 minutes in the stand mixer.
The half-whole-wheat version came out more dense than the loaves made with 100% all-purpose flour. The flavor was a little stronger, but it was a decent loaf, if you like whole wheat.
But I wouldn't recommend using only whole wheat flour for this bread. The flavor would be too strong, and the recipe would need to be adjusted in a few ways, such as adding more sugar and salt, and possibly adding vital wheat gluten.
So, although I use all whole wheat flour in recipes such as blueberry muffins, I recommend making white Italian bread with all-purpose flour. If you really want to incorporate whole wheat, you can use a 50-50 combination of flours.
How to know whether to add more flour
The only part of this recipe that requires thought is figuring out whether to add more flour. The humidity of your kitchen will be a factor.
Here's a ridiculously simple tip: If, after a couple of minutes of kneading, you touch the dough and realize it's stuck to your fingertips, you need to add more flour.
Start with an extra ¼ cup, knead it some more and see if the dough comes together. In a stand mixer, the dough should pull away from the insides of the bowl and form a ball in the center.
If you still see residue at the bottom of your bowl, add a little more flour and knead some more. Try touching the dough again.
Still sticky? Add another ¼ cup of flour.
It's not rocket science, I promise. You almost can't go wrong.
How to make Italian bread
See the card at the end of this post for the full recipe, but here's an overview.
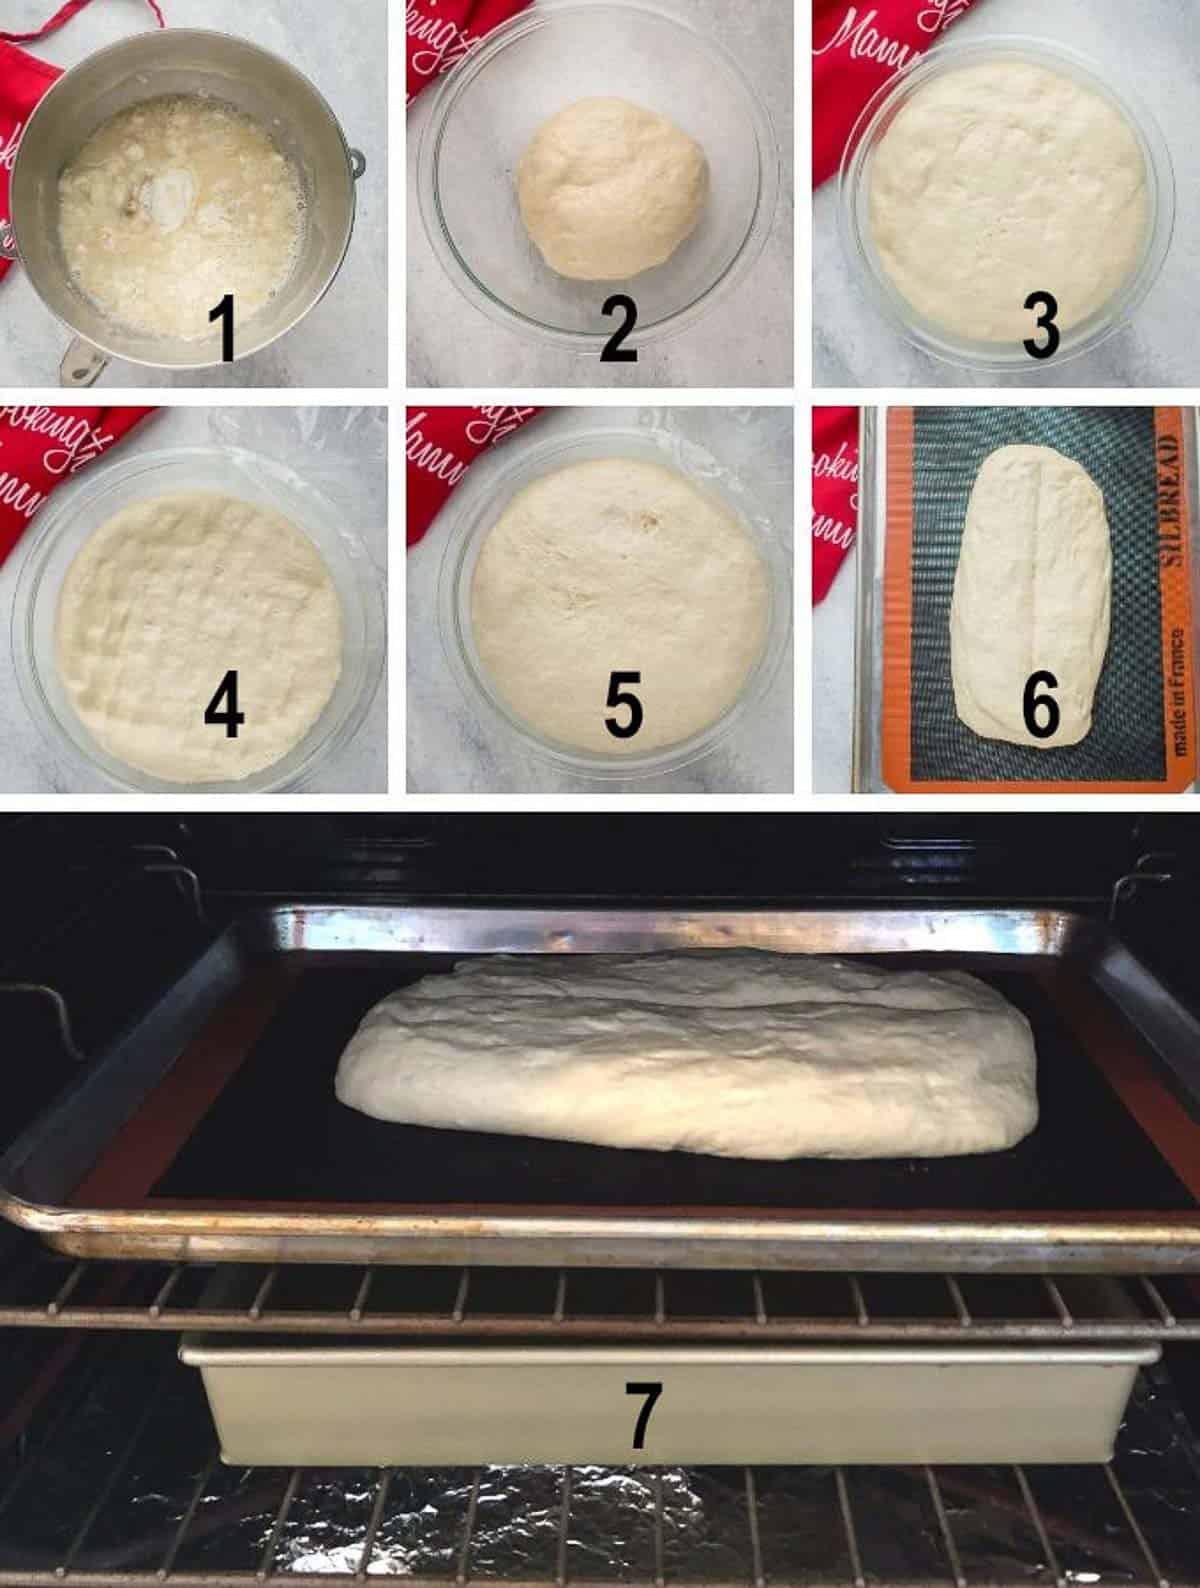
- Mix the ingredients in bowl and knead in a stand mixer or on the counter. Add extra flour if the dough is sticky.
- The dough should come together in smooth ball. Place it in a greased bowl, covered, to rise for two hours. (You can leave your house!)
- After the first rise, the dough should have doubled in size.
- Gently punch it down. Let the dough rise again for 40 minutes, covered. (One time, I left to do errands and came back more than an hour later - no big deal.)
- After the second rise, the dough is ready.
- Shape it into a loaf (it takes about five seconds!) and place it on a lined or greased half-sheet pan (you don't need a special loaf pan!) Cut a vertical slit (or horizontal ones) in the loaf to allow it to vent and open as it bakes.
- Bake it on the center rack of your oven, with a metal pan of hot water below it.
Recipe tips
- Baking the shaped Italian bread dough with a pan of hot water below it will create steam. The steam produces a crispy crust.
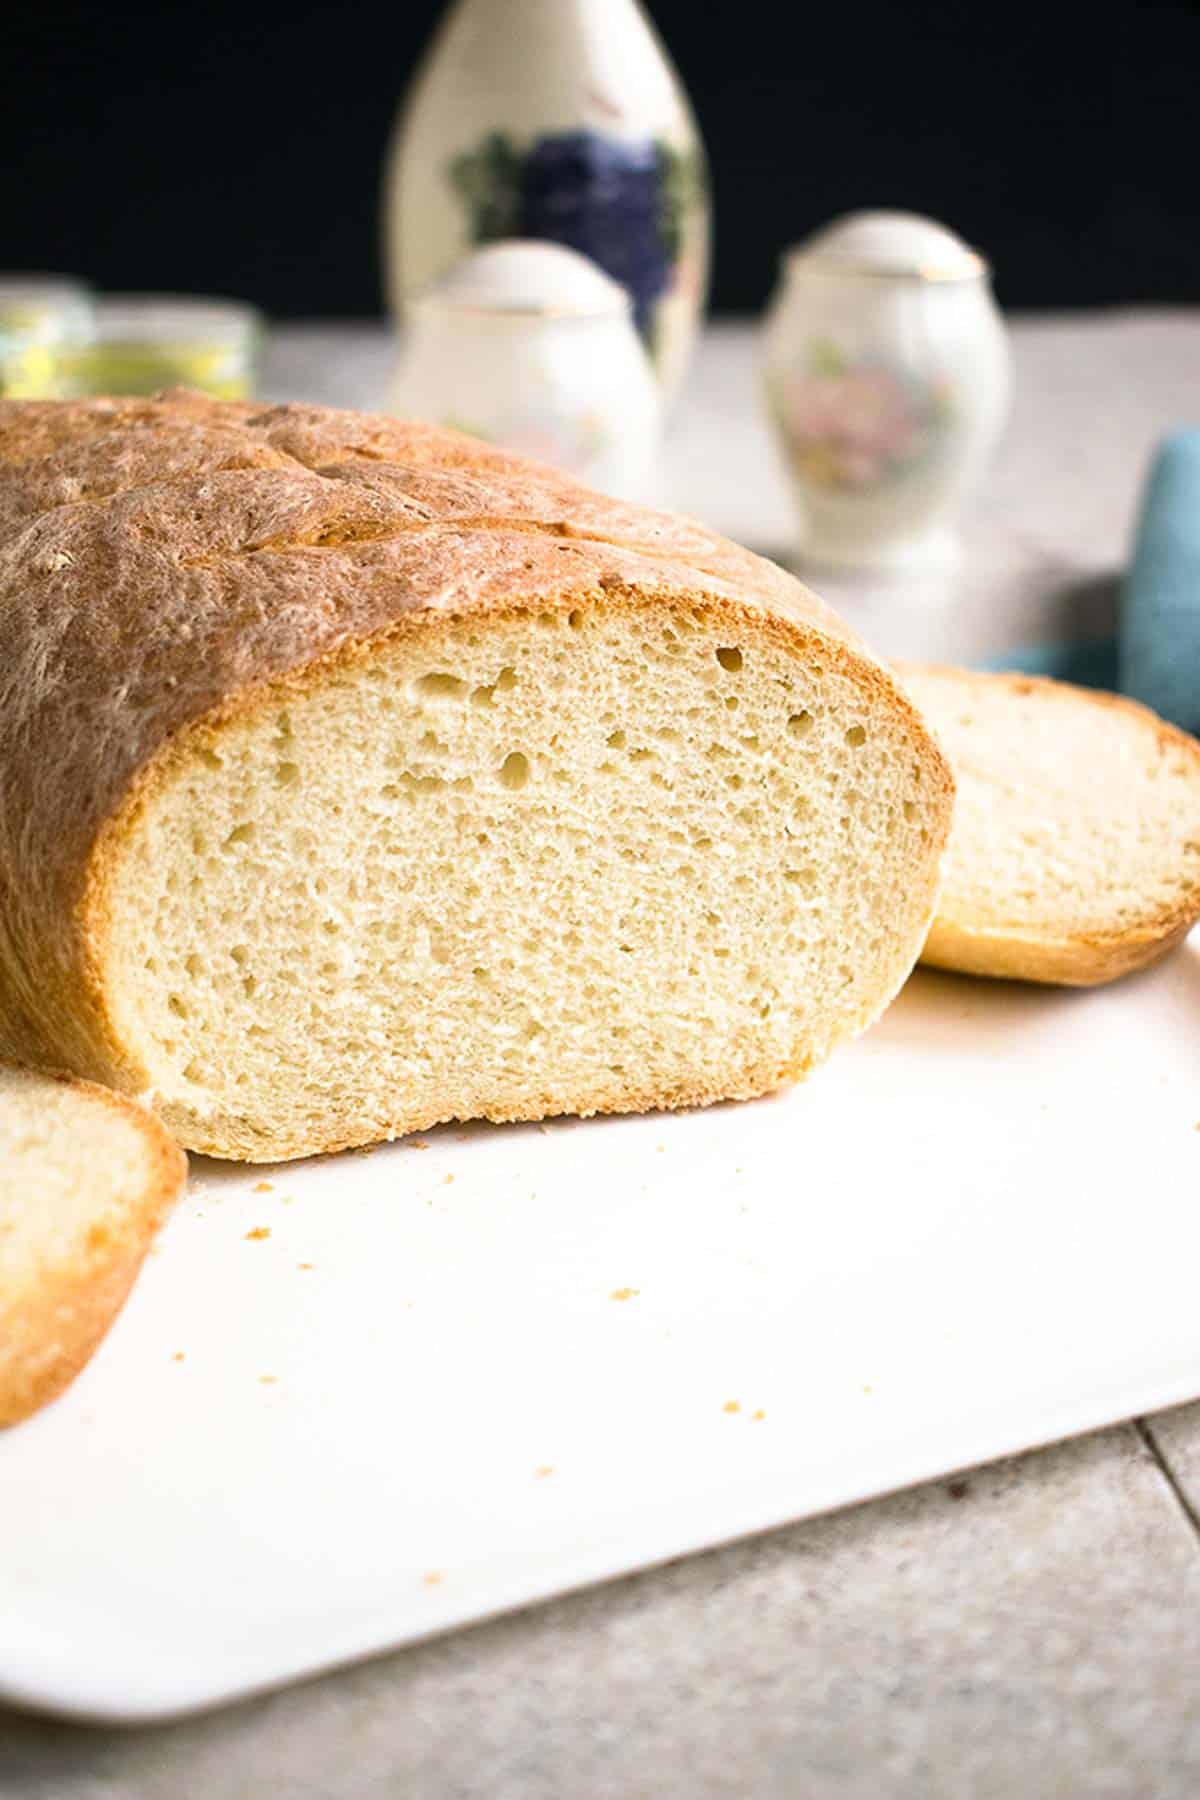
- To test whether your bread is done: Wearing oven mitts, turn over the loaf of bread when it's out of the oven. With ungloved fingertips, tap the bottom of the loaf. If it sounds hollow, it's done.
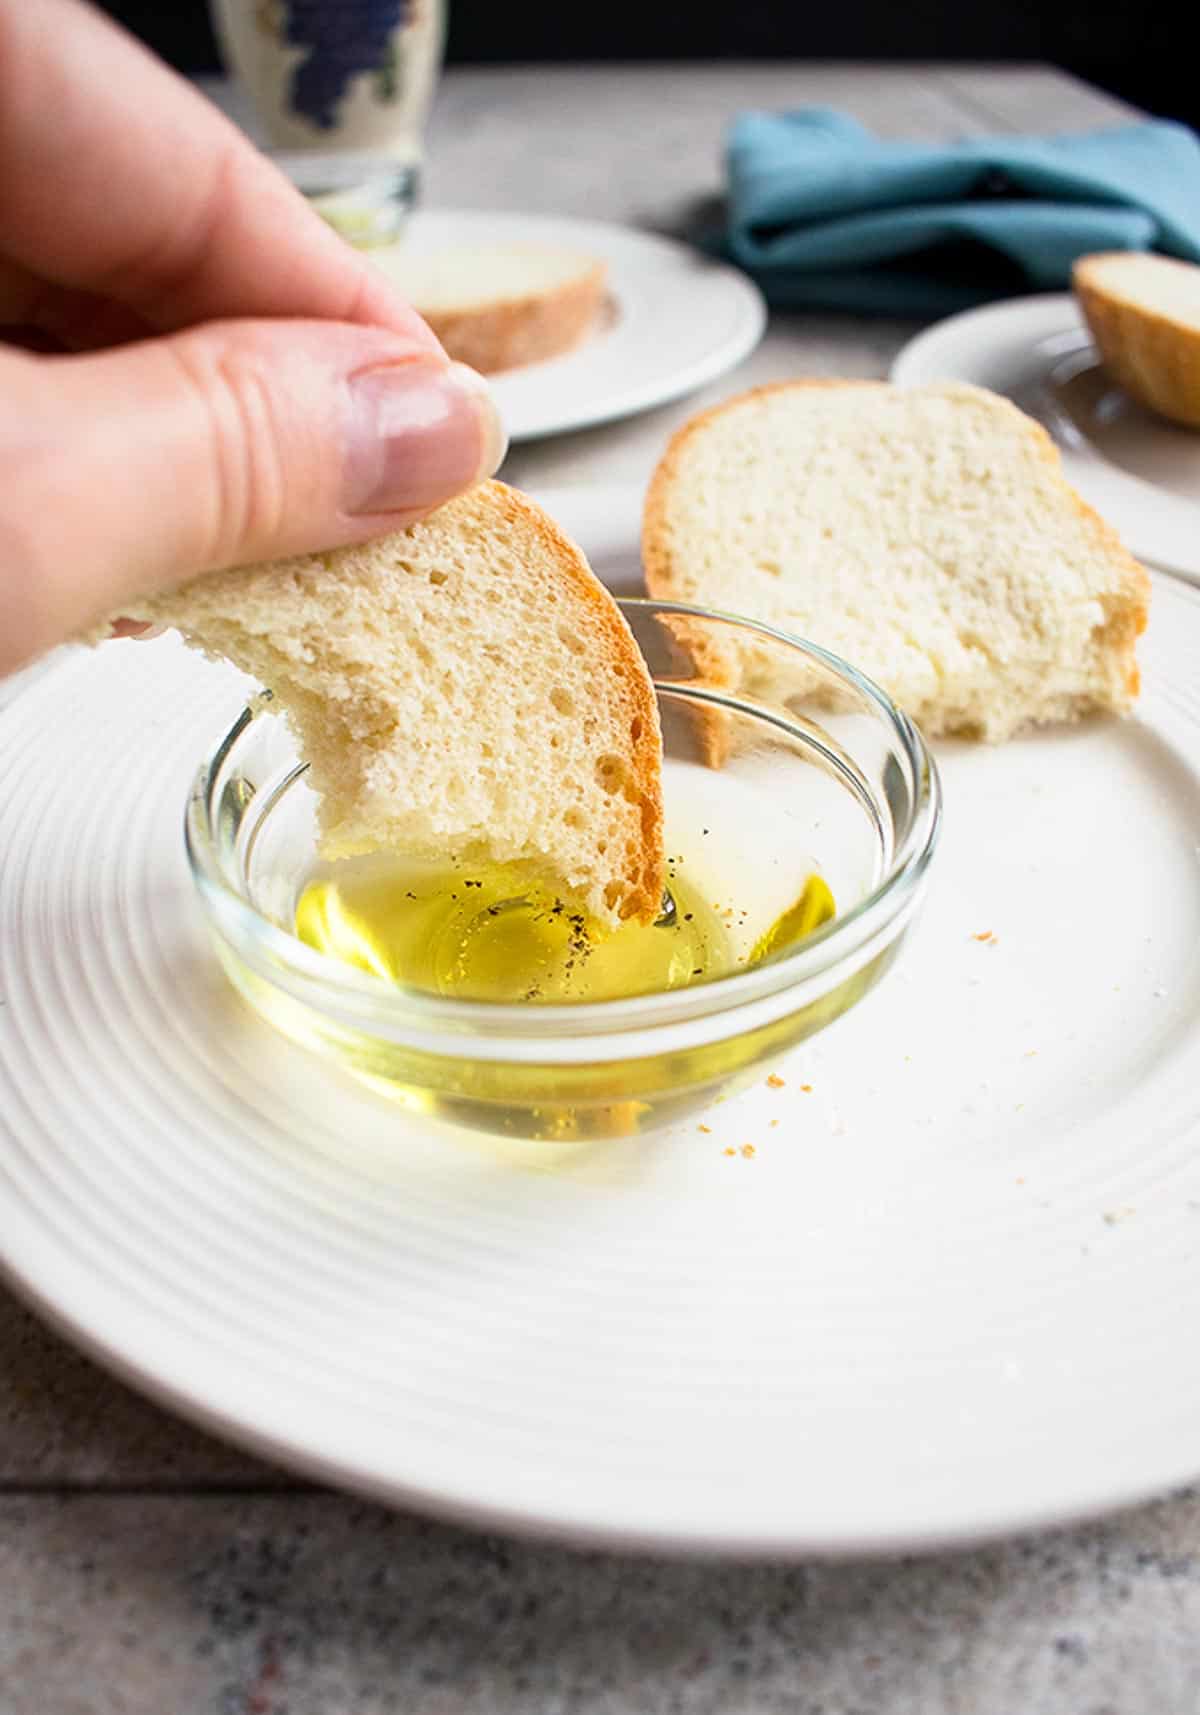
How to serve it
When the bread cools...you'd better have some dipping oil ready.
It's perfect for entertaining, so I included it in this collection of 63 Italian Appetizers. Use it to make Italian Bread Pizza.
And, you have to try this crusty Italian bread with some of our favorite Italian side dishes!
Of course, you can make slab sandwiches or enjoy Homemade Turkey Lunch Meat on sliced Italian bread. You haven't lived until you've had a "sangwich" with Pan-Fried Eggplant, Italian Chicken Cutlets, or Italian Peppers in Oil!
For breakfast, slice it into thick pieces and make Italian Bread French Toast.
And if you have some leftover bread that's drying you can make bread crumbs. You won't believe how delicious they taste!
Frequently asked questions
Store the Homemade Italian Bread at room temperature, wrapped in plastic and then placed in a brown bag. It's best eaten by the next day or so for freshness.
Yes! The best way to keep Italian bread fresh is to freeze it. Slice it into portions first, then place it in a sealed, zip-top bag in the freezer.
Just do it!
Friends, making this Homemade Italian Bread is easier than lots of things in life.
- It's easier than changing a tire.
- Easier than driving a stick shift.
- Easier than filling out back-to-school paperwork.
- Easier than mowing the lawn.
And many readers tell me this is the best Italian bread recipe they've tried.
So go for it!
More bread recipes
Be sure to try this Artisan Italian Bread, Homemade Pizza Dough with Beer and these Quick Hamburger Buns (ready in 40 minutes). And during the holidays, you can make panettone (Italian Christmas bread).
But, if you insist you're not ready for yeast breads and kneading dough, you can crank out this 5-Ingredient Beer Bread in under an hour. And don't forget quick breads like zucchini bread or banana bread!
Enjoy!
If you try this Homemade Italian Bread, be sure to leave a comment and rating!
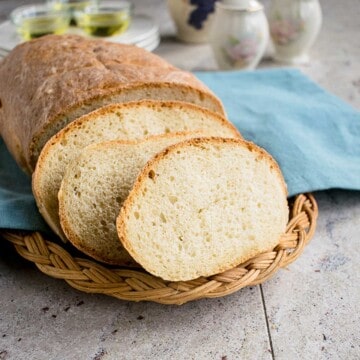
Homemade Italian Bread
Video
Ingredients
Dough
- 3 cups all-purpose flour (use up to four cups if needed; see notes)
- 2 ¼ teaspoons instant yeast (see notes if using active dry yeast)
- 2 teaspoons granulated sugar
- 1 ½ teaspoons salt
- 1 tablespoon olive oil
- 1 ¼ cups warm water
For Serving:
- olive oil (optional)
Instructions
- Add three cups of flour and the remaining dough ingredients to the bowl of a stand mixer, if you have one. Otherwise, use a large mixing bowl.
- If using a stand mixer with dough hooks, start the machine on "stir," then switch to a low speed to knead the dough for six minutes.
- If kneading by hand, stir with a spoon, then knead the dough on a clean, floured work surface for at least six minutes.
- After a couple minutes of kneading in your mixer or by hand, check to see if the dough is sticky. Touch it with your fingertips and pull them away.
- If there is dough residue on your fingertips, you need to add more flour. Add ¼ cup extra flour and knead some more.
- Check again to see if the dough is still sticky. If so, add more flour, ¼ cup at a time, until your dough comes together in a smooth ball and isn't sticky. It should pull away from the inside of the bowl of your stand mixer.
- When you are done kneading, grease your mixing bowl with cooking spray (you can use the same bowl without cleaning it first.) Place your ball of dough in the greased bowl and roll it around to coat it a bit with the oil.
- Cover the bowl with plastic wrap and let the dough rise for two hours at room temperature.
- After two hours, peel back the plastic and gently punch down the dough. Cover the bowl again with the plastic wrap and let the dough rise for another 40 minutes.
- When your dough is almost done rising, preheat your oven to 425 degrees F. Make a steam bath so your crust will be crispier. Fill a 9x13 metal pan or cast iron pan halfway with hot water. (Avoid using a glass pan, if possible, because it could shatter.) Wearing oven mitts, place the pan with the hot water on the bottom rack of your oven.
- When the dough is risen, place it onto a half sheet pan lined with parchment paper or a silicone baking mat. (If you have neither, you can lightly grease your pan with cooking spray.)
- Shape your dough into a loaf about 10 inches long and four inches wide. Use a straight-edged knife to score the dough (make a long vertical slit or horizontal slits along the surface of the dough) to allow venting. Place the pan with your dough on the middle rack of your oven.
- Bake initially for 10 minutes at 425 F.
- Lower your oven temperature to 400 degrees F, and bake your bread for 30-35 minutes more. Check if your bread is done by removing the pan from the oven. Wearing gloves, flip over the loaf. Take off one glove and tap the underside of the bread with your fingertips. If the bread sounds hollow, it is done. If not, bake it a little more.
- When the bread is done, let it cool on a wire rack until it's no longer hot. Slice the bread and serve with oil, salt and pepper for dipping, if you wish.
- Store the bread at room temperature, wrapped in plastic and then placed in a brown bag. It is best eaten by the next day or so for freshness. If you wish, you can slice the loaf and freeze it in a freezer bag.
Notes
Nutrition
(Recipe Source: Adapted from my son's recipe, which he'd adapted after seeing it online years ago. Originally published on August 26, 2017 and updated now with process photos and additional text.)


Raffaele says
Love this recipe! Turned out with a beautiful crust and a wonderful texture inside. This will be my go-to bread!
Mamma C says
Hi Raffaele - I love hearing that! I'm glad you love this Italian bread as much as we do. Thanks for letting me know!
Kerri Coakley says
Hi Mama C!!
Quick question... Would the measurements stay the same with either instant yeast out active dry yeast? Thanks - from another Mama C 🙂
Mamma C says
Hi Kerri - See the notes in the recipe card for using active yeast...I have a whole paragraph there that explains the changes needed. Enjoy!
Irene says
This recipe was so easy and tasted fabulous both as bread and toast, although still soft and tasty as a sandwich on 2nd day. Beautiful and so much nicer than shop bought. Thank you Mama C ... now where’s your other recipes, I need to check them out??
Mamma C says
Hi Irene - I'm so happy you enjoyed this Italian bread! Here is the link to the homepage of my website where you'll find many recipes. You can even go through my Recipes archive or use the search button at the top on any page. Let me know if you want to subscribe to my free email list, and I'll sign you up!
matt garrity says
I cannot see what ratio i would need of active dry yeast to the instant yeast. Conversion sites are not clear as well
Active dry yeast comes in .25 oz packets, how many are needed to match you 2.25 tsp of instant yeast
Mamma C says
Hi Matt - Use one packet of active dry yeast. I'll add that to the instructions.
Daniel says
I've tried making fresh bread years ago. The very first time, I had beginners luck. after that, every recipe I tried, failed. I stopped attempting again. Until I came across this recipe t It is so easy, I made it Christmas day and everyone raved. Including myself. Funny thing, I was limited on time so my first rise was only an hour and 2nd rise about half hour. Baking times got mixed up because my sister in law threw it in the oven without knowing times and temps. We went by intuition. And it still came out really great. Taste, feel and crustiness. Awesome
So, today, I am trying this beauty again. Everything is coming out Bread. Yippee. This is my new go to bread recipe. I highly recommend. . Thank you for providing a no nonsense bread. That tastes and looks great and does not require a lot of work........... HAPPY NEW YEAR 2021
Mamma C says
Hi Daniel - This recipe is very forgiving. I'm so glad you found it! Happy New Year!
Linda says
I’ve made this recipe quite a number of times now. I’d been looking for a bread recipe like this with not too many ingredients. I love this bread. It comes out perfect every time, doesn’t take much work at all and tastes great. Today I wanted to make my mum’s Cypriot olive bread so I added the black dried olives, diced onion and dried mint to the dough. It worked wonderfully!
Mamma C says
Hi Linda - I'm so glad you love this Italian bread! The olive version you made with it sounds delicious!
Robin Gramola says
hi there, just getting ready to make this bread , would it be alright to use my bread machine?
Mamma C says
Hi Robin - Do you mean to knead the dough or to cook it too? I've never used the bread machine for this, but I imagine it would be fine to knead the dough in the machine, making sure to add extra flour if the dough is sticky. If you do try using the machine to make the bread completely, please let me know how it turns out.
Heather says
My favourite recipe!
Mamma C says
Hi Heather - I'm so glad! Thanks for letting me know.
Stacey says
Hi - I followed the recipe to a T. My bread was kind of dense. What might I have done wrong? I was looking The outer crust was delicious as I put my cast iron pan with water in the oven - that part is great. But the inside is really kind of dense and I thought it might be "airier' on the inside?
Mamma C says
Hi Stacey - There are a number of factors that could cause dense bread. It could be that too much flour was added, the yeast wasn't working properly or the dough required more kneading. Even the oven running too hot could be a factor. Using bread flour might provide an airier loaf.
Stacey says
Thank you. I appreciate your reply!!
Monique says
My first time making Italian Bread and it came out 👏🏾 Awesome!, This recipe is definitely a keeper!!
Mamma C says
Hi Monique - You did it! Thanks for reporting back.
Monique says
I have a 9x9x2 inch pan will that Be ok to use?
Mamma C says
Hi Monique - Shape the dough round so that it will fit. It should be OK.